98
IMPORTANT:
fig. 14
fig. 10
fig. 12
fig. 13
NOTE:
NOTE:
CHANGING THE DUST BAG CLEANING THE FILTER
NOTE: Failure to keep the filters
clean, will result in a loss of
performance.
Cleaning the Motor Filter
Replacing the Dust Bag
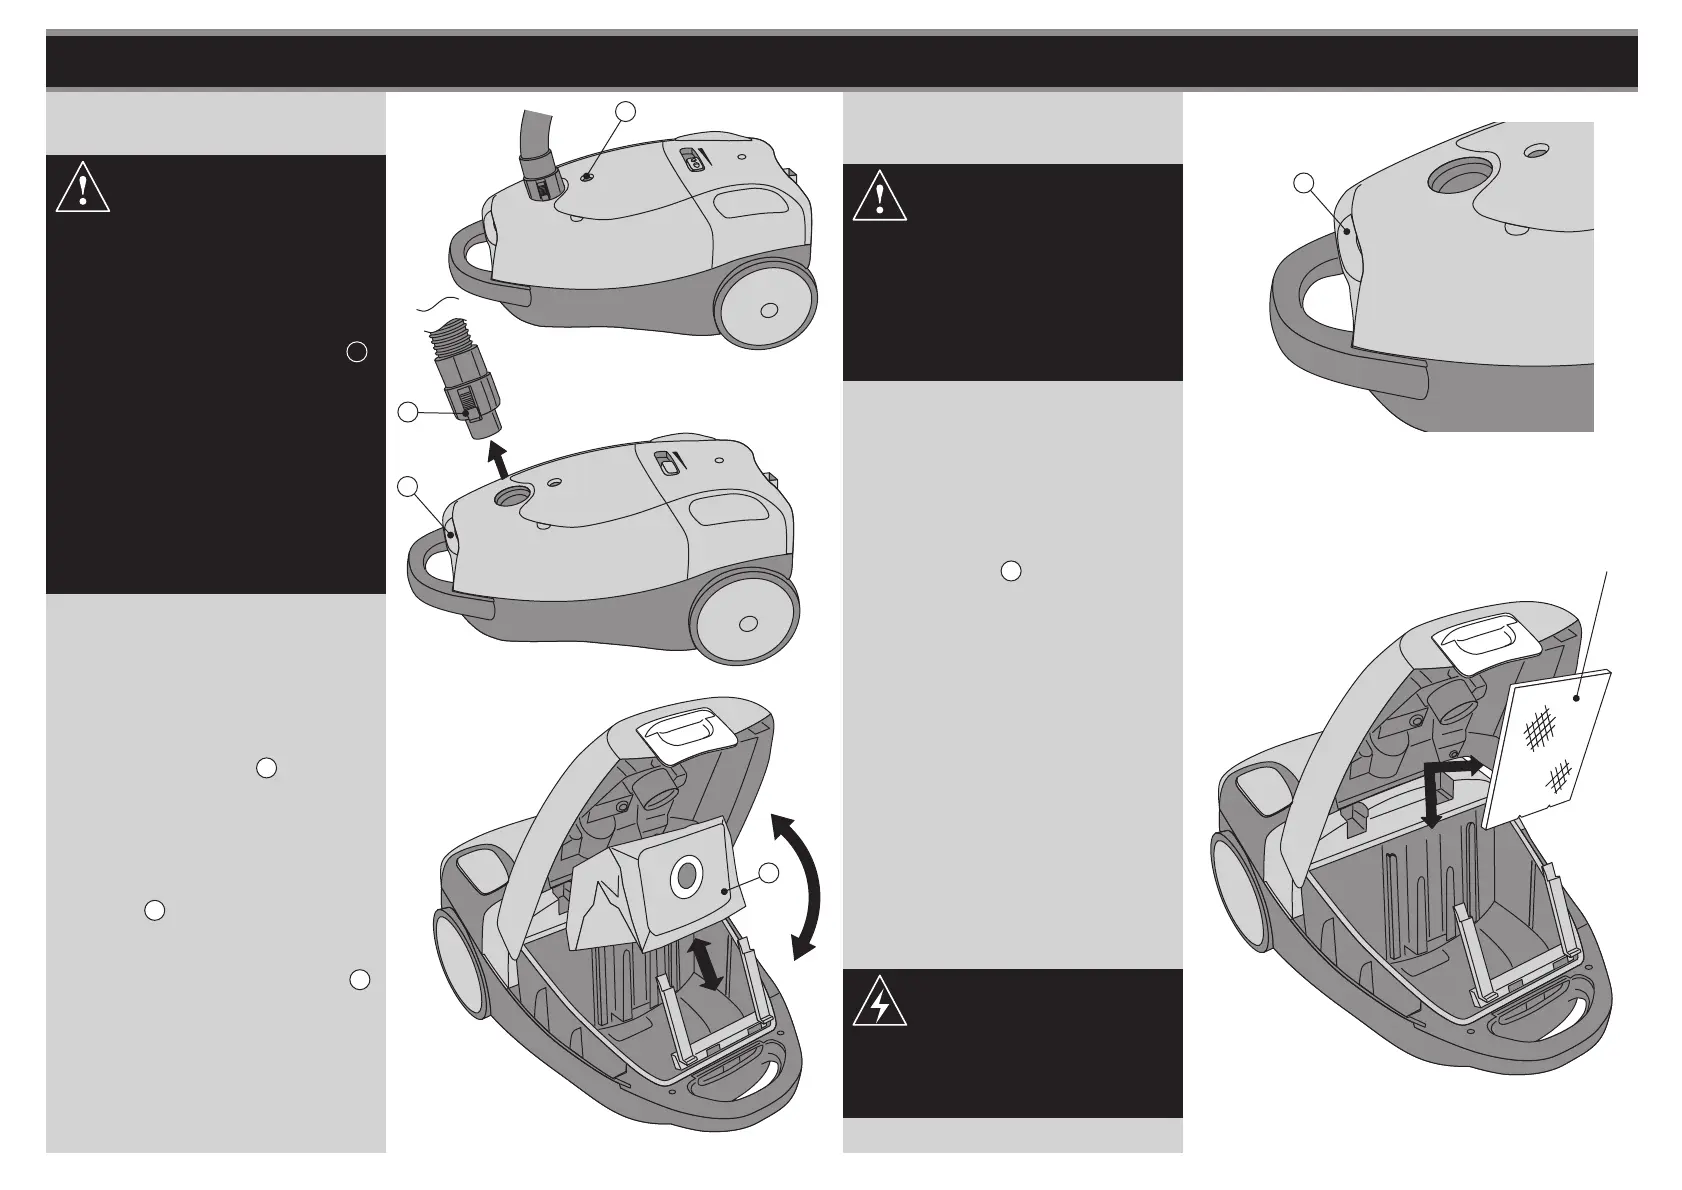
1. Unplug the Cleaner from the mains
socket.
3. Open the lid of the dust bag
compartment by pressing the Cover
Button T.
See fig. 11.
4. Carefully remove the Dust Bag M.
Re-insert a new bag and close the
lid so that it locks in place. Ensure
the Dust Bag is securely fitted
inplace.
See fig. 12.
1. Open the lid of the dust bag
compartment by pressing the
Cover Button T.
See fig. 13.
3. Remove the Motor Filter and clean
in warm soapy water. Ensure the
Exhaust Filter is totally dry before
assembly.
See fig. 14.
2. Remove the Bag. See CHANGING
THE DUST BAG on previous page.
See fig. 12.
4. Replace the Motor Filter in the
same way.
2. Remove the Vacuum Hose from
the Vacuum Cleaner by pressing
on the Fitting Hook D then pull
upwards.
See fig. 11.
Never use the appliance without
the motor filter protection and
exhaust filter installed, otherwise
damage to the product may
occur which would not be
covered by the guarantee.
R
fig. 11
D
T
M
Motor Filter
T
To obtain the best result from
your cleaner the dust bag needs
to be replaced regularly,
otherwise the airflow and
cleaning power will be reduced.
When the Dustbag Indicator R
shows fully red and
performance deteriorates it is
necessary to replace the dust
bag. Always check if there are
any blockages in the
accessories or tubes and follow
the filter cleaning instructions
for optimum performance.
See fig. 10.
Never replace wet filters in the
machine as this will create an
electrical hazard.