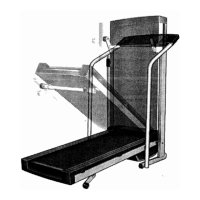
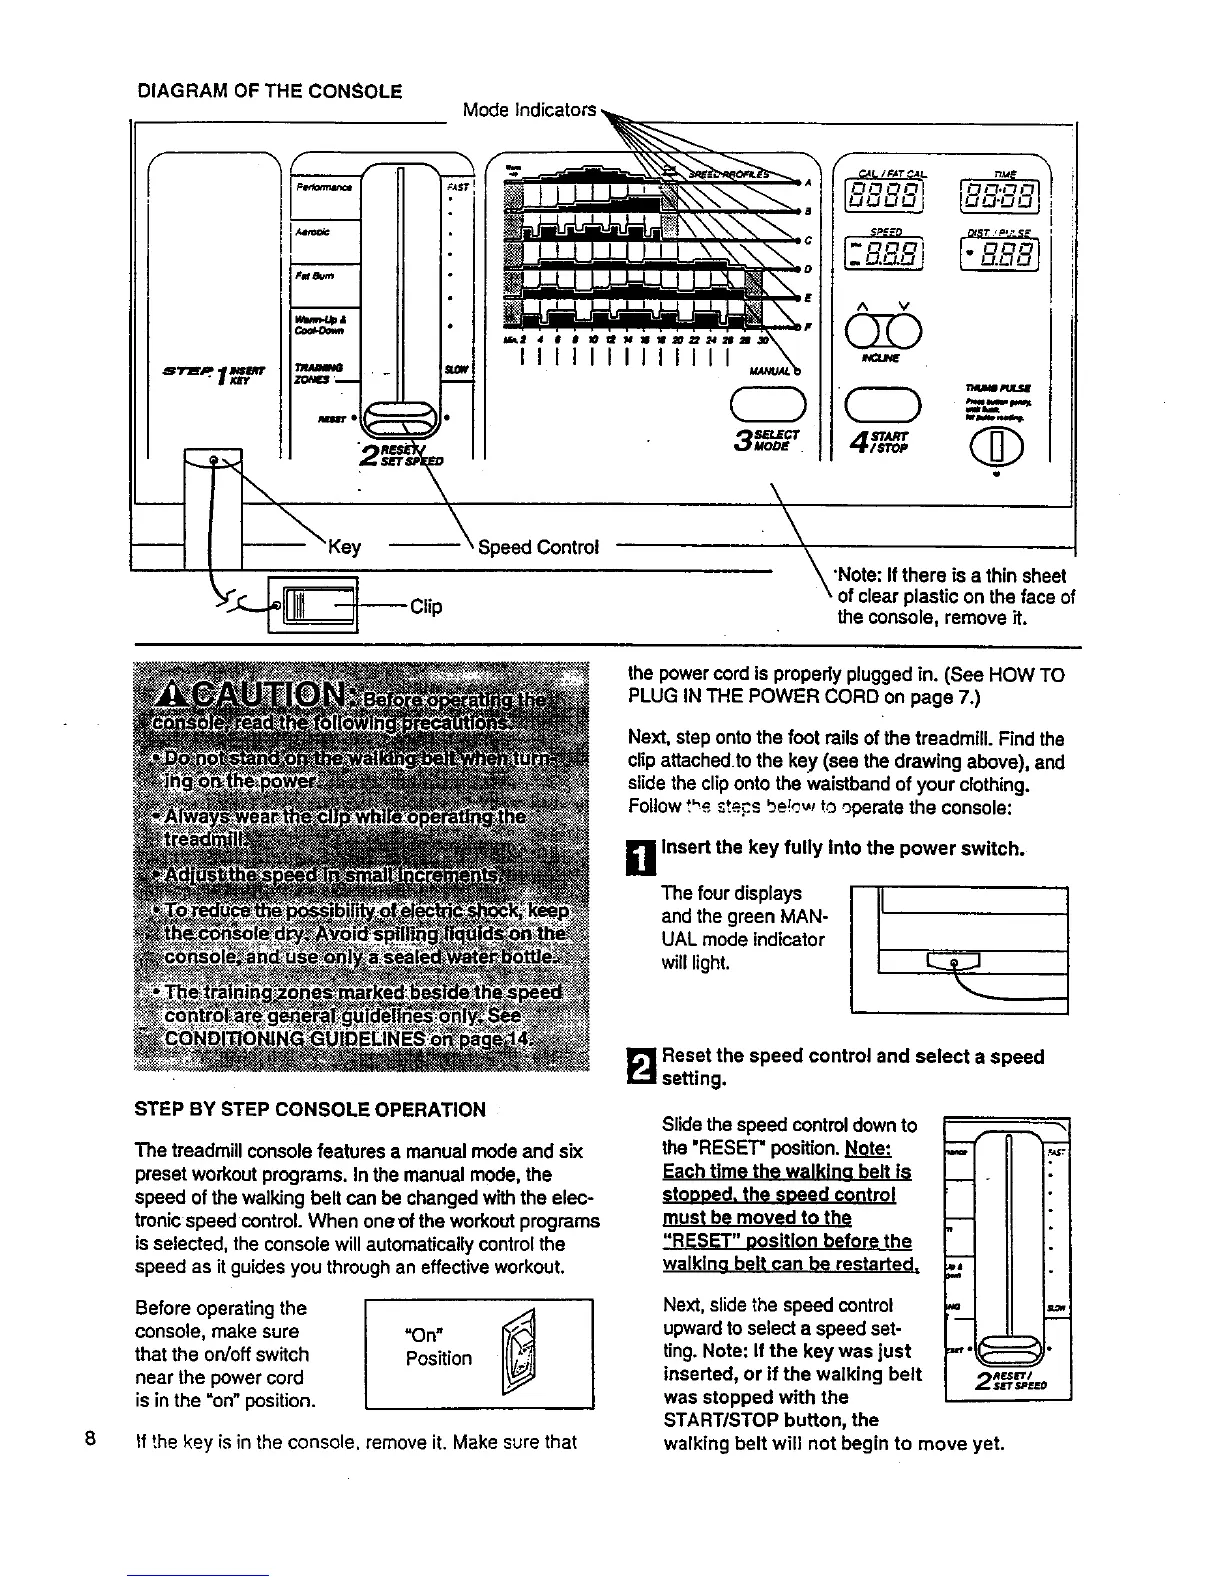
DIAGRAM OF THE CONSOLE
Mode
II11111 IIIII
' Speed Control
-- Clip
I
A V
Q
\
\
_'Note: Ifthere is a thin sheet
\ of clear plastic on the face of
the console, remove it.
the power cord is properly plugged in. (See HOW TO
PLUG IN THE POWER CORD on page 7.)
Next, step onto the foot rails of the treadmill. Find the
clipattachedto the key (see the drawing above), and
slide the cliponto the waistband of your clothing•
Follow t"_ _teF:.sbe!_._,rto operate the console:
g Insert the key fully Into the power switch.
The four displays I-
and the green MAN-
/
UAL mode indicator
willlight• I_ _]
8
STEP BY STEP CONSOLE OPERATION
The treadmill console features a manual mode and six
preset workout programs• In the manual mode, the
speed ofthe walking belt can be changed with the elec-
tronic speed control. When oneof the workout programs
isselected, the console will automatically control the
speed as it guides you through an effective workout.
Before operating the I
console, make sure "On"
that the on/off switch Position
near the power cord
is in the "on"position.
If the key is in the console, remove it. Make sure that
I_ Reset the speed control and select a speed
setting.
Slidethe speed controldown to
the 'RESET" position. Note'.
Each time the walkina belt is
stoooed, the soeed control
must be moved to the
"RESET" oositlon before the
walklna belt can be restarted.
o ii
--,.=1 ii
II I II
! I II
Next, slide the speed control
upwardto select a speed set-
ting. Note: If the key was just
inserted, or if the walking belt
was stopped with the
START/STOP button, the
walking belt will not begin to move yet.
I II I dLOsl
,.,.IC:=::=_ •
RF.SL_'I
2 SJrF,_II[ED