.SSEMBLY
_lace all parts in a cleared area and remove the packing materials. Do not dispose of the packing
naterials until the bike is fully assembled and all parts areaccounted for. Read the instructions
_elow carefully before beginning. Assembly can be completed using an adjustable wrench.
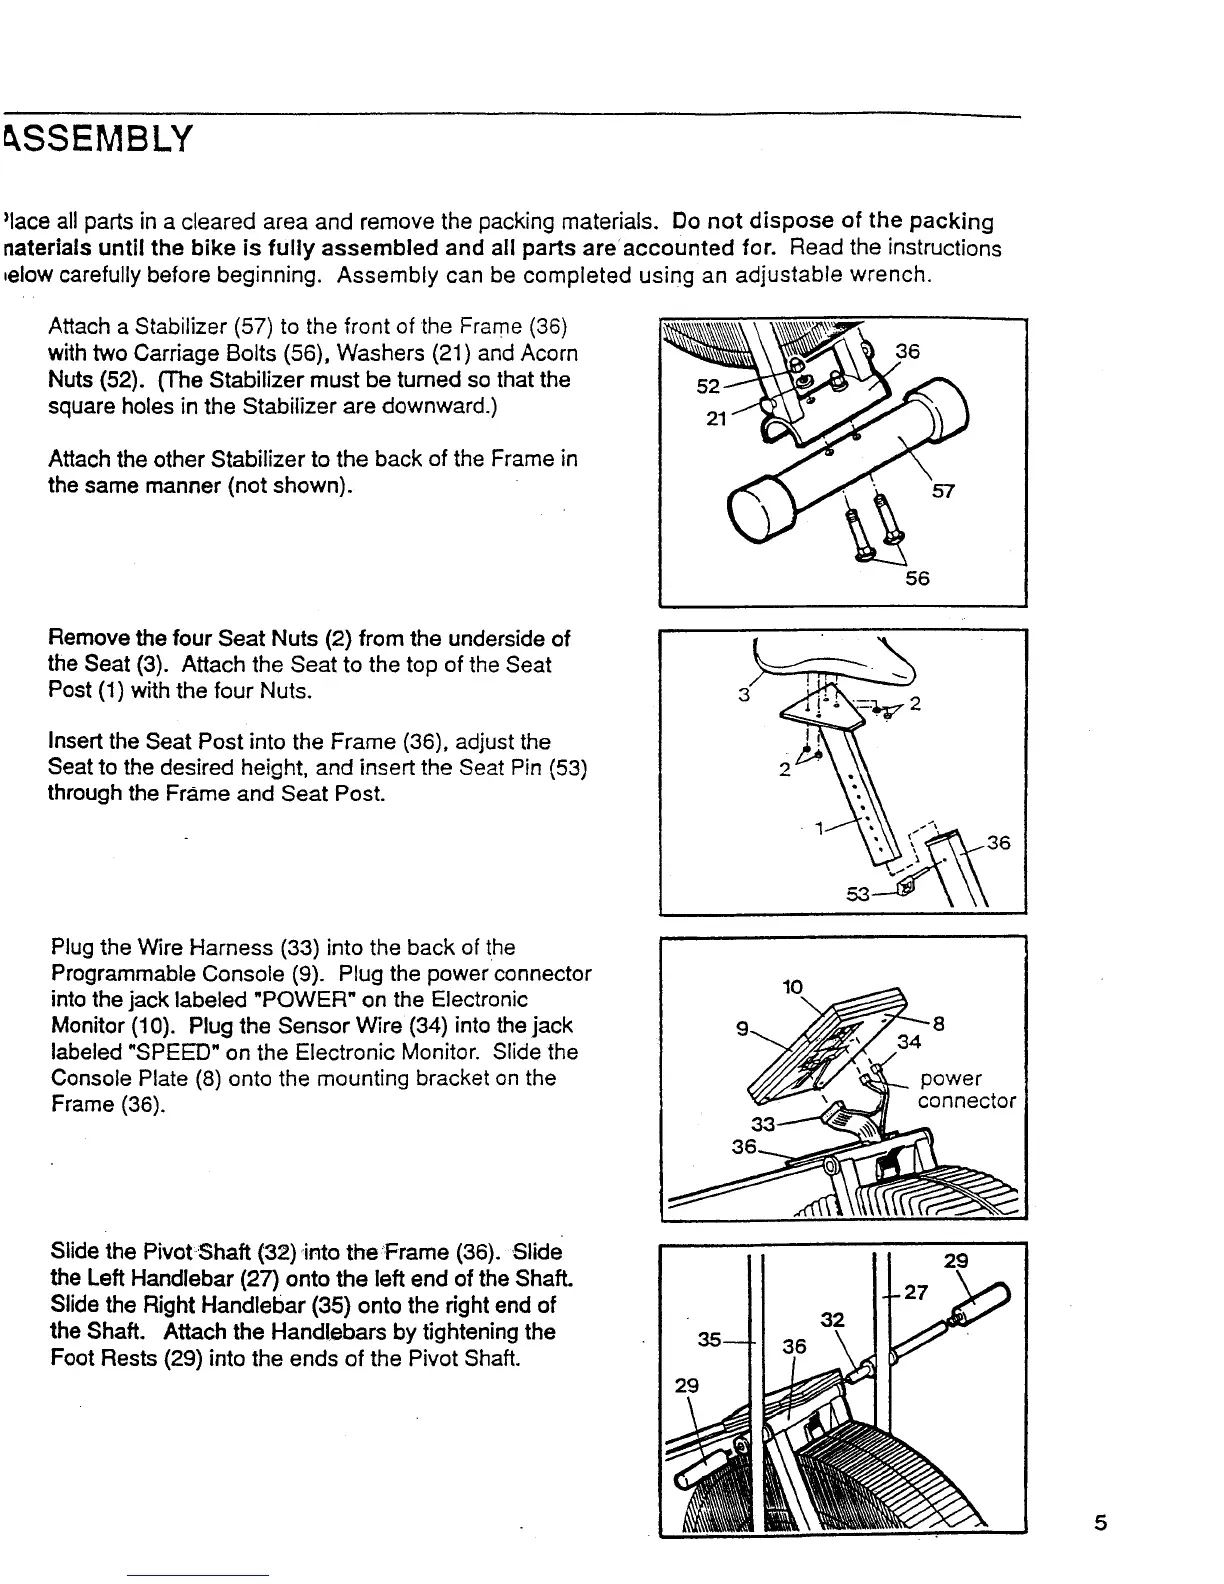
Attach a Stabilizer (57) to the front of the Frame (36)
with two Carriage Bolts (56), Washers (21) and Acorn
Nuts (52). (The Stabilizer must be turned so that the
square holes in the Stabilizer are downward.)
Attach the other Stabilizer to the back of the Frame in
the same manner (not shown).
36
21
57
56
Remove the four Seat Nuts (2) from the underside of
the Seat (3). Attach the Seat to the top of the Seat
Post (1) with the four Nuts.
Insert the Seat Post into the Frame (36), adjust the
Seat to the desired height, and insert the Seat Pin (53)
through the Frame and Seat Post.
Plug the Wire Harness (33) into the back of the
Programmable Console (9). Plug the power connector
into the jack labeled "POWER" on the Electronic
Monitor (10). Plug the Sensor Wire (34) into the jack
labeled "SPEED" on the Electronic Monitor. Slide the
Console Plate (8) onto the mounting bracket on the
Frame (36).
_2
3 Ii
2"_2___3 6
10
Slide the PivotShaft (32)into theFrame (36). Slide
the Left Handlebar (27) onto the left end of the Shaft.
Slide the Right Handlebar (35) onto the right end of
the Shaft. Attach the Handlebars by tightening the
Foot Rests (29) into the ends of the Pivot Shaft.
5q
29
36
32
29
5