6
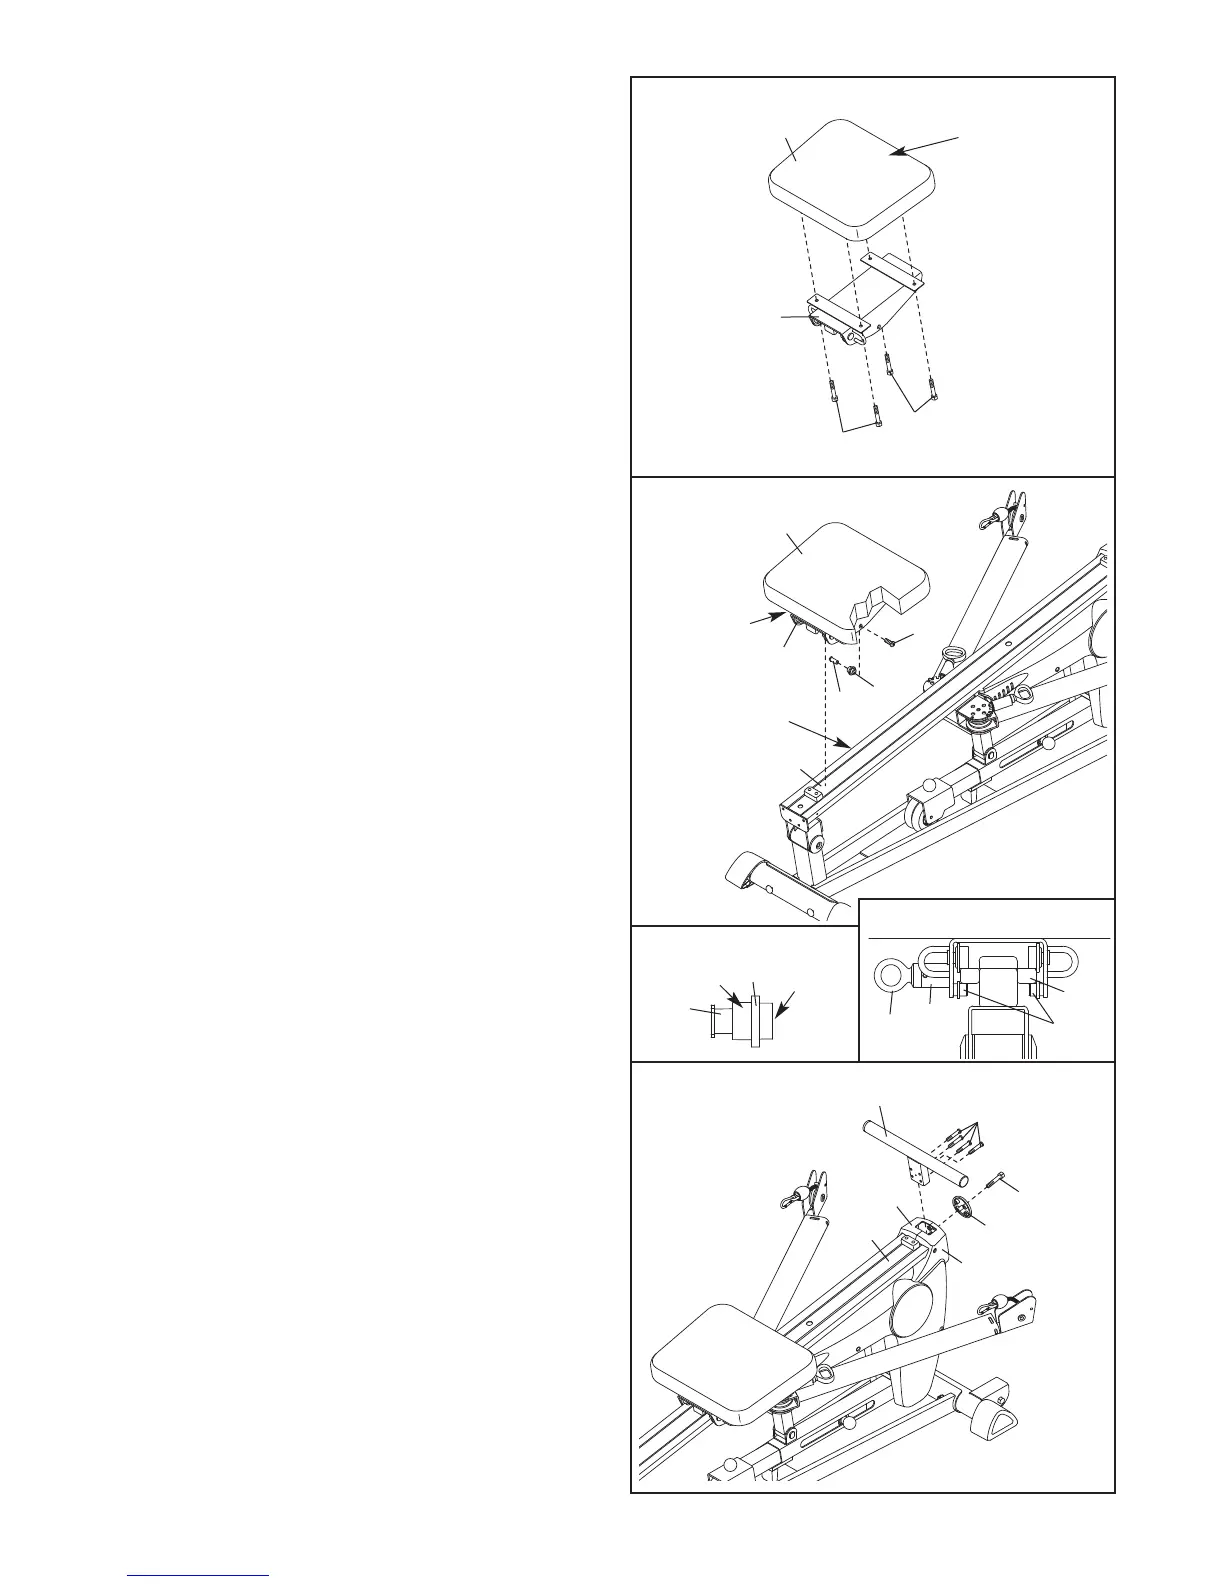
3. Orient the Seat (14) as shown. Attach the Seat to
the Seat Carriage (13) with four M6 x 16mm
S
crews (55).
4. Pull the Seat Pin (18) out of the Seat Carriage
(13) and turn it 90 degrees (see inset drawing B).
Set the Seat Carriage on the Rail (4) so that the
Seat Pin is on the same side as the adjustment
holes and the preassembled Small Seat Wheel
(not shown) is under the Rail.
Insert the barrel of an M10 x 22mm Bolt Set (66)
into the Small Seat Wheel (40) as shown in inset
drawing A.
Have a second person press down on the Seat
(14). Hold the Small Seat Wheel (40) against the
bottom of the Rail (4).
Make sure that the wide
side of the Wheel is held flat against the Rail
(see inset drawing B). Attach the Wheel to the
Seat Carriage (13) with the M10 x 22mm Bolt Set
(66). Repeat this process with the preassem-
bled Small Seat Wheel.
Pull the Seat Pin (18) out and rotate it 90
degrees. Engage the Seat Pin into an adjustment
hole in the Rail (4).
5.
Attach the Handlebar (10) to the end of the Rail
(4), inside the Side Shields (16, 17), with four M6
x 38mm Button Screws (53). Attach the Shield
Cover (43) to the Handlebar with an M4 x 25mm
Round Head Screw (47).
1
4
Wide
End
14
13
55
55
3
4
4
18
Adjustment
Holes
13
66
66
40
10
53
47
43
17
16
4
5
40
18
13
4
B
A
40
Wide
Side
Flush
Edges
66