8
SECTION 4: ASSEMBLY
4.1 INSTALLING THE HANDLEBAR
4.2 FOLDING FEATURE
YourPROGO®scooterispackagedseparatelyfromthehandlebar.
BeforeusingyourPROGO® scooter,you
mustproperlyinstallthehandlebar:
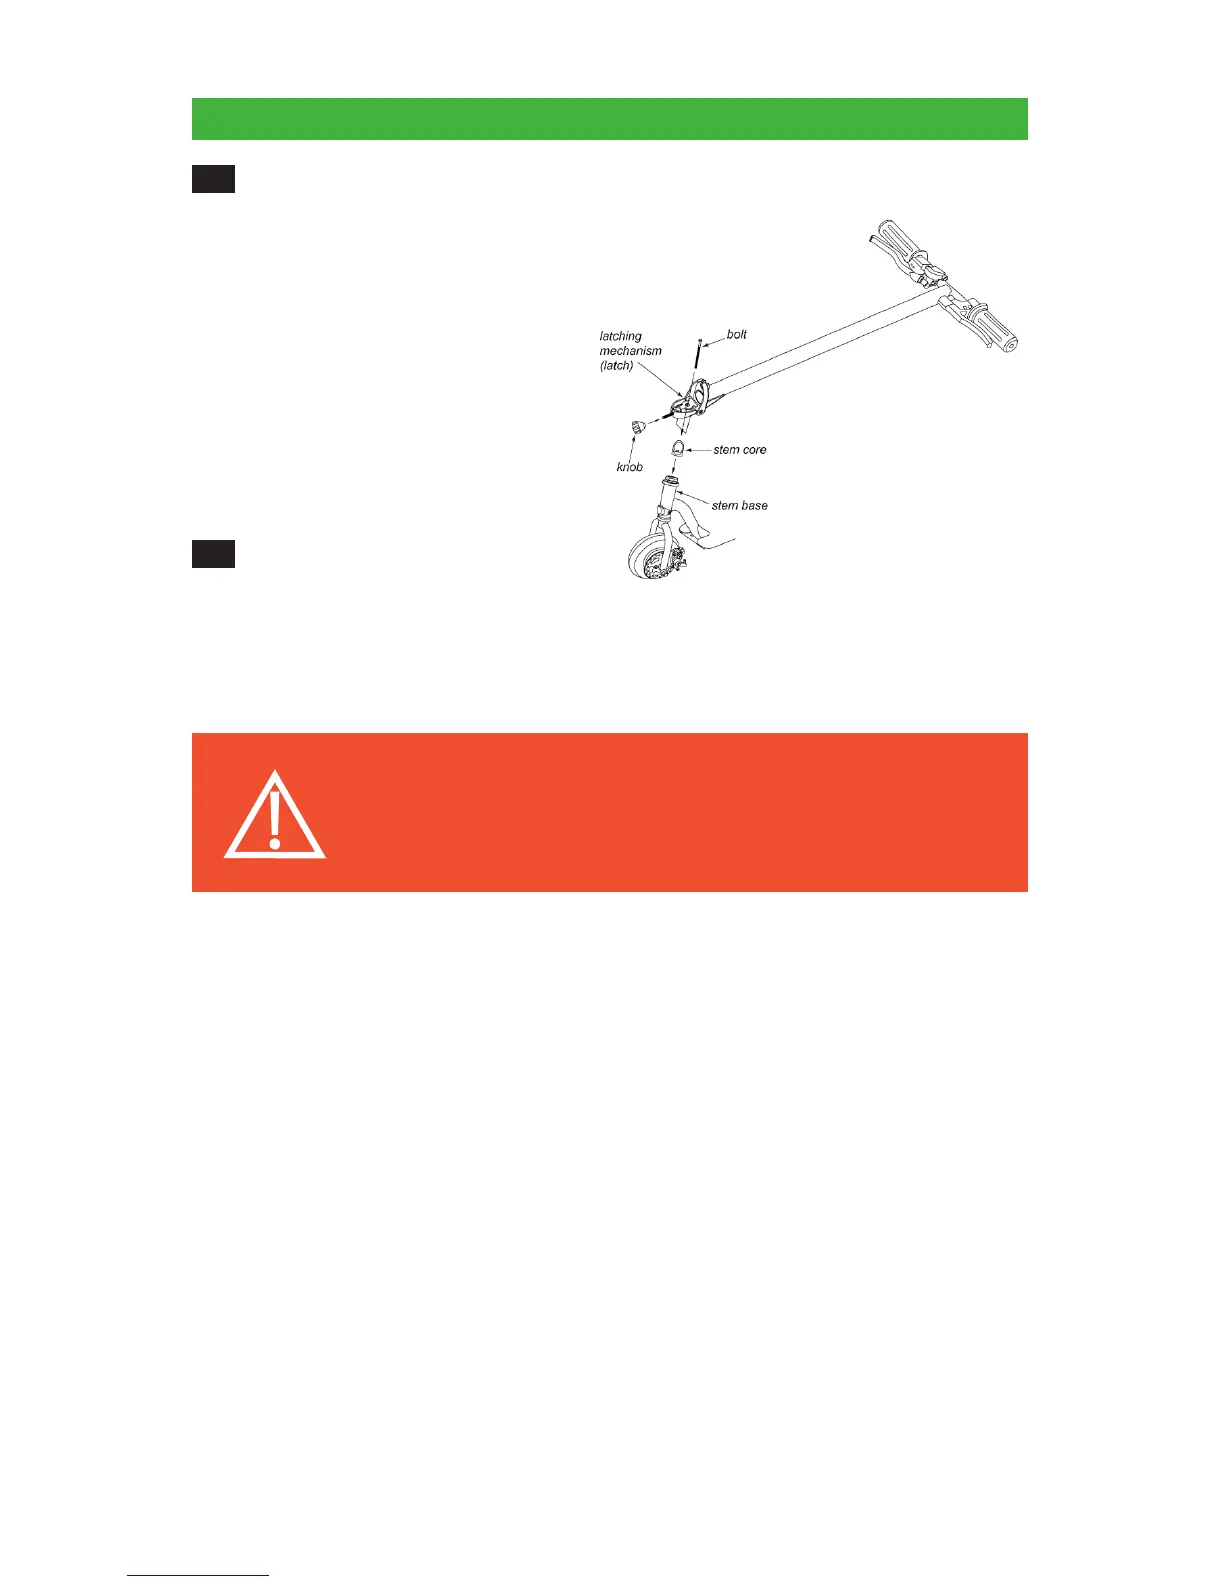
1.Unlessitisalreadyscrewedintothe
stemcore,passtheboltthroughthe
latchandscrewafewthreadsclockwise
intothestemcore(fig.1).
2.Positionthehandlebarwiththelatch
abovethefrontwheelandinsertthe
stemcoreintothestembase(fig.1).
3.Screwtheboltclockwiseallthewayinto
securethehandlebarinitsplace.
YourPROGO®isequippedwithafoldingfeatureforeasycarryingandstowage.
Beforeoperatingthescooter:
1.Pullthehandlebaruptoanuprightposition.
2.Screwthelatchknobclockwiseallthewayintosecurethehandlebarinitsposition.
3.TofoldyourPROGO®scooter,reversetheprocess.
WARNING: The “Lower Hinge” of the latching mechanism is also a
“Mechanical Fuse” designed to break if there is high shock loads, stress,
and/or fatigue exerted on the handlebar assembly. If the handlebar feels
abnormally loose or sloppy, you must immediately stop riding and have the
scooter serviced. Failure to ignore this safety feature could result in a
catastrophic failure causing a sudden loss of control.
Fig. 1