5
Description Value
IP address 192.168.1.90
Subnet mask 255.255.255.0
Default gateway 192.168.1.1
TCP port 1025
UDP port 1225
Username admin
Password admin
The projector is shipped with a set of default settings, these are as follows:
Before you connect the projector to your LAN make sure that the IP address 192.168.1.90
is not already in use. If you need to change it, you have to make sure that the computer you
use is on the same subnet. This means that the computer need to have an IP address in
the range from 192.168.1.1 to 192.168.1.254.
2 SETTING UP LAN COMMUNICATION
2.1 Setting the IP address
If you need to change the computers IP address, follow these steps:
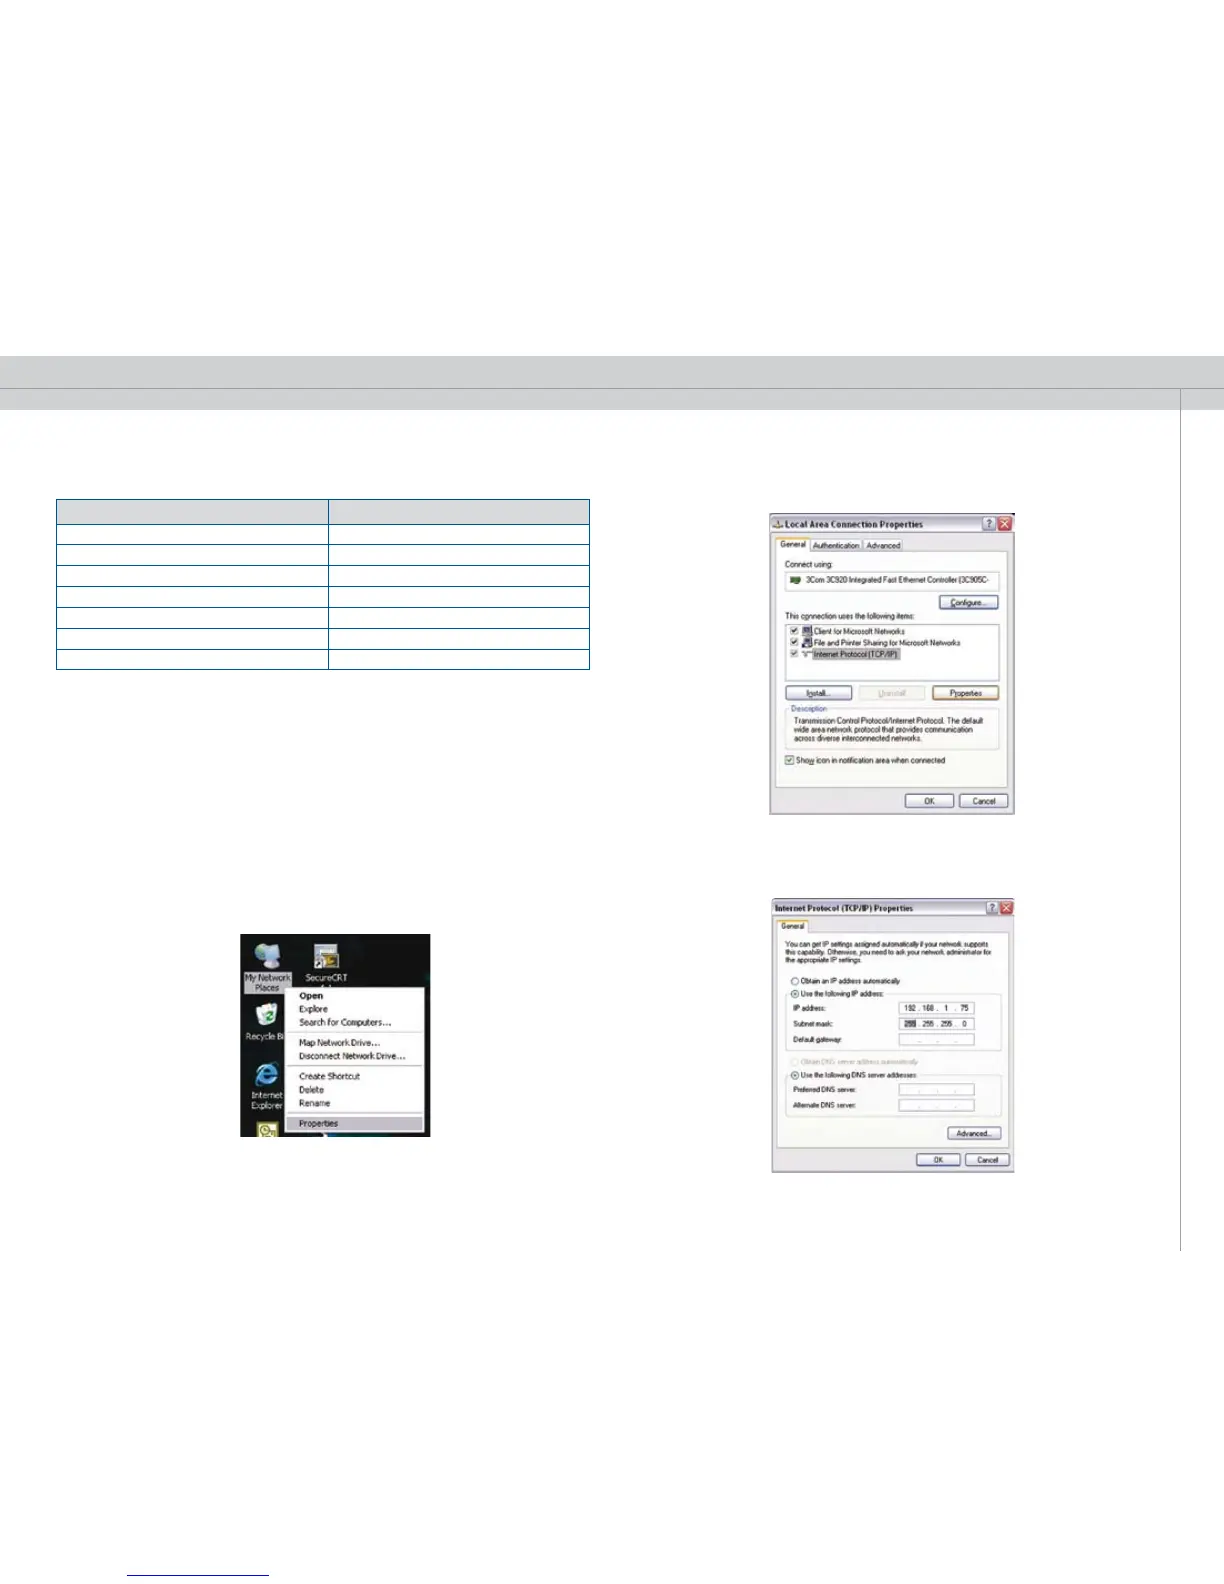
1. Right click on “Network Neighborhood” / “My Network Places” on your computer, and
then select “Properties”.
2. Doubleclick on the network connection that represents your LAN, select “properties”,
then doubleclick “Internet Protocol (TCP/IP).
3. This will take you to a screen where you can set the computers IP address:
Set the IP address and click OK on this and the previous dialog when you’re done.