SmartStor NAS Quick Start Guide
12
Task 6: Setting up the SmartStor
The SmartNAVI performs the setup procedures on your SmartStor. After the
procedure is done, you will have a default folder on the SmartStor, set up as a
network drive on your PC.
You can change the network settings, create RAID volumes, add and mount
folders on your SmartStor after initial setup using SmartNAVI. You can also made
more advanced settings using the WebPASM software. See “Task 7: Connecting
to Web Promise Advanced Storage Manager (WebPASM)” on page 19.
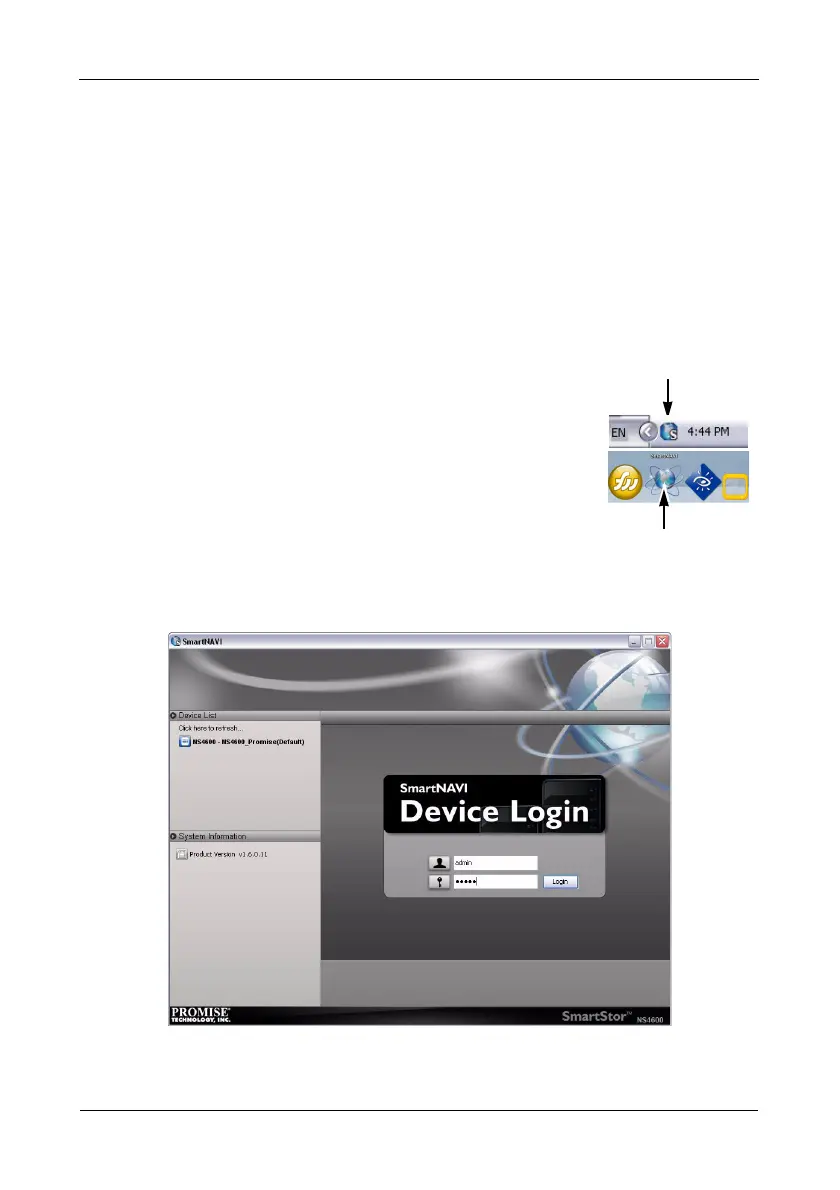
Opening SmartNAVI
1. Double-click the SmartNAVI icon in the Windows
application tray or Mac Dock (right).
The SmartNAVI Window opens.
2. Right-click the SmartStor NAS in the Device list.
The Login dialog box appears.
3. Type admin in the Username, Password, and
Confirm fields, then click the Login button.
This action creates a default user and logs the default
user into SmartNAVI.
Figure 6. Login Window
The Main Window opens.
SmartNAVI in
Windows
SmartNAVI Mac
OS X
 Loading...


