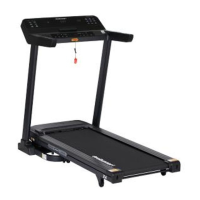
The ProRunner X1 is a walk treadmill designed for home use, offering a range of features for exercise and fitness.
Function Description
The primary function of the ProRunner X1 is to provide a platform for walking exercise. It features a walking belt, a control panel for operation, and a remote control for convenient adjustments. The treadmill allows users to control speed, distance, calories burned, and steps taken, with real-time data displayed on an LED window. It is designed for indoor use and supports various exercise routines. The treadmill includes a safety key mechanism that immediately stops the machine if removed, enhancing user safety. It also has a power-saving function that activates after 10 minutes of inactivity, and a power-off feature for complete shutdown.
Important Technical Specifications
The treadmill operates within an allowed temperature range of 5 to 40 degrees Celsius. It requires a proper electrical connection, utilizing a GFCI wall outlet with the treadmill. An extension cord should not be used. The treadmill is designed for a flat, level surface with access to correct voltage and frequency. It is not designed for outdoor use, near a pool, or in high humidity environments. The maximum running time is less than 2 hours per session. The treadmill's pulse sensors are intended only as exercise aids and not for medical purposes. The maximum user weight is not explicitly stated but implied by the safety warnings regarding proper use.
Usage Features
The ProRunner X1 offers several usage features to enhance the user experience:
Control Panel and Remote Control:
The treadmill can be operated via a control panel on the device itself or through a remote control. The remote control includes buttons for increasing/decreasing speed, starting/pausing the machine, and stopping. The remote control needs to be resynced with the treadmill if it loses connection.
Display Window:
The LED window displays various metrics including time, speed, distance, calories, and steps. These metrics help users track their progress during workouts.
Safety Key:
A safety key is provided, which must be inserted for the treadmill to operate. Removing the safety key immediately stops the walking belt, serving as an emergency stop mechanism.
Adjustable Speed:
Users can adjust the walking speed to suit their fitness level and workout intensity. The speed can be increased or decreased using the remote control or control panel.
Operation Instructions:
- Power Connection: Insert the power plug into the socket directly.
- Running Time: The constant running time is less than 2 hours. Read the entire manual before operating.
- Speed and Incline Adjustment: Understand that changes in speed and incline do not occur immediately. Set your desired speed on the computer console and release the adjustment key. The computer will obey the command gradually.
- Environmental Awareness: Use caution while participating in other activities while walking on your treadmill, such as watching television or reading. These distractions may cause you to lose balance or stray from walking in the center of the belt, which may result in serious injury.
- Belt Movement: To prevent losing balance and suffering unexpected injury, NEVER mount or dismount the treadmill while the belt is moving. The unit starts with a very low speed. Simply standing on the belt during slow acceleration is proper after you have learned to operate this machine.
- Handrail Use: Always hold on to the handrail while making control changes.
- Safety Key: A safety key is provided with this machine. Remove the safety key to stop the walking belt immediately; the treadmill will shut off automatically. Insert the safety key to reset the display.
- Pressure on Console: Do not use excessive pressure on console control keys. They are precision set to function properly with little finger pressure.
- User Restrictions: This appliance is not intended for use by persons (including children) with reduced physical, sensory or mental capabilities, or lack of experience and knowledge, unless they have been given supervision or instruction concerning use of the appliance by a person responsible for their safety. Children should be supervised to ensure that they do not play with the appliance.
- Medical Consultation: Please consult your doctor before running, especially if you have one of the following diseases:
a. Cardiopathy, hypertension, sugar diabetes, respiratory disease, smoking, and other chronic diseases, complication disease.
b. If you are over 35 years old and heavier than common weight.
c. Women in pregnant or in breasting period.
- Stop Exercising: Please stop exercising immediately and consult your doctor if you feel giddy, surfeit, thorax ache or other symptoms.
- Hydration: Please drink adequate water after taking exercises on our treadmill for more than 20 minutes.
Warning: Now here we suggest that you should consult with your physician or health professional before starting your workout, especially for the age up to 35 old or once-health problem people. We take no responsible for any troubles or hurts if you don’t following our specification. Treadmill will be carefully assembled and covered the motor shield, then connect to the power.
Maintenance Features
Regular maintenance is crucial for the longevity and performance of the ProRunner X1 treadmill.
Cleaning the Machine:
General cleaning helps prolong the life and performance of the treadmill.
- Keep the unit clean and maintained by dusting the components regularly.
- Clean both sides of the running belt to prevent dust from accumulating underneath the belt.
- Keep your running shoes clean so that dirt from your shoes does not wear out the running board and belt.
- Clean the surface of the running belt with a clean damp cloth.
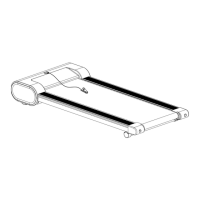
Adjusting the Walking Belt:
The walking belt may drift over time and needs adjustment to ensure proper alignment.
- If the walking belt (No. C07) moves to the left, turn the adjusting bolt on the left side 1/2 turn clockwise.
- If the walking belt (No. C07) moves to the right, turn the adjusting bolt on the right side 1/2 turn clockwise.
- If the walking belt (No. C07) will loosen, tighten the belt turn the left & right side adjustment bolts 1/2 turn clockwise.
Place the treadmill on a level ground and set it at 4kmph to check if the Walking Belt (No. C07) drifts.
Lubricating the Walking Belt:
Lubricating the walking board and walking belt is essential as the friction between the two affects the life span and function of the treadmill. It is suggested that the running board and belt be inspected regularly.
- Raise the belt up on one side and apply lubricant to the running deck.
- Use a rag to thoroughly wipe the lubricant over the running deck.
- Repeat this process for the other side.
The manual specifies that lubrication is needed every 300 KM. The system will release a beeping sound every 10 seconds and display an "OIL" icon on your display to remind you when it's time. Refer to page 12 for proper steps to lubricate your machine. After application, press and hold the STOP button for 3 seconds to clear the reminder.
Troubleshooting:
The manual provides a comprehensive troubleshooting guide for common issues, including:
- Treadmill not starting: Possible causes include not plugged in or safety key not inserted. Suggested actions are to plug in the cord or insert the safety key.
- Running belt not centered: Caused by incorrect tension on the left or right sides of the running board. Suggested action is to tighten the adjustment bolts on the left and right side of the rear roller.
- Computer not working: Possible causes include wires from the computer or computer and bottom control board not properly connected, or a damaged transformer. Suggested actions include checking wire connections or contacting customer service.
- 0001 ERROR: Message failure: Caused by wires from the computer and bottom control board not properly connected. Suggested action is to check wire connections and replace the control board if necessary.
- 0002 ERROR: Burst clash protection: Caused by incoming voltage being lower than 50% of the required voltage. Suggested action is to check that the incoming power supply is correct.
- 0005 ERROR: Current overload protection (Self Protecting System): Caused by incoming voltage being too low or too high, or a damaged control board. Suggested action is to restart the treadmill, check the incoming voltage, and check/replace the control board if damaged.
- 0006 ERROR: Motor Abnormality: Caused by the motor wire not connected or the motor being damaged, or a moving part of the treadmill being stuck. Suggested actions include inspecting moving parts, checking motor wires, and replacing the motor if necessary.
- 0008 ERROR: Control Board Abnormality: Caused by the control board not being connected. Suggested action is to check upper and middle wires and replace the control board if necessary.
- 0009 ERROR: Inversion error: Caused by the treadmill being set upright or not placed horizontally. Suggested actions include adjusting the treadmill to be placed horizontally and checking the wires of the control board.
- 0010 ERROR: Motor Abnormality: Caused by the motor being damaged or a moving part of the treadmill being stuck and the motor being unable to rotate properly. Suggested actions include inspecting moving parts and replacing the motor if necessary.