Prosound 800, 1000, 1600 Professional
Power Amplifier Manual
INTRODUCTION
The PROSOUND series of amplifiers are fully featured rack mount professional power amps, designed
to provide high quality, reliable performance for all professional applications from live bands to club
installations.
MAIN FEATURES
• Class AB design for high reliability and low distortion
• Cooling path is designed to prevent dust and dirt build up inside the amplifier, preventing PCB damage
and maintaining maximum cooling effect for greater reliability in operation
• Variable speed, brushless fan to improve cooling, reduce noise and increase fan life.
• Comprehensive protection circuitry protects the amp from over-current, short circuit, over-temperature,
DC and high frequency problems to prevent down time for repairs.
• Over-engineered power supplies for improved depth and dynamic response.
INSTALLATION GUIDELINES
• Do not use these amplifiers in damp or high humidity environments. Do not use outdoors, or anywhere
where liquids could fall or splash onto the amplifier.
• Ensure the amp is adequately ventilated, with free airflow to the front and rear panels. Keep away from
other heat sources. If the amps are mounted in a rack with other amps, ensure there is adequate cool
air flow front and rear. Note that air is drawn in through the back panel, and exhausted through the
front panel.
• NEVER cover the amplifiers, as they may overheat.
• Prosound power amplifiers are designed to fit standard 19” racks, with a 2U height and 17” depth. We
recommend the use of rear rack supports, especially if the rack is to be mobile. Use shakeproof
washers or threadlock adhesive to prevent mounting bolts becoming loose in transit.
• Ensure that the AC power supply is correct for your amplifier. The required AC supply is stated on the
rear panel next to the AC power input.
• Ensure that you use the correct type of mains lead for your equipment and country. This must be free
from damage, and easily accessible during use.
• Keep away from magnetic recording media (tape, mini disc, hard drive etc). Power amps produce an
electromagnetic field, which could affect stored files.
- 3 -
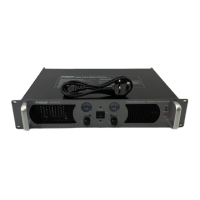
9. AC socket. Connect the supplied AC power lead here. Ensure the correct AC supply is used, as stated
on the rear panel.
10. AC Fuse. The AC power fuse is located in the drawer above the AC socket. Should the fuse fail,
replace only with the same type and rating. DO NOT replace with a higher value. If a replacement
fuse fails immediately, contact a qualified Service Engineer. Disconnect the amplifier from the AC
supply before attempting to change the fuse.
Wiring Conventions in ProSound Power Amps
Balanced XLR ; Pin 1=Signal ground. Pin2=IN phase signal . Pin 3=OUT phase signal.
Unbalanced XLR ; Pin 1= Signal ground. Pin2= Signal psoitive. Pin 3=Signal ground (common with 1).
¼” TRS balanced jack ; Tip=IN phase signal . Ring=OUT phase signal. Sleeve=Signal ground.
¼” unbalanced jack ; Tip=Signal Positive. Sleeve=Signal ground.
Speakon ; 1+=Speaker positive. 1-=Speaker negative. 2+=Common with 1+. 2-=Common with 1-.
- 6 -
 Loading...