Instructions for use
PROTEC GmbH & Co. KG, In den Dorfwiesen 14, 71720 Oberstenfeld, Germany
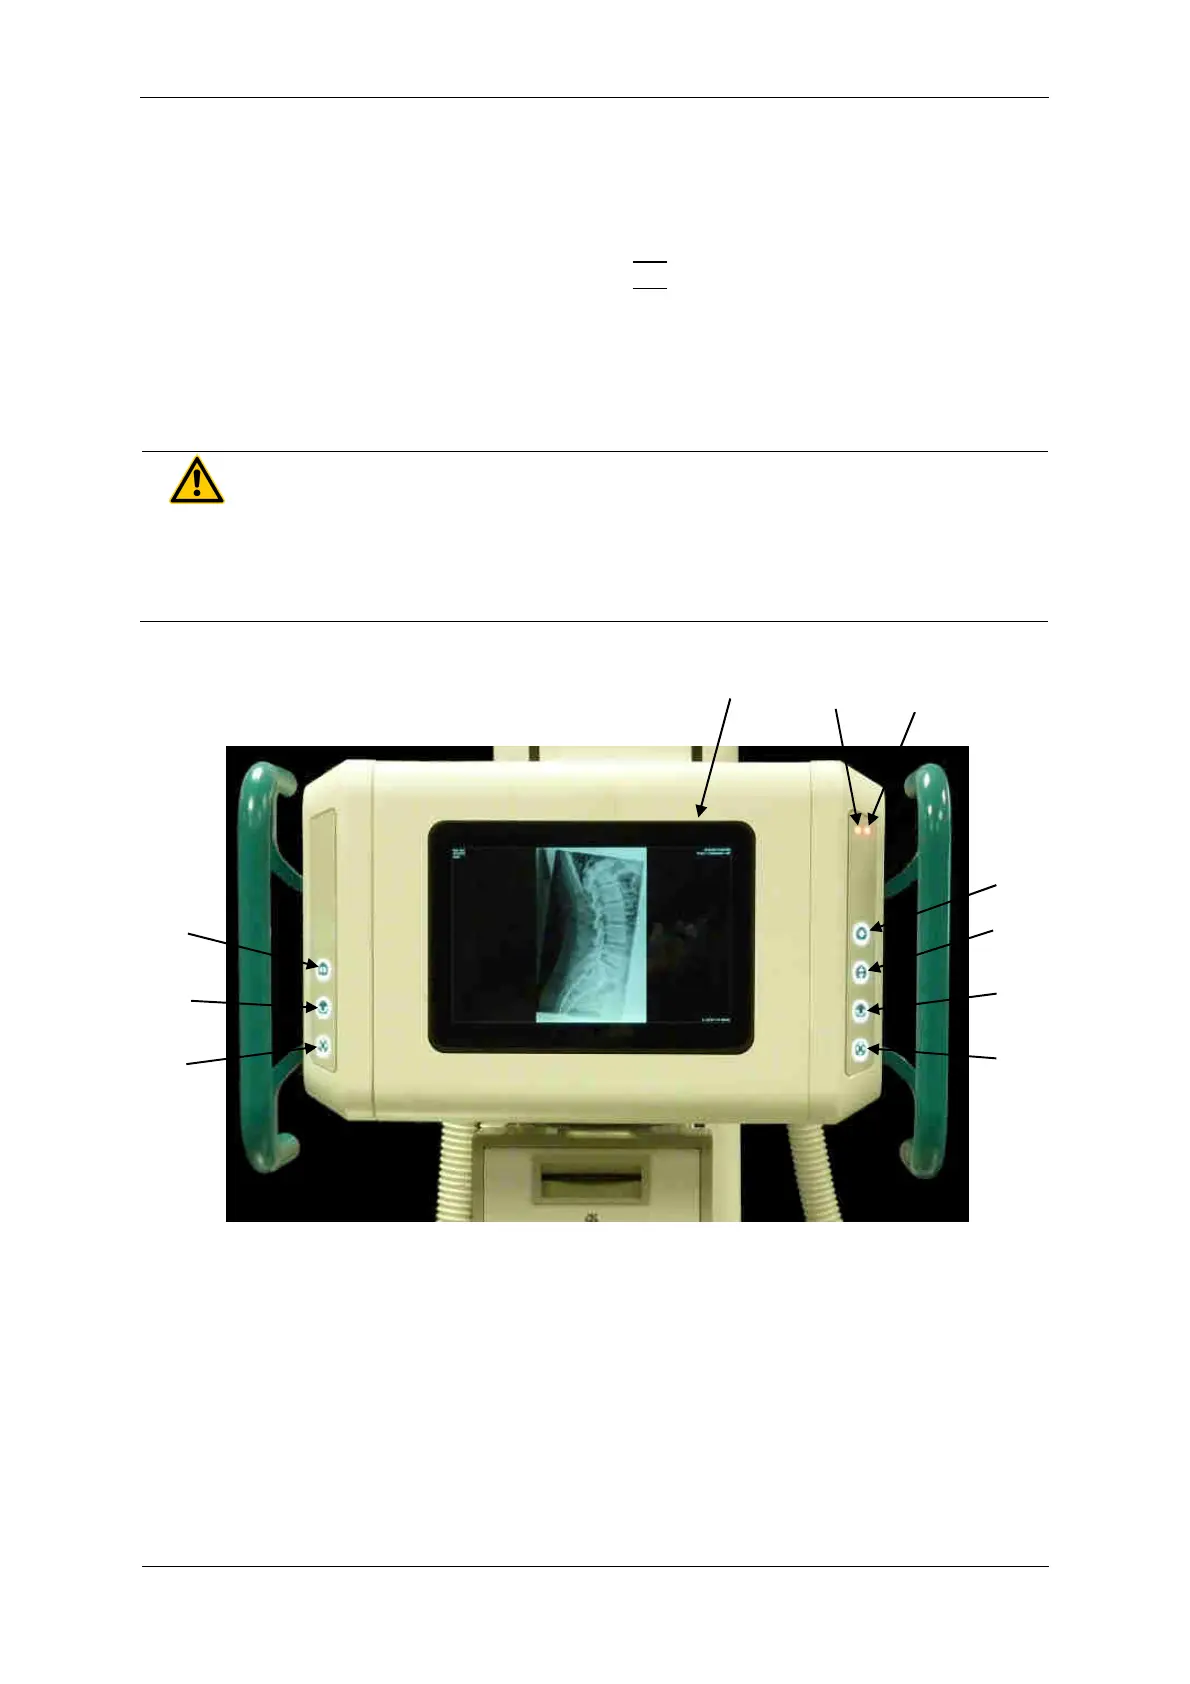
3.2.2 PROGNOST SH TOUCH
1 Touchdisplay of X-ray tube assembly
2 Brake release for horizontal movement of X-ray floor stand
3 Brake release for movement of X-ray tube assembly around the horizontal support arm axis
4 Brake release for vertical movement of X-ray tube arm and horizontal movement of X-ray floor stand
5 Brake release for vertical movement of X-ray tube arm and horizontal movement of X-ray floor stand
6 Brake release for movement of X-ray tube assembly around the horizontal support arm axis
7 Brake release for vertical movement of X-ray tube arm
8 Option: Brake release for transversal movement of X-ray tube arm (+230mm)
9 Option: Status-LED orange (if LED is on: X-ray tube arm is not engaged)
10 Option: Status-LED red (if LED on: X-ray flor stand is not engaged)
WARNING!
If the red LED on the right membrane keypad lights up, the X-ray tube carrier
is not engaged! In this state no x-rays may be taken. The X-ray tube carrier
must first engage in one of the positions (0 / ± 90° / ± 180°)!
Operation is from the front (operating side) of the X-ray head.
If the operating unit is equipped with handles, the electromagnetic lock of one or more movements
can be released by thumb pressure on the keys of the operating unit and the tube head can be
brought into the desired position.