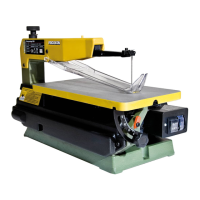
6.6 Connecting the vacuum cleaner (fig. 4)
1.Place the vacuum hose 1 of the vacuum cleanerinthe connecting
piece 2.
2.Switch on the vacuumcleanerbefore sawing so that the sawdust is
vacuumedand the suctiondevice doesnot get blocked.
Forpracti-
cal reasons, the PROXXONsuctioncontroldevice is recommended.
6.7 Saw blades
Caution!
Always remove the mains plug before performing the activities
describedh
ere.
6.7.1 Clamping in the saw blade (fig. 5a and 5b)
Standard bladeswithcross pins and hand(leaf) bladeswithout cross
pin can be clampedinto the sawblade mount.
Replace damaged orworn sawbladesimmediately.Theyre
present
asafetyrisk and worsen the work result.The best cutting perform-
ance and precisioncan only be achievedwithperfect sawblades.
Use PROXXON original sawb
ladesand carefully select suitable saw
bladesforthe intendedpurpose and material to be cut.WithProxxon,
there are also various fine toothings, flat and round blades, and some
withand without cross pin. Youwill find suggestions in these in-
structions.
6.7.1.1 Saw blades with cross pin (fig. 5a)
Sawbladeswithcross pin are particularly suitable forworking with
manyclosedinside cuts.
The sawblade can be quickly and comfort-
ably removedfromthe uppermount, looped through the work piece
and repositioned. Youwill find more precise informationinthe sec-
tion"Inside cuts".
Caution!
Sawbladeswithcross pins may only be hung in position. Do not
clamp the sawbladeswiththe cross pin additionally by means of the
cheese-head
screws. Risk offracture!
1.The the rotaryknob1 (Fig. 6) forsaw blade tensioning to the left
until the sawblade is loose.
2.Place sawblade 1 with the toothing pointing downwards through
the table opening 2 and fit in the bottommount 3.
3.Press lightly on the toparm 5 and fit blade in the uppermount 6,
see fig. 5a).
4.Release arm and by turning the rotarykno
b1 (Fig. 6) to the right,
set the sawblade tensioning.
5.Ifrequired, finely adjust the sawblade clamp as describedunder
6.7.2.
6.7.1.2 Saw blades with flat ends
(hand or leaf saw blades, see fig. 5b)
1.Turn rotaryknob1 (Fig. 6) forsaw blade tensioning to the left
until
the sawblade is loose.
2.Place sawblade 1 with the toothing at the bottom through the
table opening 2 and fit in the bottommount 3.The cheese-head
screw 4 may not be tightened!
Thenclamp the blade in the
mount by tightening the cheese-head screw 4 with the supplied
AllenkeywithTgrip 5. Caution: Make sure that the blade is
clampedreally far forward! This is where the clamping force is
at its greatest.
3.Press lightly on the toparm 6, introduce the sawblade into the
upperholder 7 and tensioninthe same way.
4.Release the arm and set the
sawblade tensioning by turning the
rotaryknob1 (Fig. 6) to the right.
5.Ifrequired, adjust the sawblade clamp as describedunder 6.7.2
6.7.2 Finely setting the correct saw tensioning (fig. 6)
Correct saw tensioning is an essential factorforac
lean work result.
This must, therefore, be carefully set.Ifoverorundertensioned, the
sawblade can lightly crack. Turn knurledbutton 1 to set the ten-
sioning.Ifthe buttonismovedto the right (clockwise), the sawblade
is more tightly tensioned. If it is turned to the left (anticlockwise) the
blade is loosened.
Acorrectly tensionedblade sounds aslight
tone if "plucked" like a
string.
6.7.3 Removing saw blade (fig. 5a and 5b)
6.7.3.1 Saw blades with cross pin (fig. 5a)
1.The the rotaryknob1 (Fig. 6) forsaw blade tensioning to the left
until the sawblade is loose.
2.Press toparm 5 slightly down so that the sawblade 1
can be
releasedfromthe topmount 6.Take out sawblade.
3.Take out sawblade frombottommount 3 and remove through
table opening 2.
6.7.3.2 Saw blades with flat ends (fig. 5b)
1.The the rotaryknob1 (Fig. 6) forsaw
blade tensioning to the left
until the sawblade is loose.
2.Openwingnut 8, the sawblade 1 releasesfromthe topmount 7.
3.
Opencheese-head screw 7 with the T grip Allenkey5, release saw
blade from the lowermount 3 and remove through the table opening.
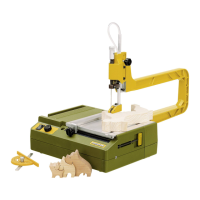
7 Working with the saw
7.1 General information for working with mechanical fret saw
The mechanical fret sa wispredominantly amachine forsawing
curvesand precise sections. A typical applicationisshown in fig. 7.
The work piece must be carefully guidedbythe opera
tor.
Note:
Me-
chanical fret saws are normally operatedwithout lengthstop, as the
sawblade losesitsline íf forcedin, particularly in the grain ofwood.
Please note that the sawblade only saws in
reverse motioninthe di-
rectioninwhich the teethpoint.
For goodresults, please note the following points:
– Whensawing, press the work piece onto the work pla
te (fig. 7),
guide by feeling and withlittle power; more pressure on the work
plate, less pressure against the sawblade.
– Make sure that the work piece is lying properly on the saw table
(norburrs orsawdust)
- 15 -
 Loading...