1
Table of Contents
1. Introduction 7 .......................................................................................................................
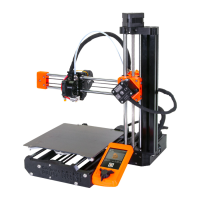
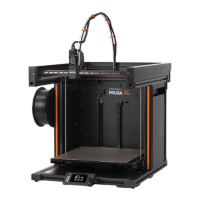
Step 1 - MMU History and Printer Compatibility 8 ......................................................
Step 2 - Supported printers 9 ..........................................................................................
Step 3 - Disclaimer 9 ........................................................................................................
Step 4 - Tools required 10 ................................................................................................
Step 5 - View high resolution images 10 .......................................................................
Step 6 - Labels guide 11 ....................................................................................................
Step 7 - We are here for you! 11 .......................................................................................
Step 8 - Pro tip: inserting the nuts 12 .............................................................................
Step 9 - Printed parts 13 ...................................................................................................
Step 10 - Prepare your desk 14 ........................................................................................
Step 11 - Continue 14 .........................................................................................................
2. MMU2S Disassembly (UPG) 15 ....................................................................................
Step 1 - Introduction 16 .....................................................................................................
Step 2 - Tools necessary for this chapter 16 .................................................................
Step 3 - Disconnecting the PTFE tubes 17 ....................................................................
Step 4 - Disconnecting the MMU2S (part 1) 17 ............................................................
Step 5 - Disconnecting the MMU2S (part 2) 18 ...........................................................
Step 6 - Removing MMU2S from the printer 18 ..........................................................
Step 7 - MMU-to-Extruder PTFE tube disassembly 19 ...............................................
Step 8 - MMU2S Unit disassembly 20 ..........................................................................
Step 9 - Textile wrap removal 20 ....................................................................................
Step 10 - Idler motor removal 21 .....................................................................................
Step 11 - 5x16sh shafts removal 21 ..................................................................................
Step 12 - Bearings removal 22 .........................................................................................
Step 13 - Selector motor removal 22 ..............................................................................
Step 14 - Selector removal 23 ..........................................................................................
Step 15 - Pulley motor removal 23 ..................................................................................
Step 16 - Selector disassembly 24 ..................................................................................
Step 17 - Control board disassembly 24 ........................................................................
Step 18 - Summary 25 ......................................................................................................
3. MMU2S Buffer Disassembly (UPG) 26 .....................................................................
Step 1 - Preparation 27 ......................................................................................................
Step 2 - Disconnecting the PTFE tubes 27 ...................................................................
Step 3 - Buffer disassembly 28 .......................................................................................
Step 4 - Summary 28 ........................................................................................................
4. Idler Body Assembly 29 ...................................................................................................
Step 1 - Tools necessary for this chapter 30 .................................................................
Step 2 - Idler versions 30 ..................................................................................................
Step 3 - Idler parts preparation 31 ..................................................................................
Step 4 - Idler bearings assembly (part 1) 31 ..................................................................
Step 5 - Idler bearings assembly (part 2) 32 .................................................................
Step 6 - Idler center bearing assembly 32 ....................................................................
Step 7 - Coupler parts preparation 33 ...........................................................................
Step 8 - Coupler preparation 33 .....................................................................................
Step 9 - Coupler assembly 34 .........................................................................................
Step 10 - Final check 34 ...................................................................................................
Step 11 - Idler Body parts preparation 35 ......................................................................
Step 12 - Silicone stopper instalation 35 .......................................................................
Step 13 - Idler installation 36 ...........................................................................................