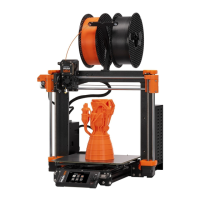
1
Table of Contents
1. Introduction 7 .......................................................................................................................
Step 1 - All the required tools are included 8 ................................................................
Step 2 - Labels guide 8 .....................................................................................................
Step 3 - Use labels for reference 8 .................................................................................
Step 4 - Spare bag 9 .........................................................................................................
Step 5 - View high resolution images 9 ........................................................................
Step 6 - Printed parts - versioning 10 .............................................................................
Step 7 - We are here for you! 10 ......................................................................................
Step 8 - Pro tip: inserting the nuts 11 .............................................................................
Step 9 - Important: Electronics protection 11 ...............................................................
Step 10 - Reward yourself 12 ...........................................................................................
Step 11 - How to successfully finish the assembly 13 ..................................................
2. Y-axis assembly 15 ............................................................................................................
Step 1 - Tools necessary for this chapter 16 ..................................................................
Step 2 - YZ frame - preparing the components 16 ......................................................
Step 3 - YZ frame - mounting the longer extrusions 16 ..............................................
Step 4 - YZ frame - mounting the shorter extrusions 17 .............................................
Step 5 - YZ frame - final check 17 ...................................................................................
Step 6 - Y-axis: front and rear plate preparation 18 .....................................................
Step 7 - Y-axis: front plate assembly 18 .........................................................................
Step 8 - Y-axis: preparation for the PSU 19 ..................................................................
Step 9 - Y-axis: rear plate assembly 19 ..........................................................................
Step 10 - Y-axis: geometry check 20 ..............................................................................
Step 11 - Mounting antivibration feet (optional) 20 .....................................................
Step 12 - Preparing Y-belt-idler (part 1) 21 ....................................................................
Step 13 - Preparing Y-belt-idler (part 2) 21 ...................................................................
Step 14 - Preparing Y-belt-idler (part 3) 22 ...................................................................
Step 15 - Mounting the Y-belt-idler 22 ..........................................................................
Step 16 - Y-axis: motor and motor holder 23 ................................................................
Step 17 - Preparing Y-motor-holder 23 ..........................................................................
Step 18 - Mounting Y-motor-holder 24 ..........................................................................
Step 19 - Y-axis: Y-carriage 24 ........................................................................................
Step 20 - Correct bearing orientation 25 ......................................................................
Step 21 - Installing bearings on the Y-carriage 25 .......................................................
Step 22 - Inserting smooth rods into Y-carriage 26 ....................................................
Step 23 - Y-axis: smooth rods holders 26 .....................................................................
Step 24 - Preparing Y-rod-holder 27 ..............................................................................
Step 25 - Mounting the Y-rod-holder parts 27 .............................................................
Step 26 - Installing the Y-carriage 28 ............................................................................
Step 27 - Aligning the smooth rods 28 ..........................................................................
Step 28 - Assembling the Y-motor pulley 29 ...............................................................
Step 29 - Y-axis: Assembling the belt 29 ......................................................................
Step 30 - Y-axis: Assembling the belt 30 ......................................................................
Step 31 - Y-axis: Assembling the belt 30 .......................................................................
Step 32 - Y-axis: Assembling the belt 31 .......................................................................
Step 33 - Y-axis: Assembling the belt 31 .......................................................................
Step 34 - Y-axis: Assembling the belt 32 ......................................................................
Step 35 - Aligning the Y-axis belt 32 .............................................................................
Step 36 - Tensioning the Y-axis belt 33 ........................................................................
Step 37 - Testing the Y-axis belt 33 ...............................................................................