21
Rev 2.0 2023-10-23
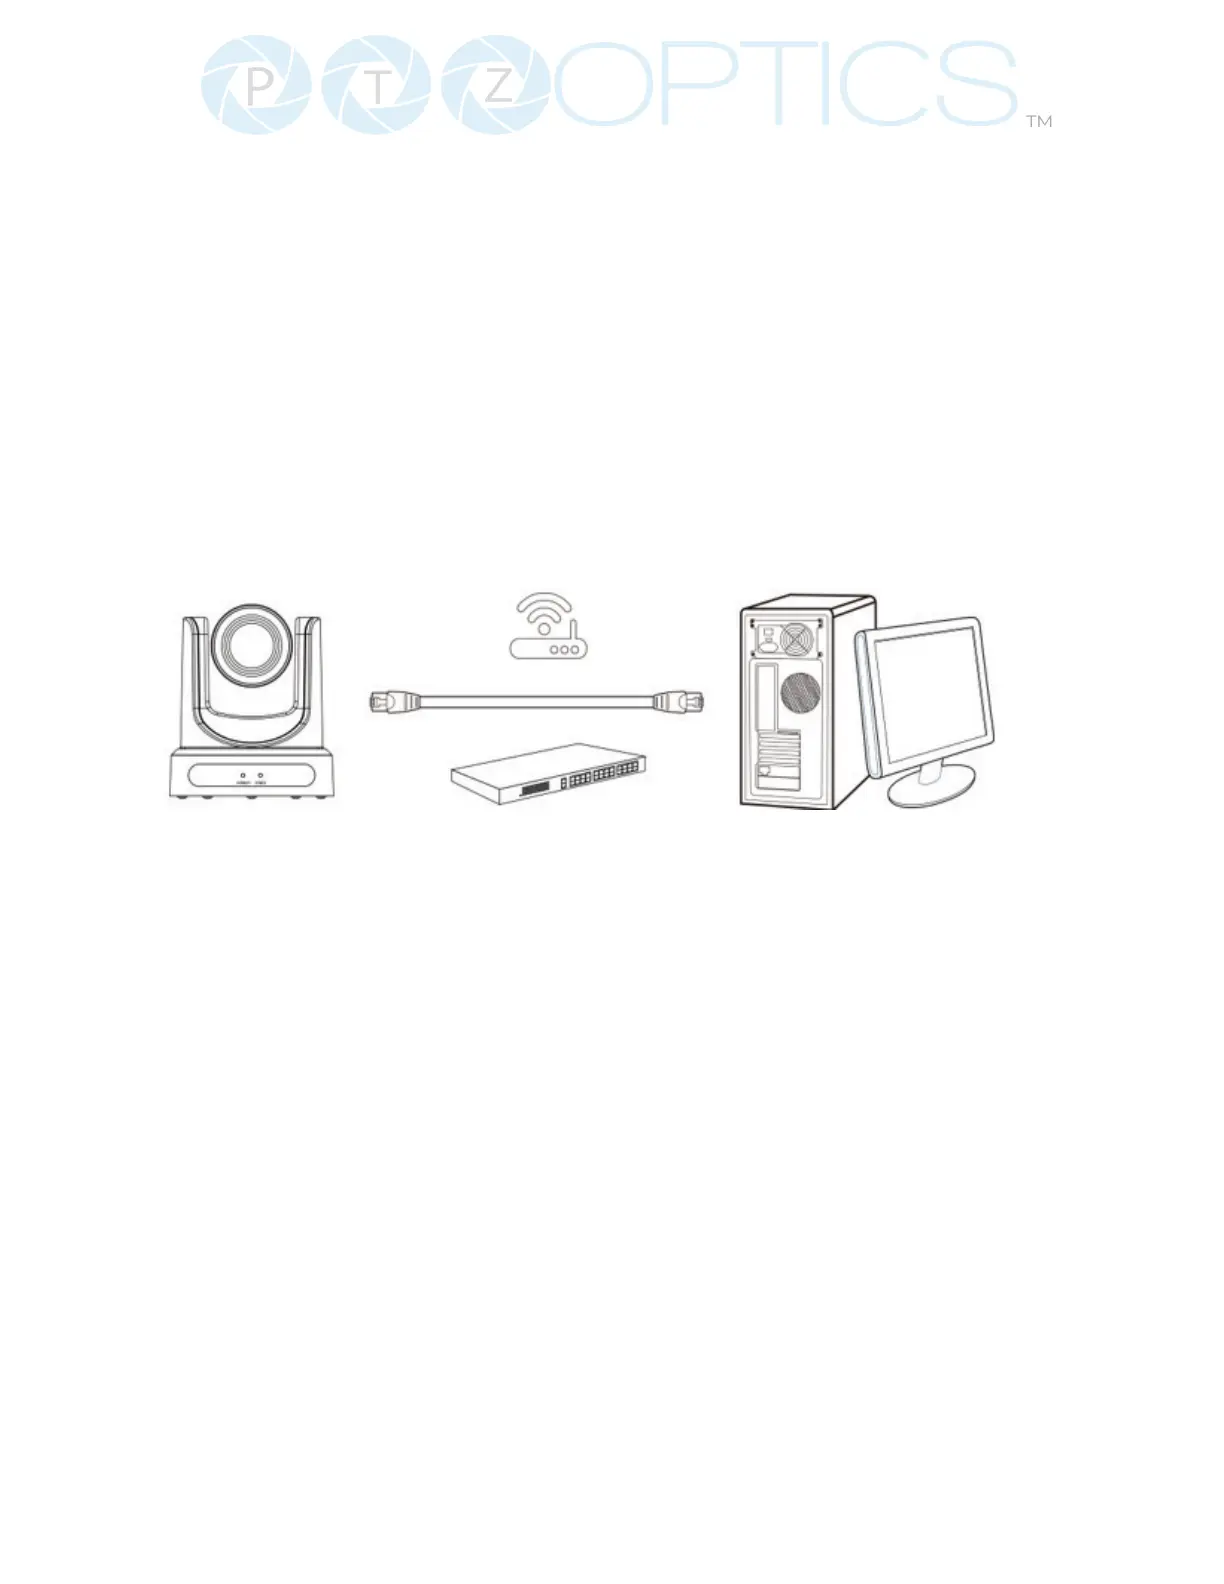
Network Connection
Operating Environment
• Operating System: Windows 7 / 8.1 / 10 / 11, Mac OS X, Linux, Android
• Network Protocol: TCP/IP
• Client PC: P4 / 128M RAM / 40G HDD / supported scaled graphics card, support for
DirectX 8.0+.
Equipment Installation
1. To connect your camera to your network, run a CAT 5 or CAT 6 cable from the camera direct-
ly into a network switch.
2. Turn on power.
3. If successful, the orange network light will illuminate and the green light will start ashing.
Picture 1.2 Connections to LAN via patch cable to LAN wall jack or LAN Switch
Finding the camera’s IP Address
The camera will automatically acquire an IP address when connected to the network. If the
network cannot assign an IP address, the camera will default to “192.168.100.88”. If you don’t
know the camera IP, please do one of the following:
Method 1: Use a Internet browser and type in “http://ptzoptics.local/” to reach the camera’s
web inter face. The username and password are both “admin” by default. The Network
Settings page will allow you to make adjustments to the camera’s network settings.
Method 2: Use the IR remote shortcut [*] > [#] > [4] to display the camera’s IP address.
Note: If you are setting up multiple cameras, it’s recommended to do so one at a time. Assign a
unique Device ID to each camera from the Device Info page. This will allow you to reach each
camera’s web interface without needing to memorize an IP address.
For example, “http://camera1.local/” and “http://camera2.local/”.