12
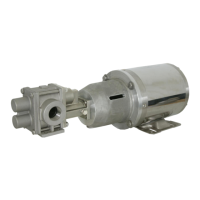
4. Next install another pair of wearplates, housing
pins and the rear housing (Item 3). Install the
housing bolts (Item 18) and tighten.
5. Install the following parts onto the pump drive
shaft in the order listed: retaining ring (Item 10),
keys (Item 21), driven magnet assembly (Item
24) with the short hub side towards the front
housing and retaining ring. Note: Only new
retaining rings should be used on the driven
magnet end due to the bending required at
disassembly. Use caution not to bend these
rings during assembly.
6. Place a new O-ring (Item 25) into the groove in
the front housing. Then install the containment
can (Item 26) over the driven magnet
assembly. Next slide the can ring (Item 28)
over the can and install screws (Item 29). If
pump is equipped with a double can, install an
additional O-ring (Item 25) then the double can
assembly (Item 27) instead of the can ring.
Also at this time install pipe plugs (Item 66).
7. If the pump is a GMC12 or GMC16, reinstall
the guide pins (Item 39) at this time if they had
been previously removed. If pump is a GMH8
fabricate guide pins by cutting off the head of
some 1 /4-20 bolts and screwing them into the
front housing. The purpose of these guide pins
is to guide the pump assembly into the adaptor
(Item 36). The attractive force of the magnetic
assemblies is so great that it is not possible to
slowly insert the pump into the adaptor. The
GMC12 and GMC16 pumps have springs (Item
40) which cushion the impact when inserting
the pump assembly into the adaptor. Note:
Great care must be used when assembling
pump to adaptor so that your fingers are not
pinched. Install pump assembly into adaptor at
this time.
8. Install bolts (Item 22). Turn motor or power-
frame input shaft by hand to check for free
rotation without binding.
9. Reinstall pump in system, open inlet and
discharge valves and check for leaks. Start
pump. Monitor pump for 5-10 minutes for signs
of binding, excessive noise and high motor
amperage draw. Check performance. If
problems are encountered refer to the
Troubleshooting Section.
BOLT-ON THERMAL JACKETS
INSTALLATION
The following tools are required:
Suitable wrenches (open end, socket or
adjustable) to bolt jacket halves together. 7/16,
9/16 or 3/4 inch wrench sizes. Bolts provided
with jacket.
Heat transfer cement (Thermon "standard
grade" or equivalent) to fill any slight clearance
between the interior surface of the bolt-on
jacket and the exterior surface of the pump.
A suitable mason's trowel to apply heat transfer
cement to the interior surface of the jacket.
Damp paper towels or rags for clean-up.
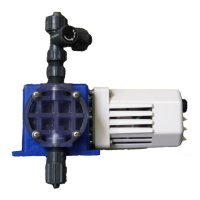
1. Install the Isochem pump that is to be jacketed
in the process line.
2. Visually inspect pump to be jacketed and
remove any foreign material, packing lists, or
identification tags which might come between
inner jacket surface and the pump. Note:
Pumps that have painted surfaces require no
special preparation. Paint should be dry.
3. Check for proper fit of the bolt-on jacket halves
by removing bolts which hold the halves
together, and place both halves around pump.
Normally there is slight clearance between the
inner jacket surface and the pump.
4. Remove jacket halves from the pump and lay
them on a clean, dry, work area, inner surfaces
face up.
5. With a trowel, coat the inner surfaces of the
jacket halves with heat transfer cement.
Coating should be approximately 1/8 to 1/4
inch (3-6mm) thick. Also dab a small quantity of
the cement on the back of the pump flanges in
three or four places.
6. Place jacket halves with heat transfer cement
on pump and press firmly in place. Bolt jacket
halves together with jacket bolts removed in
Step 3.
7. Tighten bolts alternately to assure snug, even
seating of jacket halves on the pump.
 Loading...