Section 3
Get started
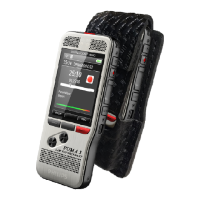
Charge the battery and set date and time
The battery is pre-installed in the recorder. Pull the battery tape off from the battery door before charging.
If the recorder does not turn on, turn on the recorder by sliding the ON/OFF switch to the ON position. You will be prompted to set
the date and time.
Set the date and time
1
Press
(+ / - )
to change the value for the year, month or day.
2
Press Next to advance to the next entry.
3
After setting the day, press Next to advance the settings to the correct time.
4
Press
(+ / - )
to select a 12-hour or 24-hour clock and to change the value of the hour and minute.
5 Press OK to confirm the date and time.
Charge the battery
1
Plug the USB connector of the included USB cable into a USB port on your computer. You may also use an optional AC
power adapter or the optional Download/Charging cradle. If using the Download/Charging cradle read the instructions for
the Download/Charging cradle in Section 13 of this guide.
2
Insert the micro USB plug into the USB port on the recorder or if using the Download/Charging cradle place the recorder in
the cradle. Use care when inserting the micro USB cable into the recorder. Make sure the connecter is positioned correctly.
Do not force the cable.
3 The recorder starts charging. Let the recorder charge for 3 hours before first use.
4
Your recorder is now ready to use.
• The computer must be turned on when charging the battery.
• The device may become warm when the battery is being charged.
• The maximum battery capacity will only be reached after several charging/discharging cycles.
**Note: The recorder switches itself to Power Save mode automatically if no key is pressed within a pre-set period of time. This
is configurable in the Power Save settings. Lifting or moving the recorder will wake up the recorder from Power save mode.
 Loading...