For an updated copy of this document, visit www.Q5X.com/support 14 | P age
This Quick Start Guide is an overview. Users are asked to
review the manual for detailed instructions.
The carrying pouch contains two parts:
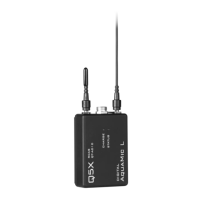
• Digital CoachMic transmitter (QT-AD10C)
• Micro USB charging cable
Users also need:
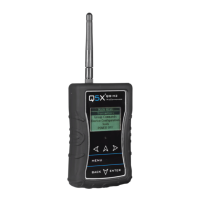
• Q5X Gateway (remote control)
o Handheld MicCommander (QG-H2) or
o Network Gateway (QG-N3)
• Shure Axient Digital receiver
• Microphone (1-pin Lemo connector)
Visit www.Q5X.com/support to:
• update the firmware
• register the warranty
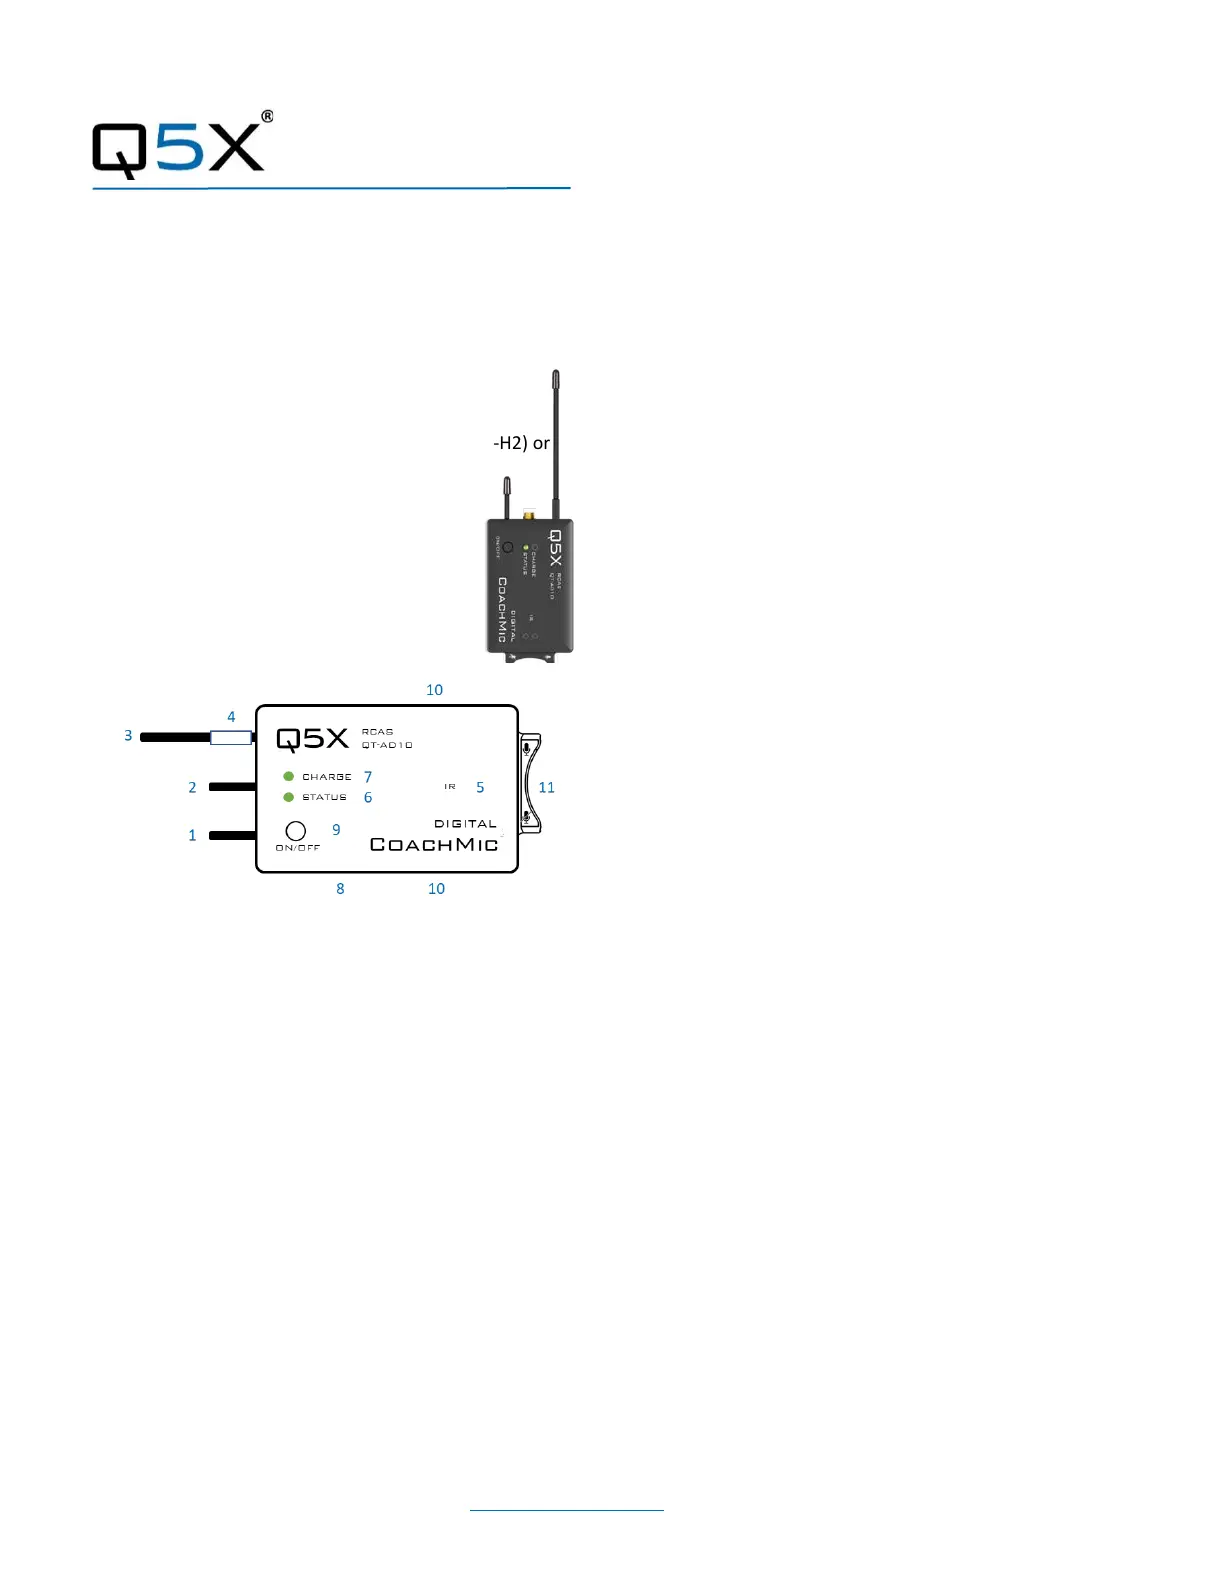
1 2.4 G antenna - For the RCAS control channel.
2 Audio input - Connects to a microphone with a
one-pin Lemo connector.
3 UHF antenna - For RF signal transmission.
4 Serial number - Unique serial number for RCAS
identification and control. (on the antenna)
5 IR port - Infrared sync with the receiver for set-
up, initiating encryption and installing firmware
updates.
6 Status LED - See manual for details on LED
patterns and colours.
7 Charge LED - Red = charging, green= charged
and flashing red/green = error.
8 USB port - Charges the battery.
9 On/Off button - Manual power control
between on, standby and storage modes.
10 Belt clip holes - Allows vertical and horizontal
placement.
Mute switch - Suspends audio transmission.
CoachMic Transmitter
• Bring the transmitter out of storage mode (minimal
battery draw) and into standby mode (detectable but
the UHF radio is off) using either method below:
o Hold the ON/OFF button until the status LED
changes from flashing rapidly to slowly, or
o Plug and unplug a powered micro USB
charging cable into the side of the transmitter.
• Connect the 1-pin Lemo microphone.
BATTERY LIFE: 8 hours @ 2/10mW 4 hours @ 20mW
PREPARE: Gateway remote control (H2 or N3)
• Install the antenna on the top. (NEVER power the unit
without the antenna in place.)
• Power the Gateway as instructed in its manual.
• Turn on the unit by pressing the power button.
PAIR: CoachMic and Gateway remote control (H2 or N3)
• The screen on the Gateway displays the serial number
of paired transmitters.
• Press the <MENU> button to either scan for
transmitters or add the serial number found on the
PlayerMic antenna.
ADJUST: Set the functions in the two transmitter menus of the
Gateway. Screen one includes frequency, power on/off, battery
level, mic mute/live and mic offset. Screen two includes:
transmitter name, group, RF power, 2.4GHz channel, storage
and reboot.
IR SYNC: Use IR Sync to form an audio channel between the
transmitter and receiver. The receiver band must match the
band of the transmitter.
• Select a receiver channel.
• Tune the channel to an available frequency using group
scan or manually tune to an open frequency.
• Assure transmitter is in standby or on mode.
• Press the SYNC button on the receiver.
• Align the IR windows between the transmitter and the
receiver so that the IR LED illuminates red.
• When complete, “Sync Success!” appears on the
receiver.
USE TIPS: When using the CoachMic, the belt clips can be
configured to wear the transmitter horizontally on the left or
right side of the body, or vertically in a pocket. The mute
function can be controlled by either the integrated rocker switch
or wirelessly by the Gateway.