8
EN
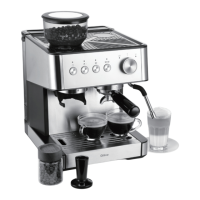
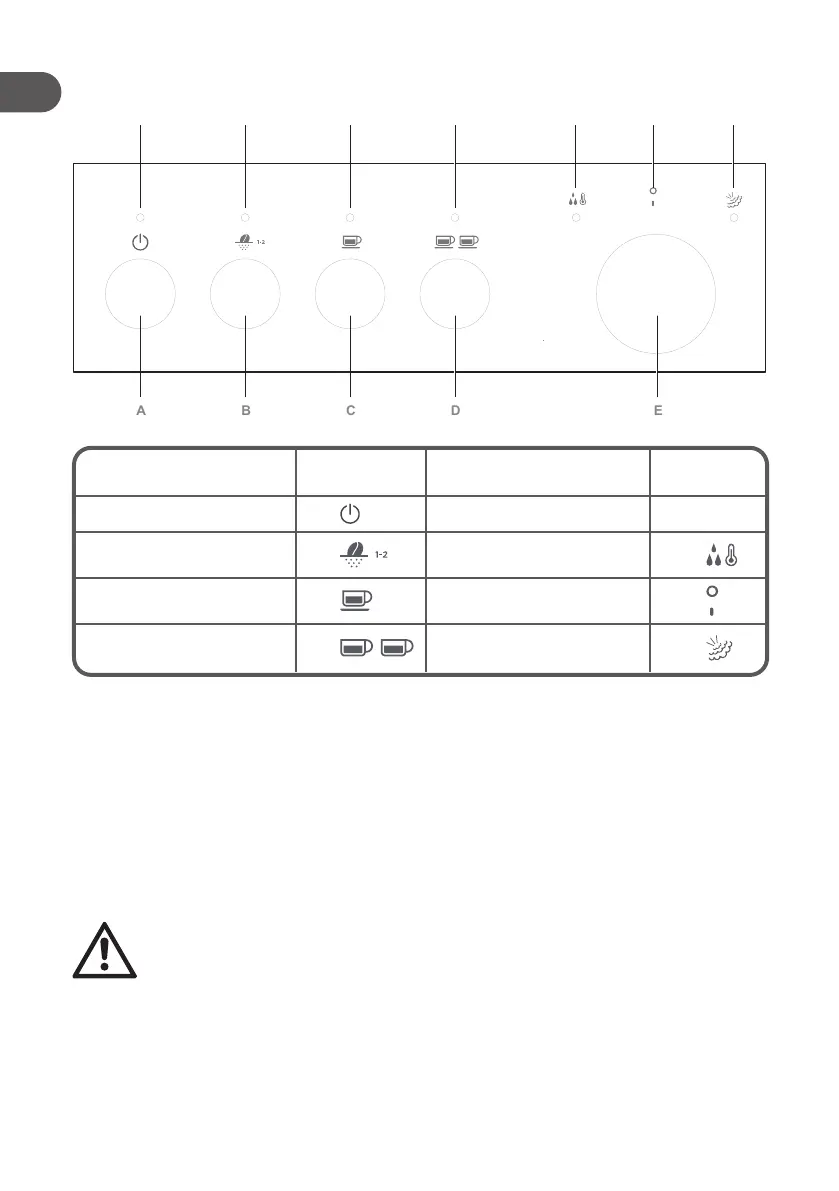
3.2. CONTROL PANEL OVERVIEW
Control buttons Indicator Steam wand knob
Indicator/
position
A. Power button a
E. Steam wand knob
B. Grind button
(for 1 or 2 cups)
b
– Hot water position e1
C. Single cup button
(approx. 30 ml)
c
– Stop position e2
D. Double cup button
(approx.100ml±10ml)
d
– Steam position e3
4. BEFORE FIRST USE
1. Remove all packaging materials.
2. Check that the appliance has no visible damage and no parts are missing.
3. To ush the internal pipes of the machine, follow the next sections to ll the water tank,
attach the portalter with a lter into the brew head (without ground coee), turn on the
machine and wait until it enters Standby Mode to brew 2 cups of hot water from the brew
head, and then dispense 1 cup of hot water from the Steam wand.
4. Clean the appliance and accessories following the instructions in the CLEANING AND
CARE section.
5. ASSEMBLY & SET UP
WARNING – Moving parts! Always turn o and unplug the appliance from the power
outlet before assembling, disassembling, or cleaning any parts to avoid the risk of
injury or electrical hazards.
5.1. ASSEMBLING THE GRINDER
1. Turn o the machine by pressing the Power button (A) and disconnect the power cord from
the power outlet.
2. Insert the top burr (3) into the grinding chamber (4) by holding the wire handle and turn it
clockwise to lock it in place (Fig. 1).
a b c d
e1 e2 e3
 Loading...