laptop (Ubuntu full version), Raspberry Pi 3 with Raspberry OS and the Orange PI 800. Here are
commands that remove BRITTY:
sudo systemctl stop brltty-udev.service
sudo systemctl mask brltty-udev.service
note output: Created symlink /etc/systemd/system/brltty-udev.service
→ /dev/null.
sudo systemctl stop brltty.service
sudo systemctl disable brltty.service
These commands are similar as used for Modem Manager service.
WSJT-X configuration
Next it is necessary to set up WSJT-X to communicate with QMX. We will use WSJT-X as the
example, because it will be what most people are using. But other software will be identical (for
example JS8Call) or similar. There are two parts to the set-up – firstly to choose the right USB
Sound card, and secondly to set up the CAT communication so that WSJT-X can control the QMX
via the serial comm port.
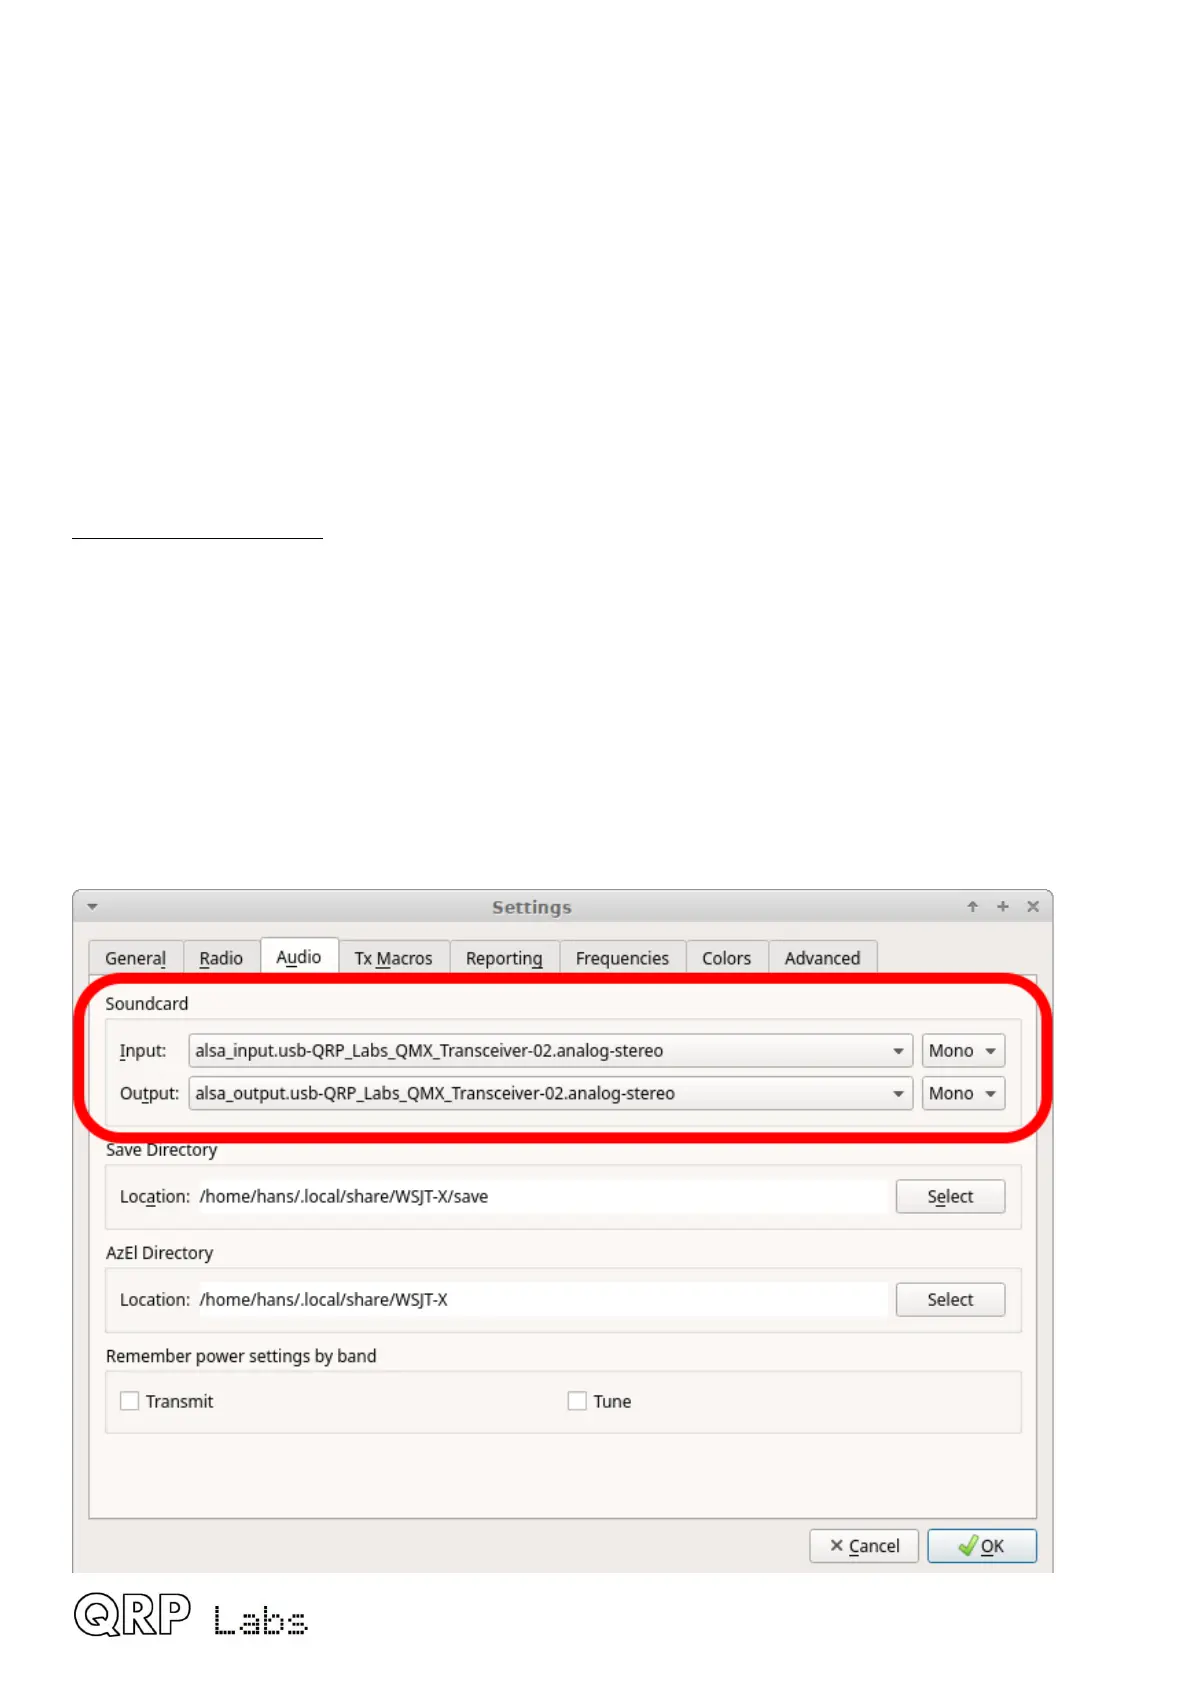
Open the WSJT-X settings window (from the File menu) and select the Audio tab. Select “QRP
Labs QMX Transceiver” as the input and output sound card. The below screenshot shows how it
looks on my system, which is Linux (Xubuntu 18.04). It will look different on Windows, Mac and
perhaps other Linux distros but the basic idea will be the same… you should see something in the
drop-down which says something about QMX, and that’s the sound card to select.
QMX operang manual; rmware 1_00_012 50

 Loading...
