18
QSC, LLC
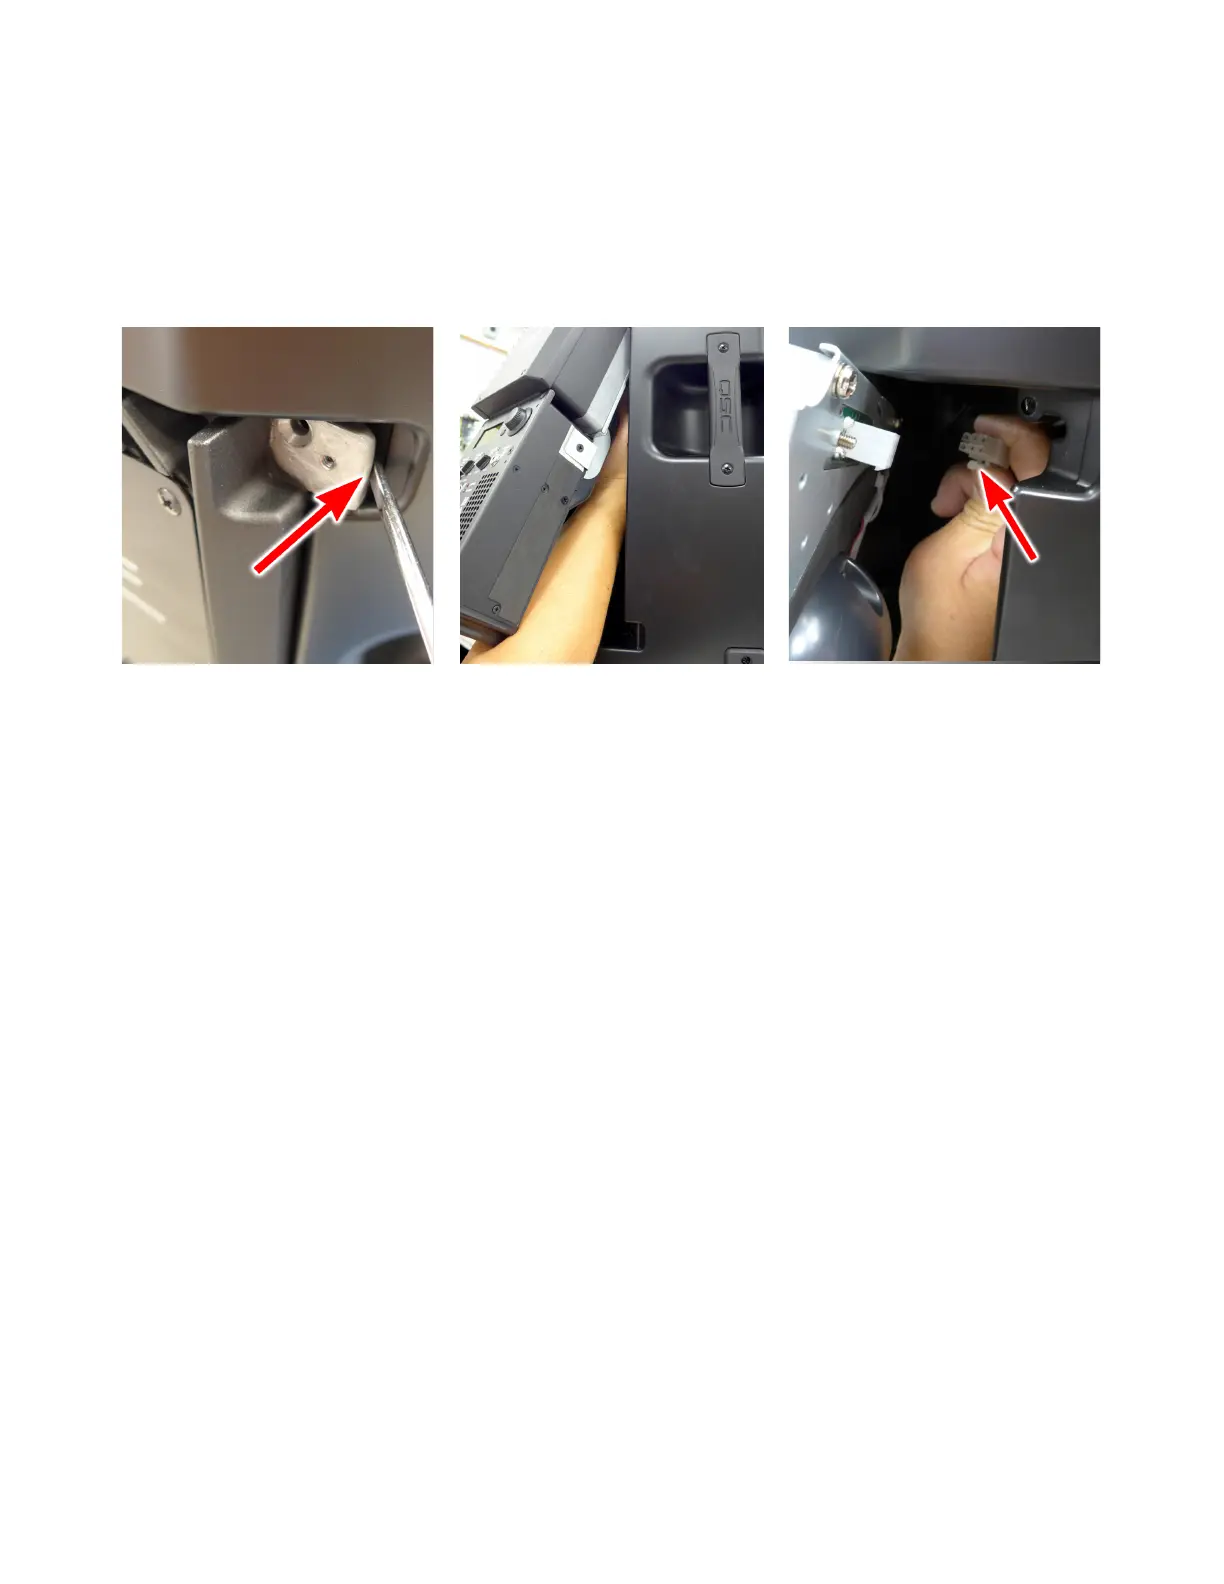
5. Using a flat head screwdriver or similar tool, gently pry the top-right corner tab of the amplifier module until its loose
from the speaker cabinet. See the Figure 5.1.3 for best method to loosening the amplifier module.
6. Gently pull away the amplifier module from the cabinet and angle the module upwards for access to the wiring harness
connector.
Warning: Forcefully pulling the amplifier module out of the cabinet could damage the wiring harness connector on the
rear side. The wiring harness must be disconnected before removing the amplifier module.
7. Disconnect the wiring harness from the rear of the amplifier module. Place pressure on the tab of the connector to fully
disconnect the wiring harness.
Important Tip: To access the connector, route your hand from the bottom of the enclosure and up towards the far back
corner of the amplifier module. Placing the speaker upright on the edge of a table will make it easier for your hand
and arm to access the connector. See Figure 5.1.4 and Figure 5.1.5 as a visual aide.
8. Fully remove the amplifier module from the enclosure.
Installation
1. Prepare to insert the amplifier module into the speaker cabinet.
2. With one hand holding the wiring harness and the other hand holding the amplifier module, place the module inside
the cabinet and connect the wiring harness to the rear connector on the amplifier module.
Important Tip: This procedure is much easier to perform when the speaker is upright, near the edge of a table. Before
connecting, verify that the locking tab on the wiring harness connector is oriented in the same position as the amplifier
jack. They should both point down.
3. Verify the connector is “locked” in place by gently pulling the wiring harness away from the jack and making sure it does
not easily disconnect.
4. Gently insert the amplifier module completely into the cabinet.
5. Fasten 6 plastite screws that secure the amplifier module to the speaker cabinet. See Figure 5.1.2.
6. Fasten 2 machine screws, including the rubber feet, into the amplifier module. See Figure 5.1.1
7. Amplifier module installation is now complete.
Figure 5.1.3 - Prying amplifier module
away from enclosure.
Figure 5.1.4 - Accessing the wiring
harness
Figure 5.1.5 - Connector removal from
amplifier jack.

 Loading...