13
ES ES
TD-000368-02-A
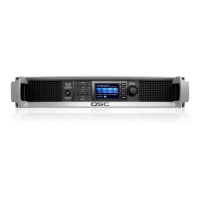
— Figura 17 —
F5: AB C+D
F5: AB C+D
AB Parallel
C+D Bridged
1
AB
3
C+D
The following are electrically
the same point
A (1+) and B (1+)
A (1-) and B (1-)
X (2+) and Y (1+)
X (2-) and Y (1-)
A B X
2+
2-
C D Y
1+
1-
1-
1+
1+
1-
= Subwoofer
= Mid Range
Optional
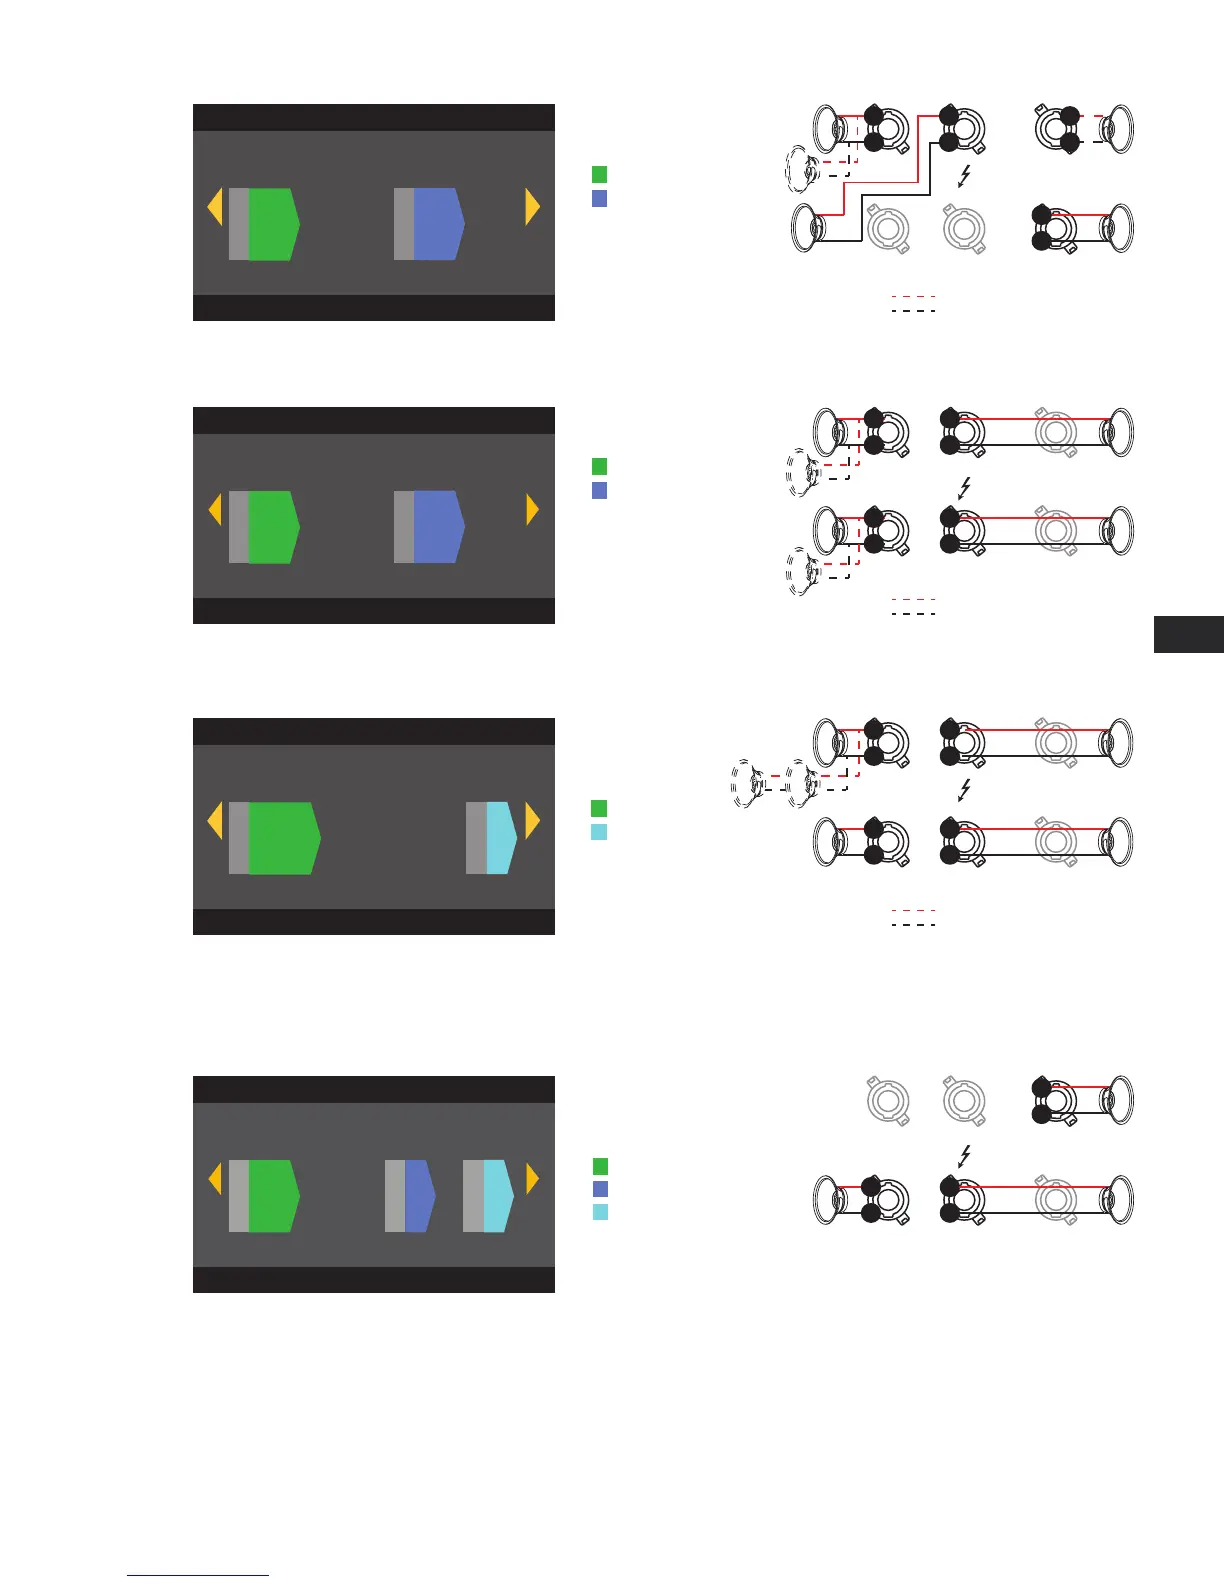
— Figura 18 —
F4: AB CD
F4: AB CD
CD Parallel
The following are electrically
the same point
A (1+) and B (1+)
A (1-) and B (1-)
C (1+) and D (1+)
= Subwoofer
= Mid Range
1
AB
3
CD
Optional
A
C
B
D
X
Y
1+
1-
1+
1-
1+
1-
1+
1-
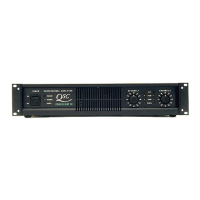
— Figura 19 —
F7: ABC D
F7: ABC D
1
ABC
4
D
D Single
The following are electrically
the same point
A (1+), B (1+), and C (1+)
A (1-), B (1-), and C (1-)
= Subwoofer
= High Range
Optional
A B X
1+
1-
C D Y
1+
1-
1+
1-
1+
1-
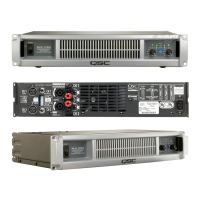
Configuraciones de tres canales
— Figura 20 —
F3: Config - A+B C D
F3: Config - A+B C D
A+B Bridged
C Single
D Single
1
A+B
3
C
4
D
= Subwoofer
= Mid Range
A B X
C D Y
1+
1-
= High Range
1+
1-
1+
1-
AB en paralelo
C+D puenteado
AB en paralelo
CD en paralelo
ABC en paralelo
D individual
A+B puenteado
C individual
D individual
Los siguientes representan el
mismo punto eléctricamente
A (1+) y B (1+)
A (1-) y B (1-)
X (2+) e Y (1+)
X (2-) e Y (1-)
Los siguientes representan
el mismo punto eléctricamente
A (1+) y B (1+)
A (1-) y B (1-)
C (1+) y D (1+)
C (1-) y D (1-)
Los siguientes representan
el mismo punto eléctricamente
A (1+), B (1+), y C (1+)
A (1-), B (1-) y C (1-)
= Subwoofer
= Subwoofer
= Subwoofer
= Subwoofer
= rango medio
= rango medio
= rango alto
= rango medio
= rango alto
Opcional
Opcional
Opcional