EasyManua.ls Logo

Quail Digital Pro10 - User Manual

Default Icon
14 pages
Print Icon
To Next Page IconTo Next Page
Loading...
Pro10
Headset System
Installation Manual

Questions and Answers

  • S
    snyderjenniferSep 12, 2025
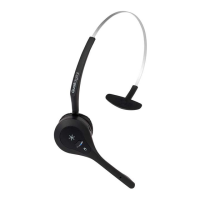
    Why are my Quail Digital Pro10 not working in an area they previously worked in?
    • M
      madisongomezSep 12, 2025
      If your Quail Digital Headsets aren’t working in an area where they previously did, locate the base serving that area. Check that the LEDs on the base are red and green (primary) or both green (secondary). Press the talk button on your headset; the lower LED on the base should flash green. If the LED is amber or doesn’t flash green, the base station may be faulty. Contact tech support.
  • C
    chloe42Sep 13, 2025
    How to fix Quail Digital Headsets when the LED is pulsing but there is no audio?
    • B
      Brandon MooreSep 13, 2025
      If the Quail Digital Headsets LED is pulsing normally but there's no audio, try placing the headset back in the charger for at least 10 seconds to reset it. If that doesn’t work, remove the battery and then replace it. If the problem persists, send the headset in for repair or replacement.
  • C
    Curtis BenderSep 15, 2025
    What to do if Quail Digital Headsets LED isn't flashing when in charger?
    • J
      Jimmy Hanson PhDSep 16, 2025
      If your Quail Digital Headsets has been in the charger, but the LED isn’t flashing, determine if it’s a headset or battery fault. Try swapping the battery with one from a working headset. If changing the battery resolves the issue, discard the faulty battery and order a replacement. If not, send the headset back for repair or replacement.

Summary

Pre-Installation Procedure

Pre-Installation Preparation

Lists required tools and details the Pro10 system components for preparation.

Step 1 - Charging headsets

Instructions on how to unpack and charge the Pro10 headsets for initial use.

Step 2 - Pre-installation survey

Guidance on assessing the installation site to ensure optimal headset coverage and performance.

Step 3 - Locating base stations

Defines optimal placement rules and considerations for base stations to maximize range and avoid interference.

Step 4 - Conducting your range test

Procedure for testing the wireless range and signal strength of the Pro10 system.

Step 5 - Positioning the registration point

Guidelines for correctly positioning the registration point for system configuration.

Installation Procedure

Step 6 - Installing base stations and registration point

Instructions for physically mounting base stations and the registration point on walls.

Step 7 - Connecting base stations and registration point

Details on how to connect base stations and the registration point using network cables.

Step 8 - Synchronising base stations

Process for synchronizing all base stations and the registration point for system operation.

Step 9 - Setting up the charger

Guide on placing and powering the headset charger in a suitable location.

Step 10 - Registering headsets

Step-by-step procedure to register individual headsets with the Pro10 system.

Step 11 - Testing the installation

Final walk-through test to confirm uninterrupted communication across all areas.

Appendix A - Headset battery fitting

Appendix B - Headset functionality & system troubleshooting

Appendix C - Pro10 products and codes

Regulatory Notices

Quail Digital Pro10 Specifications

General IconGeneral
BrandQuail Digital
ModelPro10
CategoryHeadsets
LanguageEnglish

Related product manuals