Do you have a question about the QualGear QG-KIT-VA-3IN-B and is the answer not in the manual?
Drill holes of 4.0mm diameter and 65mm depth at marked locations on the stud.
Drill holes of 10mm diameter and 45mm depth at marked locations on the concrete.
Twist the 3-inch NPT pipe's male threaded end into the ceiling adapter's female thread.
Tighten screws using Allen Key (I) to secure the pipe's position on the adapter.
Connect the 3-inch NPT pipe to the projector plate and tighten set screws.
Adjust extension brackets on the projector mount using Allen Key (H) for optimal positioning.
Attach the projector mount to the projector using appropriate screws and Allen Key.
Slide the projector assembly into the projector plate until a click is heard.
Slide the projector plate out from the projector assembly to disconnect it.
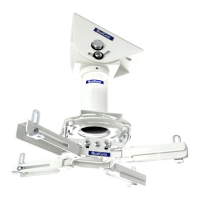
The QualGear QG-KIT-VA-3IN-B is a professional-grade projector mounting kit designed to securely suspend a projector from a ceiling, offering versatile installation options and precise adjustments. This kit is ideal for both residential and commercial installations where a stable and adjustable projector mount is required.
The primary function of the QualGear QG-KIT-VA-3IN-B is to provide a robust and adjustable solution for mounting a projector to a ceiling. It consists of a projector mount, a vaulted ceiling adapter, and a 3-inch NPT pipe, along with various screws and anchors for different ceiling types. The kit allows for the projector to be positioned accurately relative to the screen, with features for tilt angle adjustment and flexible extension bracket configurations to accommodate a wide range of projector models. The design emphasizes secure attachment and ease of installation, ensuring the projector remains stable during operation.
| Brand | QualGear |
|---|---|
| Model | QG-KIT-VA-3IN-B |
| Category | Projector Accessories |
| Language | English |