EasyManua.ls Logo

QualGear QG-PRO-PM-CA-B - User Manual

Default Icon
4 pages
Print Icon
To Next Page IconTo Next Page
Loading...
To connect a 1.5" NPT pipe to the mounted adapter plate, twist the male threaded end to
the female thread on the adapter. Using allen key (I), tighten screws (D or E) onto the pipe
and secure the position. Then pull the decorative cover (B) up the pipe to conceal the
adapter plate (A) for a neat look.
1.5" NPT Pipe
(not included)
CAUTION!
Do not exceed the maximum rated weight
specified. Otherwise, serious injury or
property damage may occur.
54.5kg
(120lbs)
RATED
Version November 2015
5 Year Limited Warranty
Version November 2015
5 Year Limited Warranty
Decorative
Cover (B)
QG-PRO-PM-CA-B
QG-PRO-PM-CA-W
IMPORTANT!
Do not loosen screws all the way when making adjustments, this will disconnect the
parts and may cause injury or property damage.
Installing the Decorative Cover
2
OR
(D) x 2
(E) x 2
Adapter Plate
Allen Key
(I)
Question and Answer IconNeed help?

Do you have a question about the QualGear QG-PRO-PM-CA-B and is the answer not in the manual?

Summary

Installing the Decorative Cover

Safety Warnings

Parts and Hardware

Parts Checklist

Lists all components included in the package for verification before installation.

Hardware Package

Details the screws, anchors, and tools provided for mounting the adapter.

Maintenance

Mounting to a Wooden Joist or Stud Ceiling

Find and Mark Stud

Locate stud edges and mark the centerline and mounting points using a stud finder and template.

Drill Mounting Holes

Drill holes of specified diameter and depth into the marked stud locations.

Attach Adapter Plate

Align adapter plate with holes and secure using screws and washers with a socket wrench.

Mounting to a Concrete Ceiling

Mark Concrete Locations

Mark desired mounting locations on the concrete ceiling using the wall marking template.

Drill and Prepare Holes

Drill holes and insert metal expansion anchors into the concrete for mounting.

Secure Adapter Plate

Align adapter plate with anchors, attach washers and nuts, and tighten with a socket wrench.

Overview

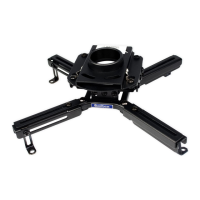
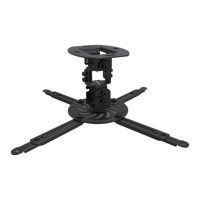
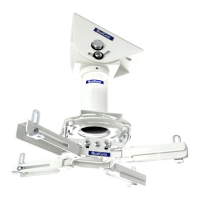
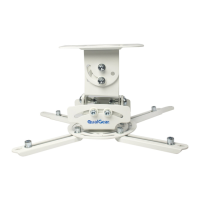
The QualGear Single Joist Ceiling Adapter with Cover (models QG-PRO-PM-CA-B and QG-PRO-PM-CA-W) is an accessory designed to securely mount a 1.5" NPT pipe to a ceiling, providing a neat and professional installation for various equipment.

Function Description:

This device serves as a robust ceiling mount for equipment that utilizes a 1.5" NPT pipe for attachment. It consists of an adapter plate that secures to the ceiling and a decorative cover that conceals the adapter plate and mounting hardware for an aesthetically pleasing finish. The adapter plate features mounting holes compatible with both wooden joists/studs and structural concrete ceilings. Once the adapter plate is installed, a 1.5" NPT pipe (not included) can be threaded into the adapter's female thread and secured with set screws using an Allen key. The decorative cover then slides up the pipe to hide the mounting components.

Important Technical Specifications:

  • Weight Rating: The device is rated to support a maximum weight of 54.5 kg (120 lbs). Exceeding this limit can lead to serious injury or property damage.
  • Pipe Compatibility: Designed for use with standard 1.5" NPT pipes.
  • Mounting Surfaces: Compatible with wooden joists/studs and structural concrete ceilings.
  • Mounting Hardware (for Wooden Joist/Stud):
    • Screws (C): 2 pieces
    • M6 Washers (G): 2 pieces
    • Drill Bit Size: 5/32" (4mm) wood drill bit
    • Drill Depth: 65mm (2.5")
  • Mounting Hardware (for Concrete Ceiling):
    • Metal Expansion Anchors (F): 4 pieces
    • M6 Washers (G): 4 pieces (used with anchors)
    • Drill Bit Size: 1/4" (6.0mm) masonry drill bit
    • Drill Depth: 38mm (1.5")
  • Security Screws: M5 x 5mm Security Screws (D) x 2 OR M5 x 5mm Screws (E) x 2 are provided to secure the NPT pipe to the adapter.
  • Tools Included: Allen Key (I) x 1.
  • Warranty: 5 Year Limited Warranty.
  • Version: November 2015.

Usage Features:

  • Versatile Mounting: The adapter plate is designed with specific hole patterns for different ceiling types. For wooden joist installation, holes 3 and 4 are used. For structural concrete installation, holes 1, 2, 5, and 6 are utilized.
  • Clear Installation Steps: The manual provides detailed, step-by-step instructions for both wooden and concrete ceiling installations, including how to locate studs, mark drill points using a provided template (H), and the correct drill bit sizes and depths.
  • Secure Pipe Connection: The 1.5" NPT pipe is threaded into the adapter and then firmly secured using either two M5x5mm security screws (D) or two M5x5mm screws (E) with the included Allen key (I), ensuring a stable connection.
  • Aesthetic Finish: The decorative cover (B) slides up the pipe to completely conceal the adapter plate (A) and all mounting hardware, providing a clean and professional appearance.
  • Indoor Use Only: All QualGear products, including this ceiling adapter, are intended for indoor use. Outdoor use will void the limited warranty.
  • Safety Warnings: The manual emphasizes critical safety precautions, such as not exceeding the maximum rated weight, using an assistant or mechanical lifting equipment for heavy items, and ensuring the supporting surface can safely bear the combined load. It also warns against over-tightening screws, which can damage components.
  • Professional Installation Recommended: The product should only be installed by individuals with good mechanical aptitude, experience in building construction, and a full understanding of the instructions.

Maintenance Features:

  • Regular Security Checks: Users are advised to regularly check that the ceiling adapter is secure and safe to use. This involves periodic inspection of the mounting screws and the pipe connection to ensure they remain tight and stable.
  • Support Contact: In case of any questions regarding instructions, warnings, or maintenance, users can contact their local distributor or QualGear technical support via email at support@qualgear.com.
  • Hardware Integrity: The manual stresses that all hardware must be used at the designated points to prevent property damage and/or personal injury, implying that regular checks should confirm all hardware is in place and functioning correctly.
  • Avoid Loosening Screws Completely: When making adjustments, it is crucial not to loosen screws all the way, as this can disconnect parts and potentially cause injury or damage. This highlights the importance of careful and controlled adjustments during maintenance.

QualGear QG-PRO-PM-CA-B Specifications

General IconGeneral
BrandQualGear
ModelQG-PRO-PM-CA-B
CategoryProjector Accessories
LanguageEnglish

Related product manuals