EasyManua.ls Logo

QualGear QG-PRO-PM-VCA-B User Manual

Default Icon
4 pages
To Next Page IconTo Next Page
Page #1 background imageLoading...
Page #1 background image
CAUTION!
Do not exceed the maximum rated weight
specified. Otherwise, serious injury or
property damage may occur.
136kg
(300lbs)
RATED
Version November 2015
5 Year Limited Warranty
Version November 2015
5 Year Limited Warranty
QG-PRO-PM-VCA-B
QG-PRO-PM-VCA-W
Joining the Pipe to the Ceiling Adapter
3
IMPORTANT! Do not loosen screws all the way when making adjustments, this
may disconnect the parts and may cause injury or property damage.
Allen Key
(G)
Using allen key (G), tighten screws (D or E)
onto the pipe and secure the position.
2
To connect a 1.5" NPT pipe to the
ceiling adapter, twist the male
threaded end of the pipe into the
female thread on the adapter.
Ceiling
1
±45°
OR
(D) x 2
(E) x 2
Adjustment to the vaulted
ceiling adapter can be
made at an angle of ±45°.
1.5" NPT Pipe
(not included)
Question and Answer IconNeed help?

Do you have a question about the QualGear QG-PRO-PM-VCA-B and is the answer not in the manual?

QualGear QG-PRO-PM-VCA-B Specifications

General IconGeneral
BrandQualGear
ModelQG-PRO-PM-VCA-B
CategoryProjector Accessories
LanguageEnglish

Summary

Joining the Pipe to the Ceiling Adapter

Connect Pipe to Adapter

Connect the 1.5" NPT pipe's male threaded end to the adapter's female thread.

Secure Pipe Position

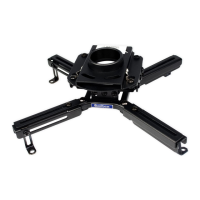
Use Allen key (G) to tighten screws (D or E) onto the pipe to secure its position.

Parts and Hardware Checklist

Mounting to Wooden Joist or Stud Ceiling

Locate and Mark Studs

Use a stud finder and straight edge to find and mark stud edges and centerlines.

Mark Mounting Holes

Use the wall marking template (B) to mark the stud locations for the adapter.

Installing Adapter to Ceiling

Mounting on Wooden Joist Ceiling

Align adapter holes with ceiling, insert screws (A) and tighten with socket wrench.

Mounting on Concrete Ceiling

Insert anchors (F), align adapter, add washers/nuts, and tighten with socket wrench.

Related product manuals