Quantum DXi6802 and DXi690x: Rack Mount Rails Replacement
6-68446-01
April 2016
10 Replacing the DXi6802 Array or Expansion Module Rails
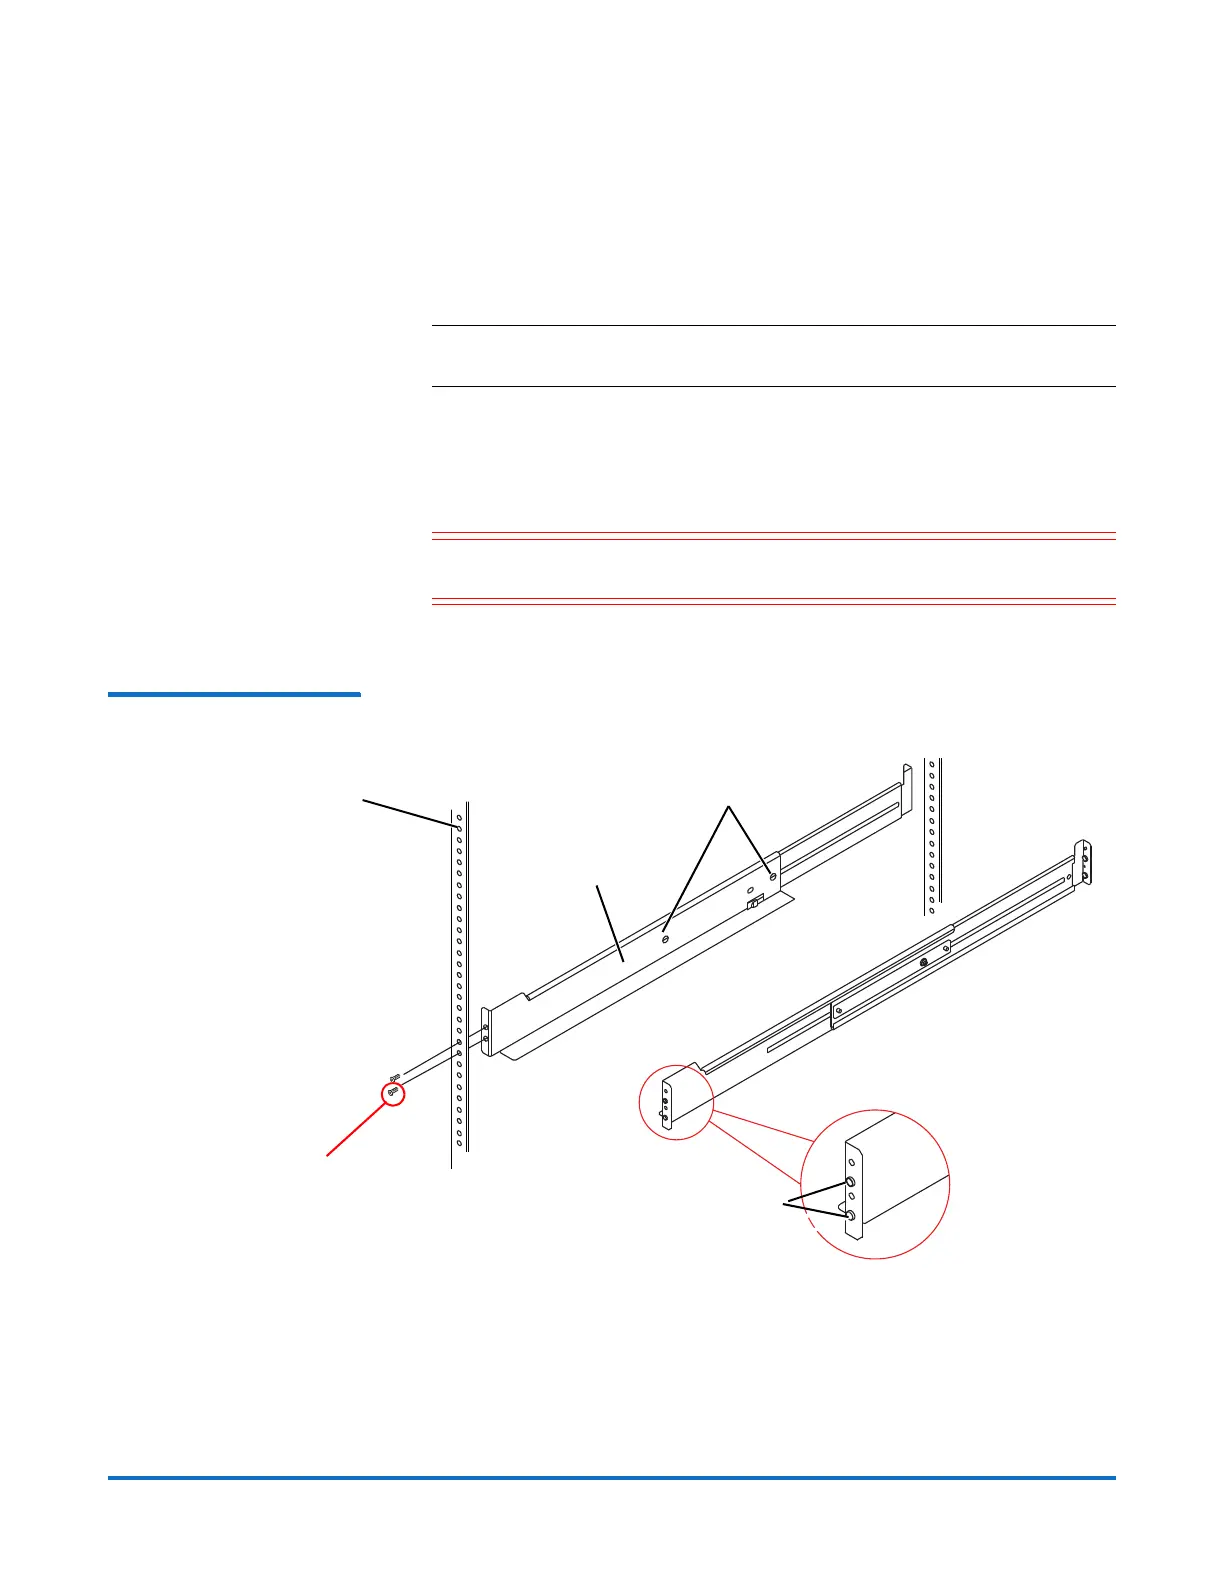
2 Make sure that the adjustment screws on the support rail are loose.
3 Place the support rail inside the cabinet and extend the support rail until the
flanges on the support rail touch the inside of the cabinet.
4 Insert one M5 screw through the front of the cabinet and screw into the top
captured nut in the support rail. Add a large washer between each M5
screw and the mounting rail bracket.
Note: Only insert the top screw on the front of the rail at this time. Do
not
insert the bottom screw yet.
5 Insert two M5 screws through the rear of the cabinet and screw into the
captured nuts in the rear flange in the mounting rail. Add a large washer
between each M5 screw and the mounting rail bracket.
6 Tighten the adjustment screws on the mounting rail.
Caution: Do not over tighten the screws. You can strip the threads on
the mounting rails if the hex screws are over-tightened.
7 Repeat this procedure for the second mounting rail.
Figure 9 Installing the Array or
Expansion Module Rails
Rack mounting holes Adjustment screws
Mounting rail
Spacers
Insert the bottom front
screw AFTER installing the
module to secure the
module in place
 Loading...