Quantum DXi6802 and DXi690x: Rack Mount Rails Replacement
6-68446-01
April 2016
Replacing the DXi6802 Array or Expansion Module Rails 11
Installing the DXi6802
Array or Expansion
Module
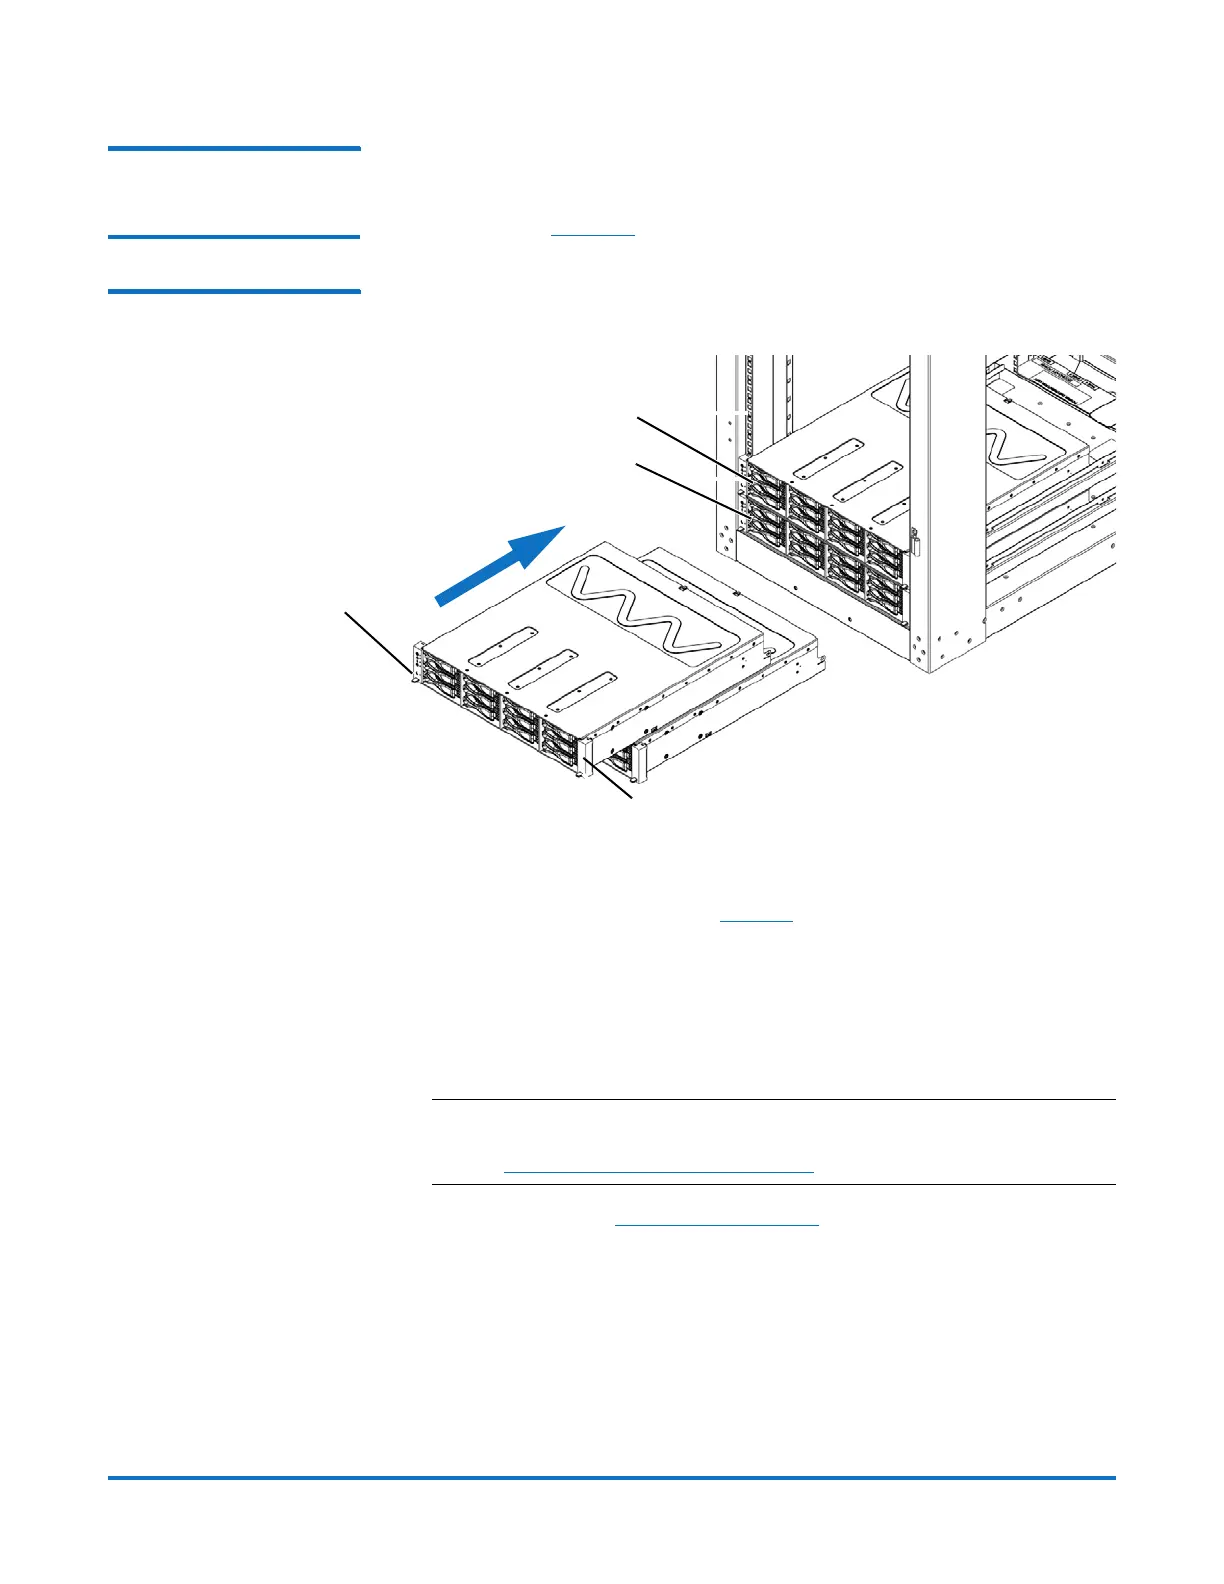
To install the DXi6802 Array Module or Expansion Module:
1 Align the Array or Expansion Module with the rails and slide the module into
the rack (see
Figure 10).
Figure 10 Installing the Array
or Expansion Module
2 Insert one M5 screw through the bottom hole in the front of each rail to
secure the module in place (see
Figure 9).
3 Install the end caps on either side of the module by inserting the top of the
end cap first and then snapping the bottom into place.
Install the end cap with the indicator icons to the left of the module, and
install the end cap with the drive numbers to the right of the module.
4 Reconnect all power and SAS cables on the rear of the module.
Note: For cabling diagrams, see the
DXi6800 Installation and
Configuration Guide
(6-67757) at
www.quantum.com/DXi6800docs.
5 Turn on the system (Turning On the System on page 17).
End caps (indicator icons)
Expansion Module
End cap (drive numbers)
Array Module
 Loading...