9
Initial Assembly
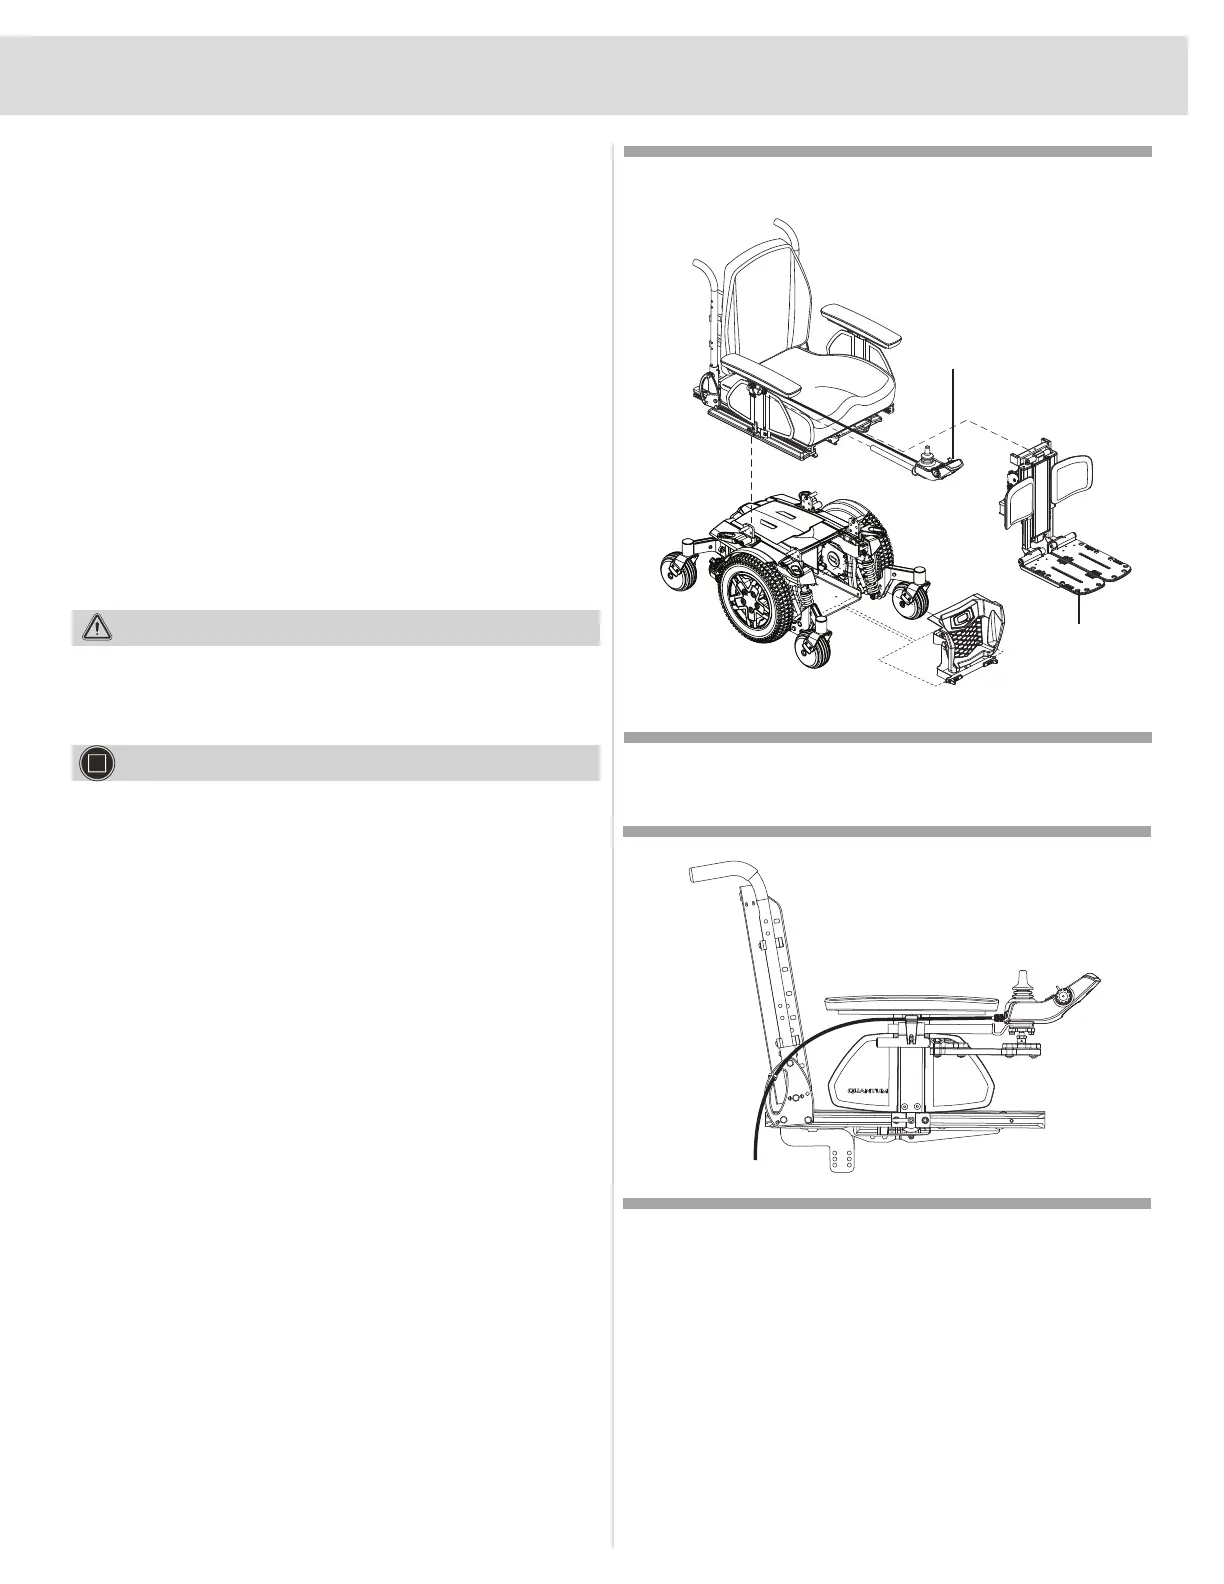
Your power chair may require some assembly either before initial
use or after transportation. It may also require disassembly to
make some comfort adjustments. Figure 3 details those parts
of the power chair that are designed to be disassembled and
assembled by an end user or by a qualied caregiver before
using the product or making comfort adjustments.
NOTE: Any nylon insert lock nut removed during the
disassembly or adjustment of the power chair must be
replaced with a new nut. Nylon insert lock nuts should
not be reused as it may cause damage to the nylon
insert, resulting in a less secure t. Replacement nylon
insert lock nuts are available at local hardware stores or
through your Quantum Rehab Provider.
NOTE: If your power chair is equipped with a a Q4 Seat
Power Positioning System, refer to the information
provided in separate manuals.
Do not pick up the seat frame by the armrests. They are
free to pivot, and you may lose control of the seat if they
do so.
Prevent controller harness damage! Avoid routing the
controller harness on the outside of the armrest pad.
Route the harness under the armrest or toward the
inside of the armrest pad. Use correct tie-down points
for controller harness to prevent the harness from
getting caught in the drive wheels, pinched in the seat
frame, or damaged when passing through doorways.
ASSEMBLY
WARNING!
Controller
Position
Foot Platform
Figure 3. Assembly View
MANDATORY!
Figure 4. Controller Harness Routing on TB-Flex Seat