Locating Lattus Storage Nodes
Lattus Replace Decommissioned Disks 15
c. In the List of Jobs screen, look for the job Initializingnewdisksonmachine<machinename>.
Note: If the job doesn't appear, but the Newemptydisk(s)detectedevent appeared, it
could mean that you replaced the wrong disk(s). Verify that the serial number of disk you
replaced matches the serial number of the decommissioned disk in the disk details PDF you
exported from the Lattus CMC earlier.
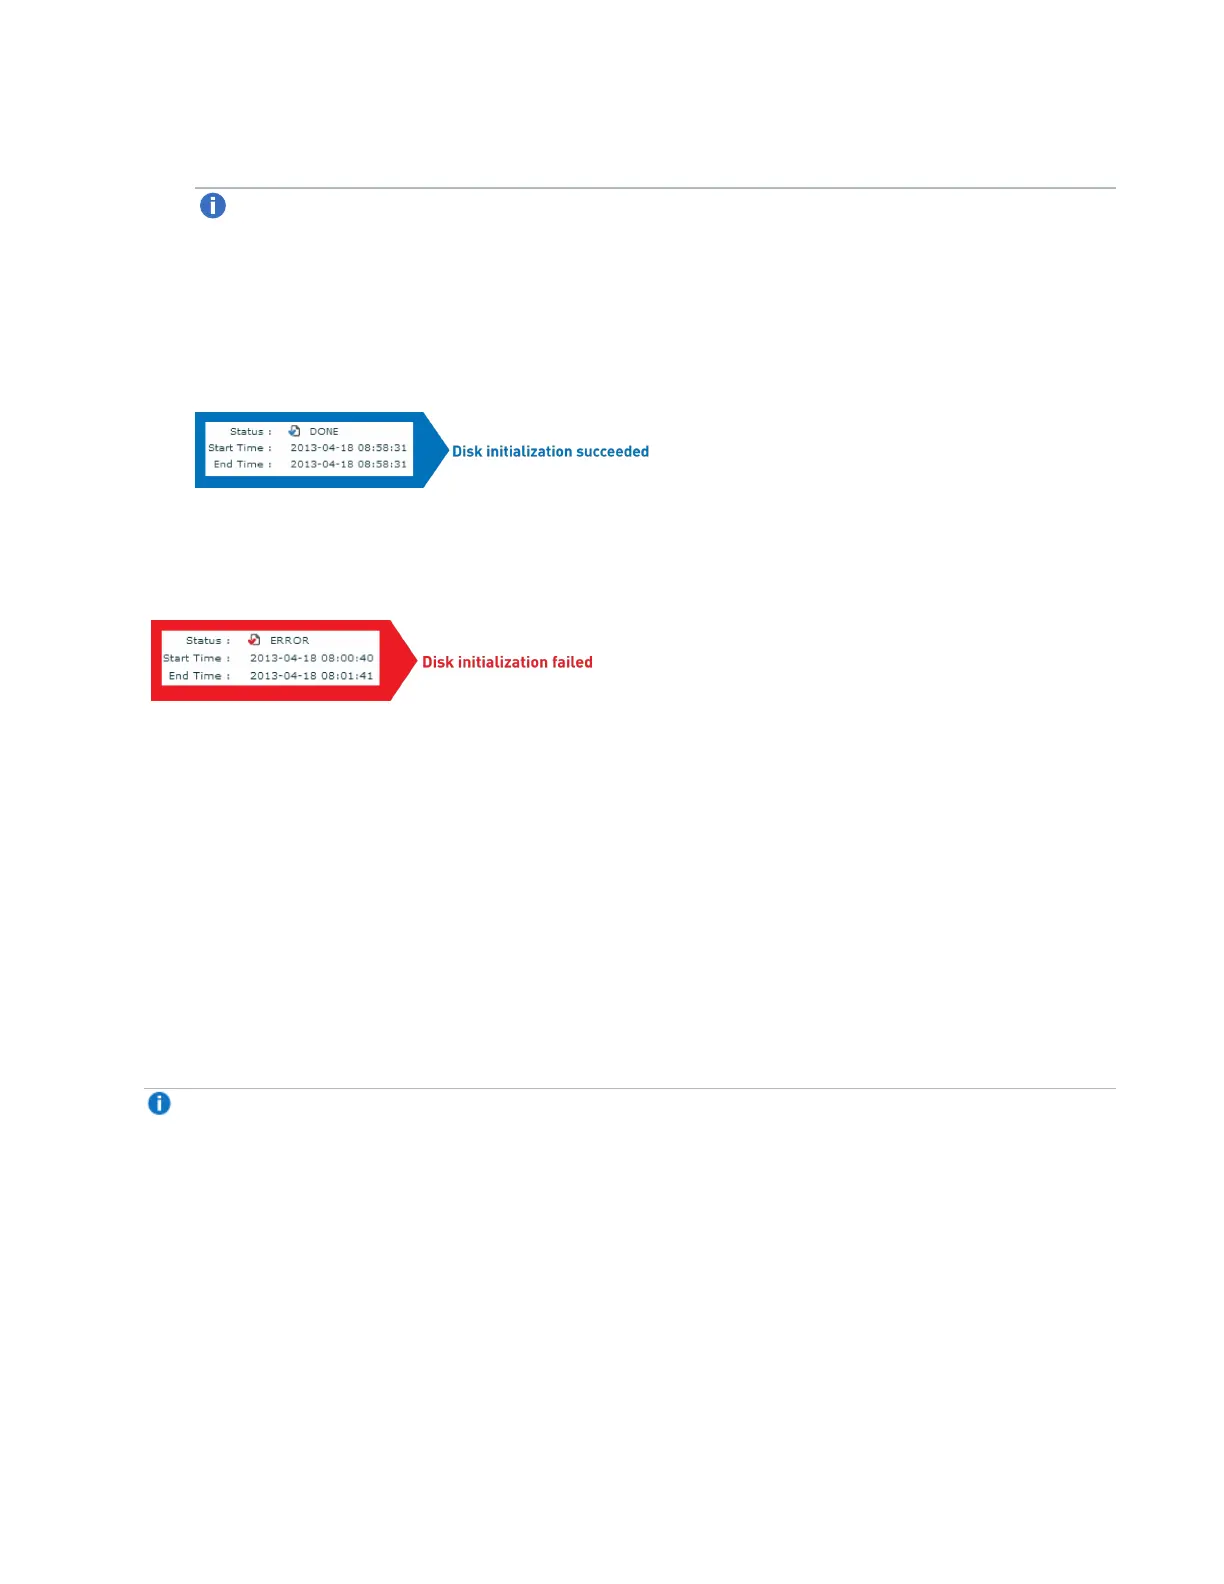
d. Select the job to monitor its progress. Once the job completes, its status displays as Done (blue
check mark; initialization was successful) or Error (red check mark; initialization failed) along with
the job's start and end timestamps.
3. If the disks fail to initialize, contact Quantum support and ask them for assistance. Click the failed job to
display its details in the Job Details screen; technical support will need this information to help
determine the cause and resolution for the failed disk initialization.
Repurposing a Disk
In the event that the automatic replacement does not take place (there is no “initializing new disk” job
started), most likely the system cannot detect the purpose of the new disk. (You can see the new disk in the
list of unmanaged disks by navigating to Dashboard > Administration > Hardware > Disks >
Unmanaged.)
If this occurs, you must manually specify the purpose of the new disk by doing the following:
1. In the CMC, go to Dashboard > Administration > Hardware > Disks > Unmanaged.
2. Select the new disk, and in the Commands pane, click Repurpose.
3. In the Use As field, select Replacement Disk.
Note: You can select Replacement Disk only when there is a decommissioned disk. If there are
no decommissioned disks, you can select Additional Disk only as the purpose for the disk.
4. In the Replacement For field, select the decommissioned disk you want to replace.
5. Click Next to start the replacement. A job “Initializing new disks on <name of node>” starts.
6. Repeat steps 1 - 5 for other unmanaged disks.