Locating Lattus Storage Nodes
Lattus Replace Decommissioned Disks 7
Note: After replacing the failed component, turn off the Location LED by clicking the Location
LED OFF radio button.
d. You can now physically locate the selected Lattus Storage Node at the data center by finding the
storage node whose Location LED is illuminated.
Shutting Down the Lattus Storage Node
Before replacing disks inside a Lattus Storage Node, you must shut down the node that requires disk
replacement (as identified in the previous step).
If you need to replace disks in multiple storage nodes, follow the steps below for shutting down and replacing
the disks one node at a time.
Caution: Do not shut down more than one Lattus Storage Node at a time. If you shut down too many
storage nodes at once, data unavailability may occur.
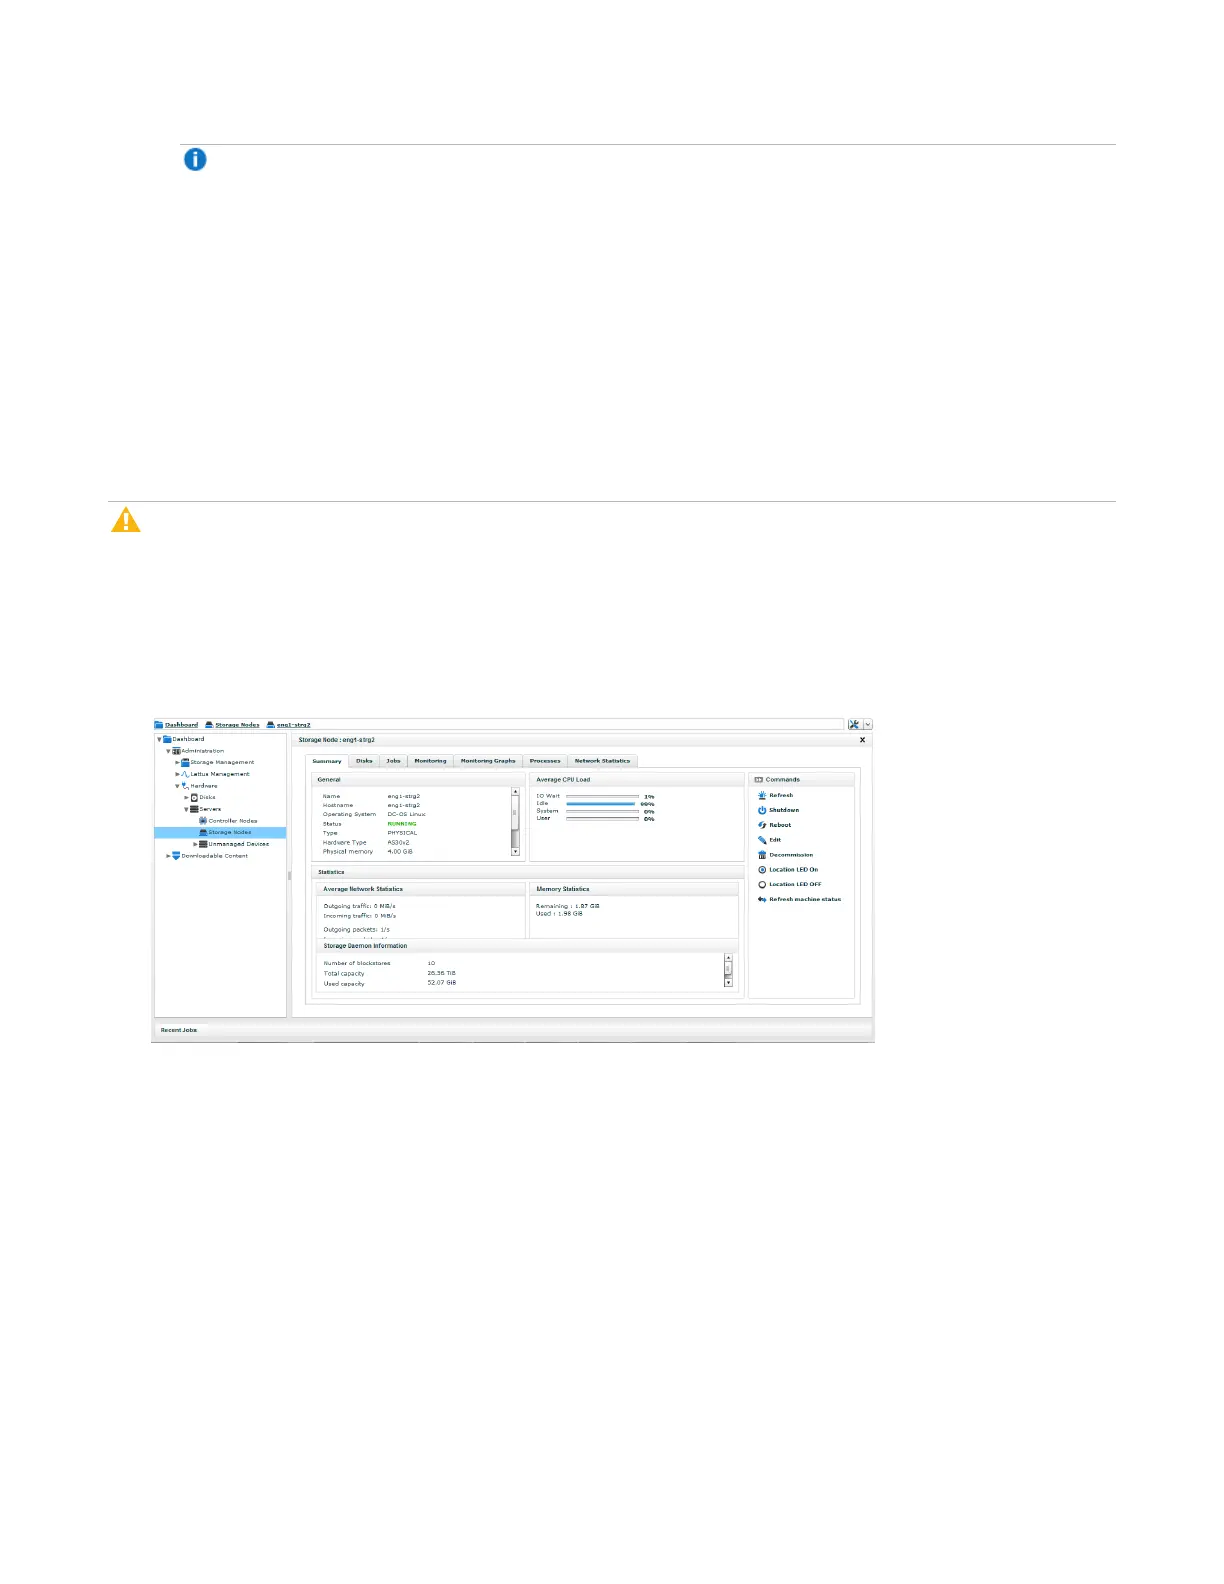
1. In the Lattus CMC, navigate to Dashboard > Administration > Hardware > Servers > Storage
Nodes.
2. When the list of storage nodes appears, select the node you want to shut down. After you do so, several
command options appear on the right side of the screen.
3. When the list of storage nodes appears, select the node you want to shut down. After you do so, several
command options appear on the right side of the screen.
Removing the Lattus Storage Node from the Rack
To replace the disks in a Lattus Storage Node, you must remove it from the rack completely. To remove it
from the rack, follow these steps:
1. Once the Lattus Storage Node has been successfully shut down, go to the data center and locate the
Lattus Storage Node that contains disks that need to be replaced (look for the illuminated Location
LED).