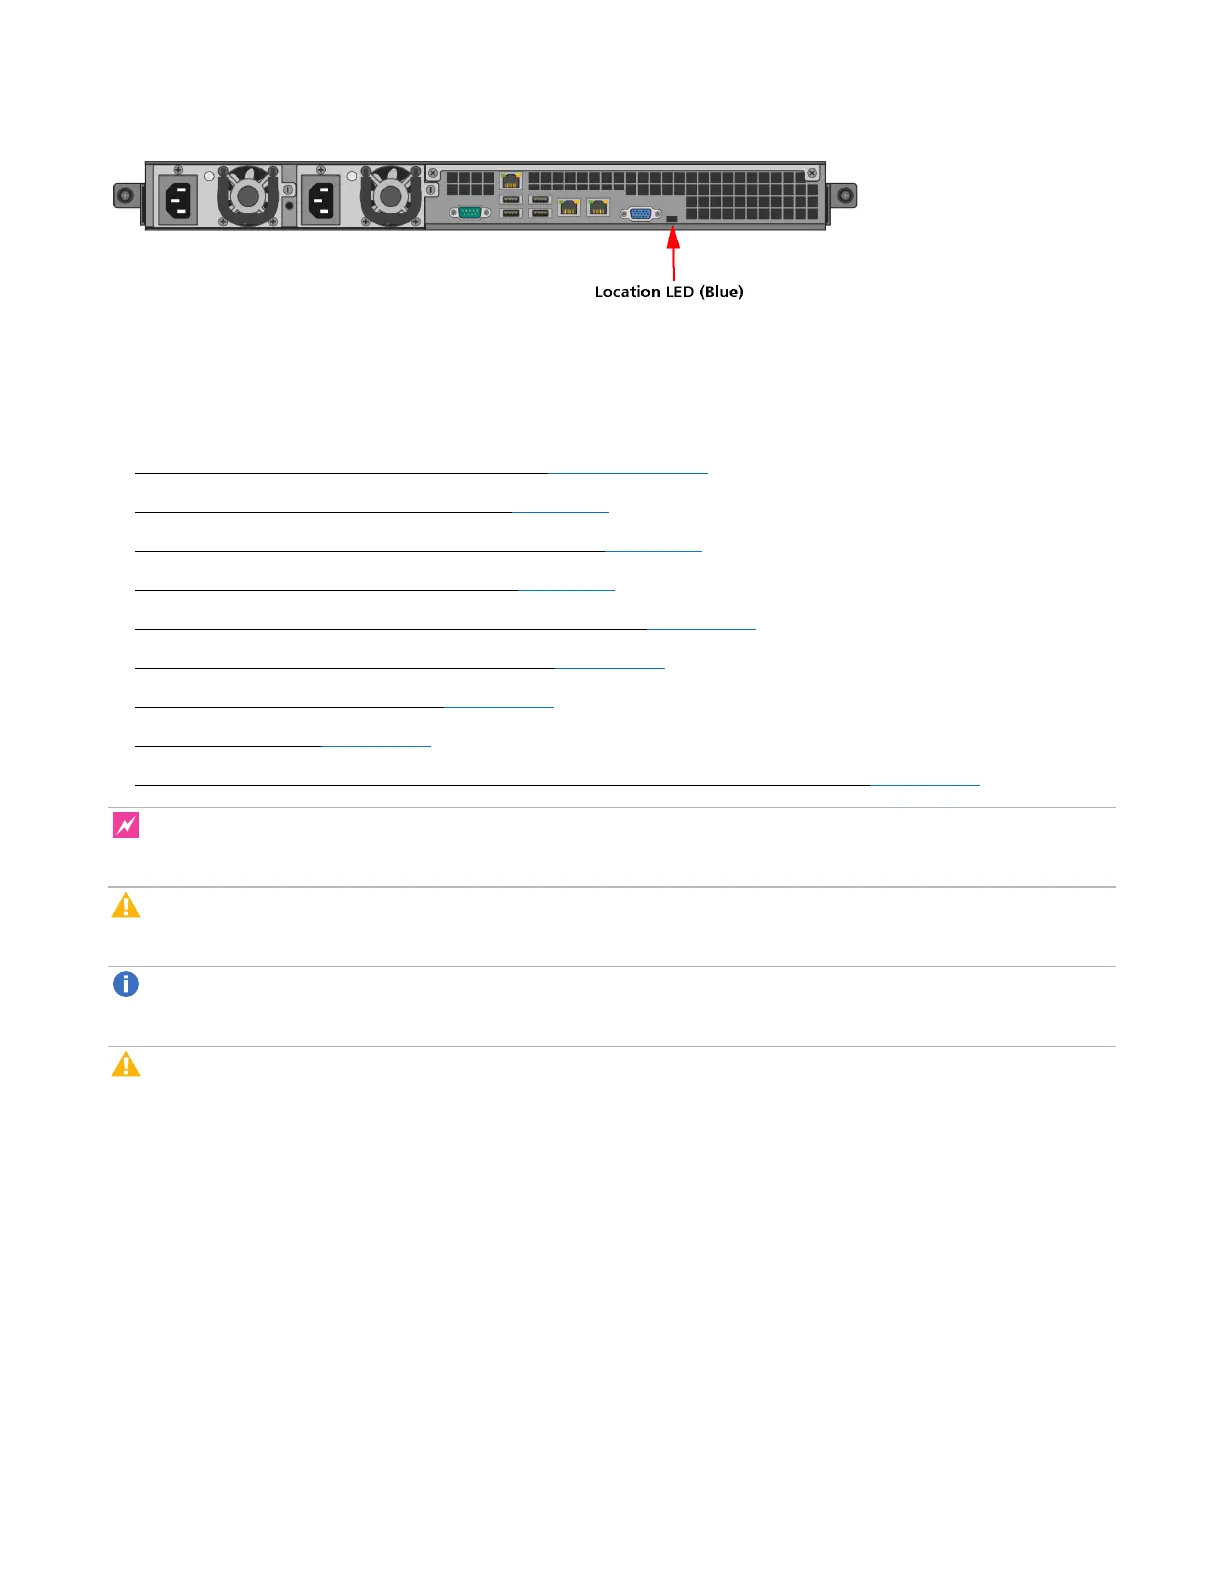
Locating Lattus Storage Nodes
Lattus Replace Decommissioned Disks 4
Getting Started
Replacements for your decommissioned disks are shipped to you when required.
Replacing disks in a storage node involves these steps:
l Exporting the Decommissioned Disk Details on the next page
l Shutting Down the Lattus Storage Node on page 7
l Removing the Lattus Storage Node from the Rack on page 7
l Replacing Disks in the Lattus S10 or S20 on page 9
l Replacing Disks in the Lattus S20 Model 2, S30 or S50 on page 11
l Reinstalling a Lattus Storage Node in a Rack on page 14
l Booting the Lattus Storage Node on page 14
l Repurposing a Disk on page 15
l What to Do When You're Finished Replacing Disks in the Lattus Storage Node on page 16
WARNING: Opening or removing the Lattus Storage Node cover while it is powered on may expose
you to a risk of electric shock.
Caution: When replacing items from the inside of the chassis, ensure that you take precautions to
prevent Electrostatic Discharge (ESD).
Note: Unless otherwise specified, the procedures in this section apply to all Lattus storage nodes (S10,
Lattus S20, Lattus S20 Model 2, S30 and Lattus S50).
Caution: If you need to replace disks in multiple storage nodes, shut down and replace the disks one
node at a time. If you shut down too many storage nodes at once, data unavailability may occur.
Be especially careful when replacing storage nodes disks in systems that have a small number of
storage nodes, such as a 6-node system.
If the spread width is larger than the number of storage nodes, turning off one or more storage nodes
can have a serious impact on Lattus availability. The moment the actual disk safety becomes negative,
your Lattus installation is no longer accessible.
Follow these guidelines if you must replace disks in an environment with a small number of storage
nodes:
1. Turn off only one node at a time.
2. Replace the disk(s).