Locating Lattus Storage Nodes
Lattus Replace Decommissioned Disks 5
3. Switch on the node.
4. When the node is fully operational, wait at least five minutes before turning off the next node.
Prerequisites
l A Philips screwdriver.
l A number of new storage disks equal to the number of disks that need to be replaced.
The new disk must meet the following properties:
l The spare disk has to be clean (no partitions)
l The disk size of the new disk has to be the same or higher than the original one.
Note: To see an overview of how to replace a decommissioned disk in an S10/S20 Storage Node,
review the video "Lattus: Replacing Decommissioned Disks in an S10/S20 Storage Node” by
clicking here to access the Lattus Documentation Center, and then select Learn > Videos >
Lattus CRU Hardware Replacement Videos.
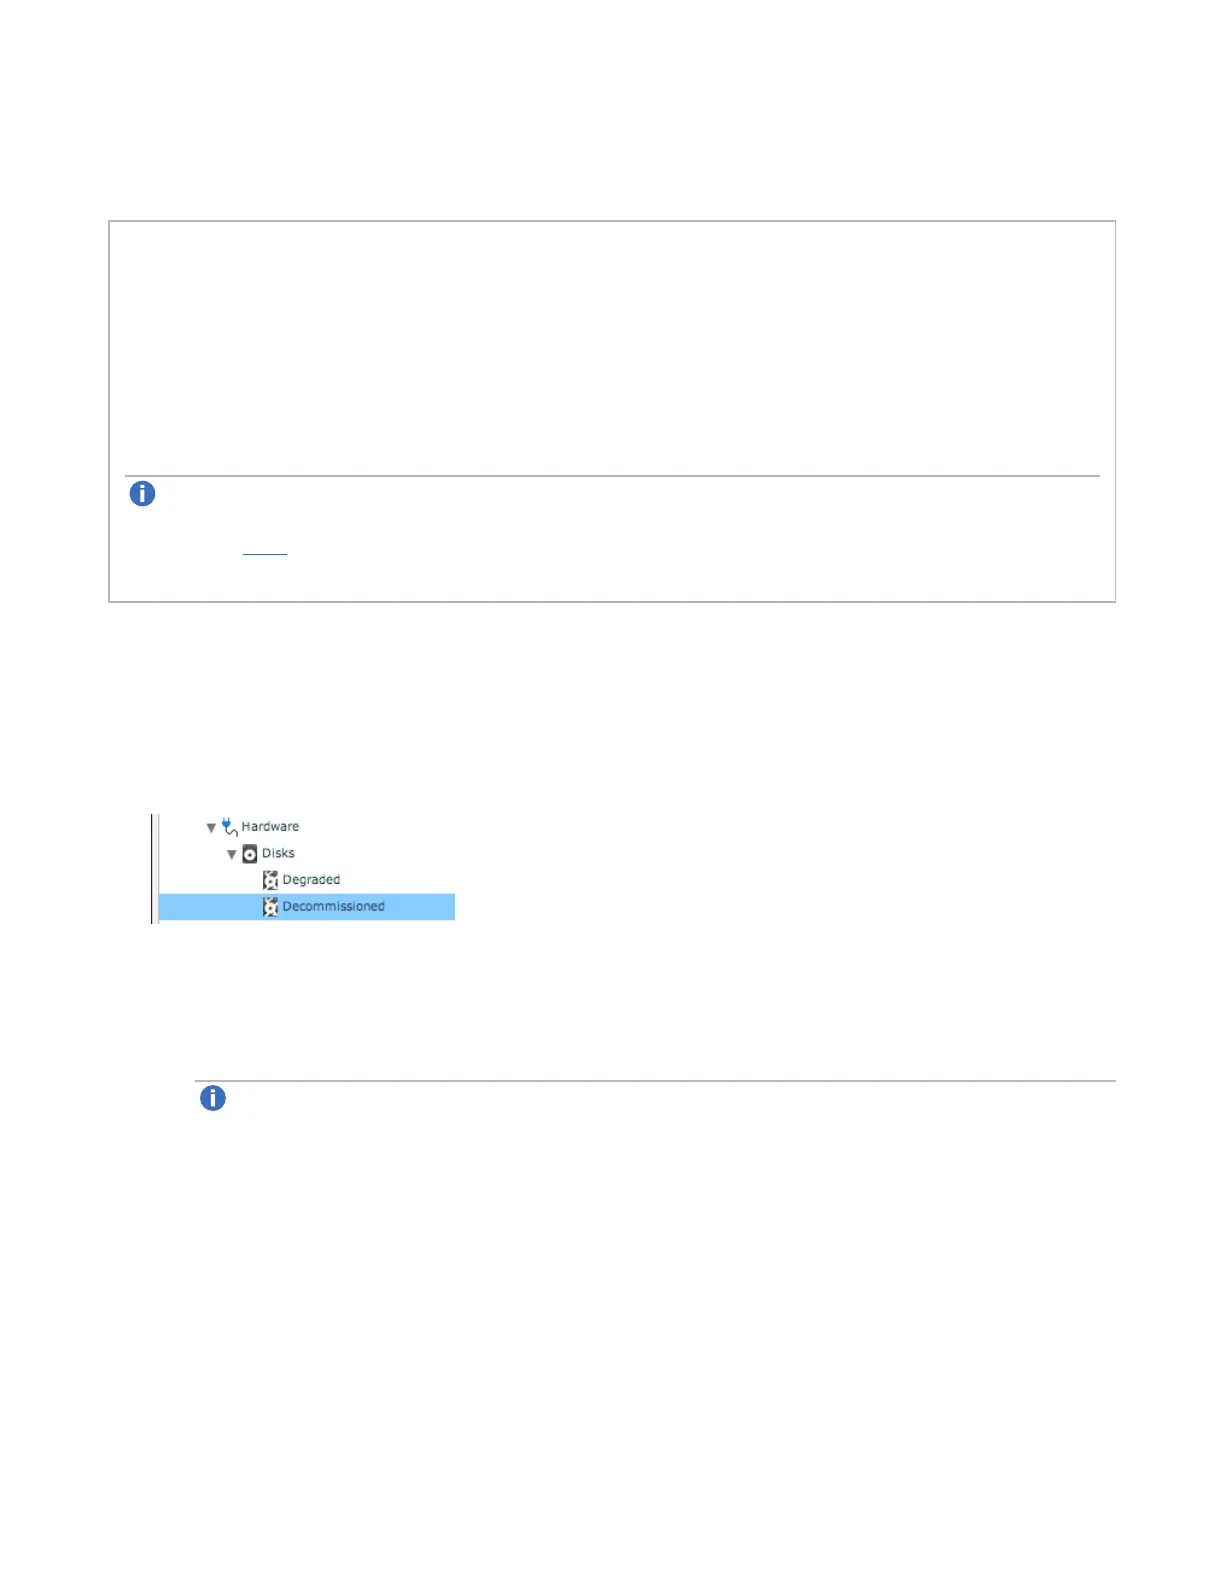
Exporting the Decommissioned Disk Details
To properly identify decommissioned disks within a Lattus Storage Node, you must print the details for the
decommissioned disks from the Lattus CMC:
1. Navigate to Dashboard > Administration > Hardware > Disks > Decommissioned.
2. In the Decommissioned Disks screen, select the check boxes next to the decommissioned disks.
3. In the Commands pane, click one of the following:
a. Export details as PDF: A PDF with all the necessary details is generated.
Note: This feature is currently disabled and will be enabled again in a future Lattus release. In
the meantime, use the emailed pdf method described below.
b. Mail details: specify an email address. A generated PDF with the necessary details is sent to that