Rev 3.1 01/11/23 - 13 - Model 600 User Guide
alarm condition that prevents the unit from operating such as control voltage lost or lock out alarm
active. The unit switched to lead will remain in the lead position until the lead switch timer elapses or
an alarm condition that causes a lead switch.
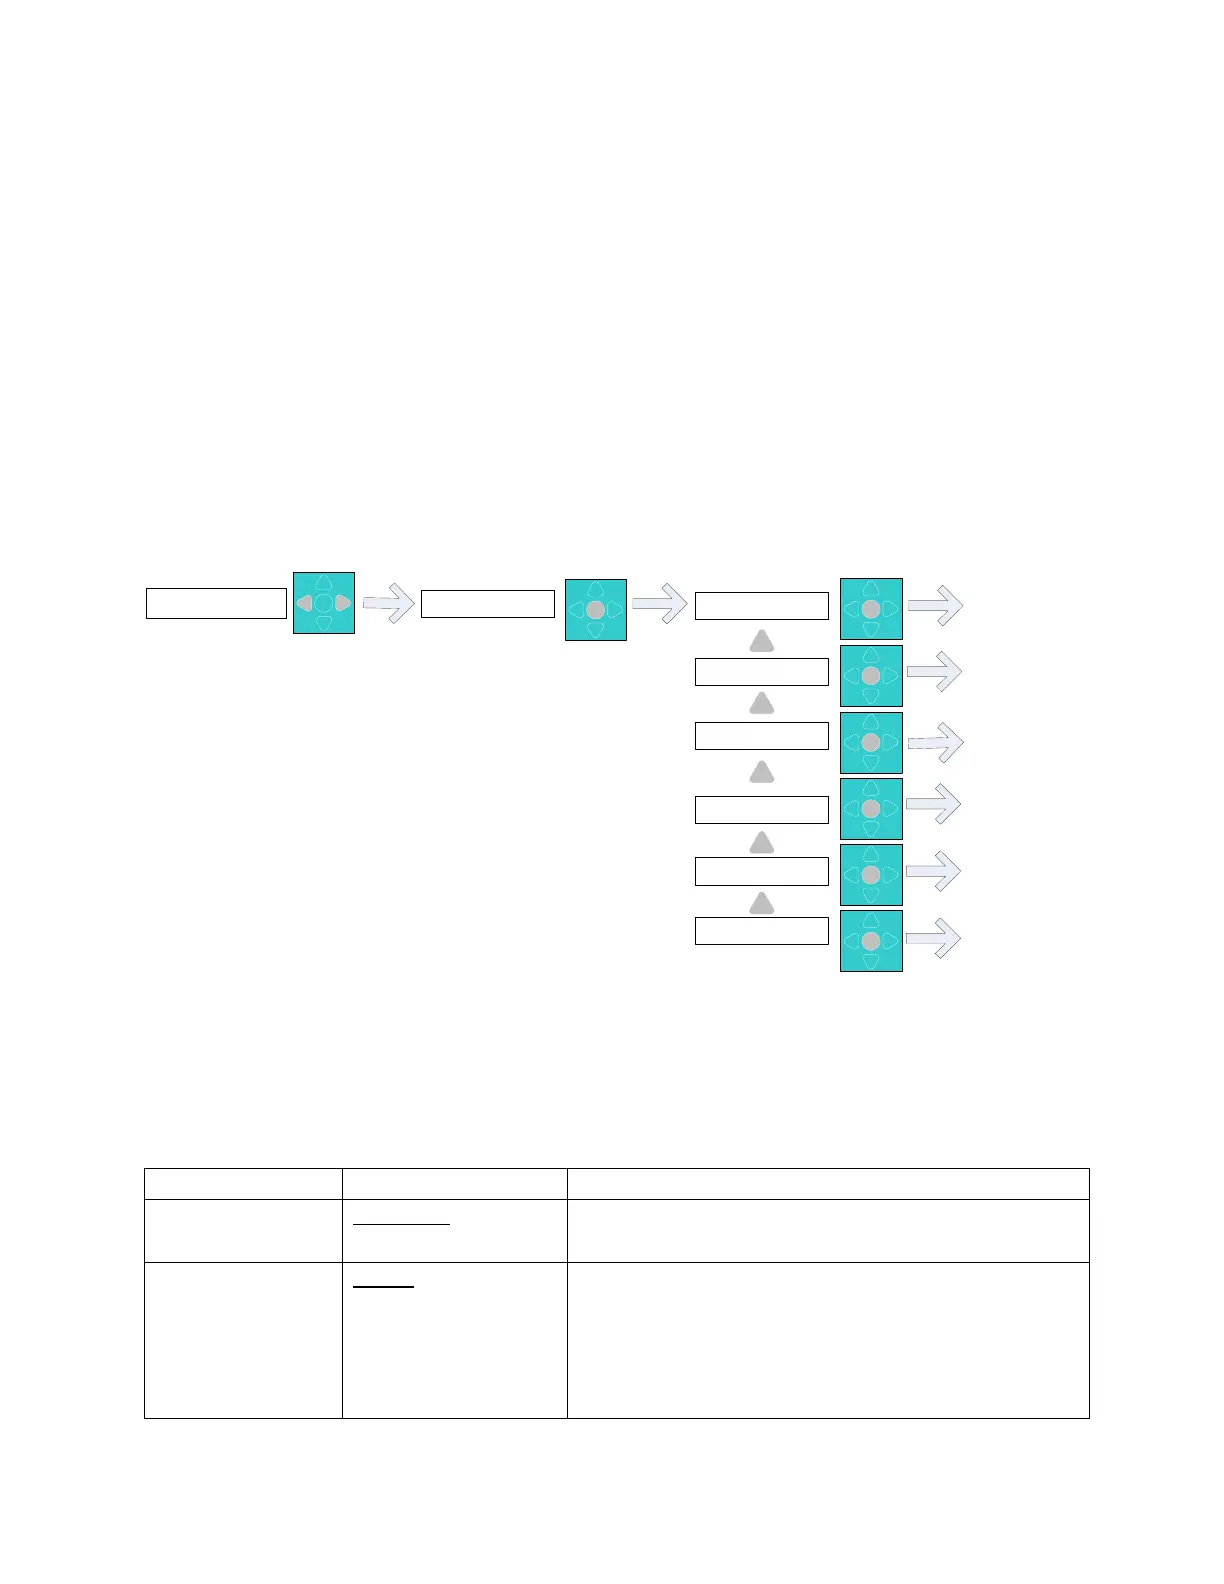
3.4 Programming the Model 600
Press and hold the left and right arrow simultaneously until the display shows the enter password
option. The default password is 11. Use the up/down arrow keys to change the password value and
press the center button to log in. Passwords can be turned off or changed to any value from 11 to 99 via
Modbus and the front panel System menu. From this menu use the up/down arrows to navigate to the
available choices of: System, Setpoints, Economizer, Alarms, Bypass & Run. Choosing one of these
options will present the available choices. Use the up/down arrows to cycle through the choices for
each field and the center button to accept the change and move to the next choice. Once you start in
one of the program menus, you must step through all choices until the end to accept your changes.
Press the center button to accept the current program value and go on to the next choice.
Access Code
11
Program Choices
Run
Program Choices
System
Program Choices
Economizer
Program Choices
Setpoints
Entering Run Mode
Entering System
Settings Menu
Entering Economizer
Settings Menu
Entering Setpoints
Settings Menu
74° F LD =1 COOL1
NO ACTIVE ALARMS
Program Choices
Alarms
Entering Alarm
Settings Menu
Program Choices
Bypass
Entering Bypass
Menu
Figure 9 - Programming Flow
3.5 Program Menus
This section shows the program menus and available options. Items underlined indicate the default
setting. All temperature values are shown in Fahrenheit.
3.5.1 System Menu*
Select the engineering units for displaying temperature
and temperature setpoints
High Zone 1 & 2,
Avg Zone 1 & 2
Select the sensor to be used for control and alarming
decisions. High will select the highest reading of the
two and AVG will average the two sensors. This value
will be shown on the main status screen as the
controlling temperature.