quest
quest
1-800-533-7533
Quest DEH 3000 Installation, Operation and Maintenance Instructions
6
www.QuestProtect.com
sales@questprotect.com
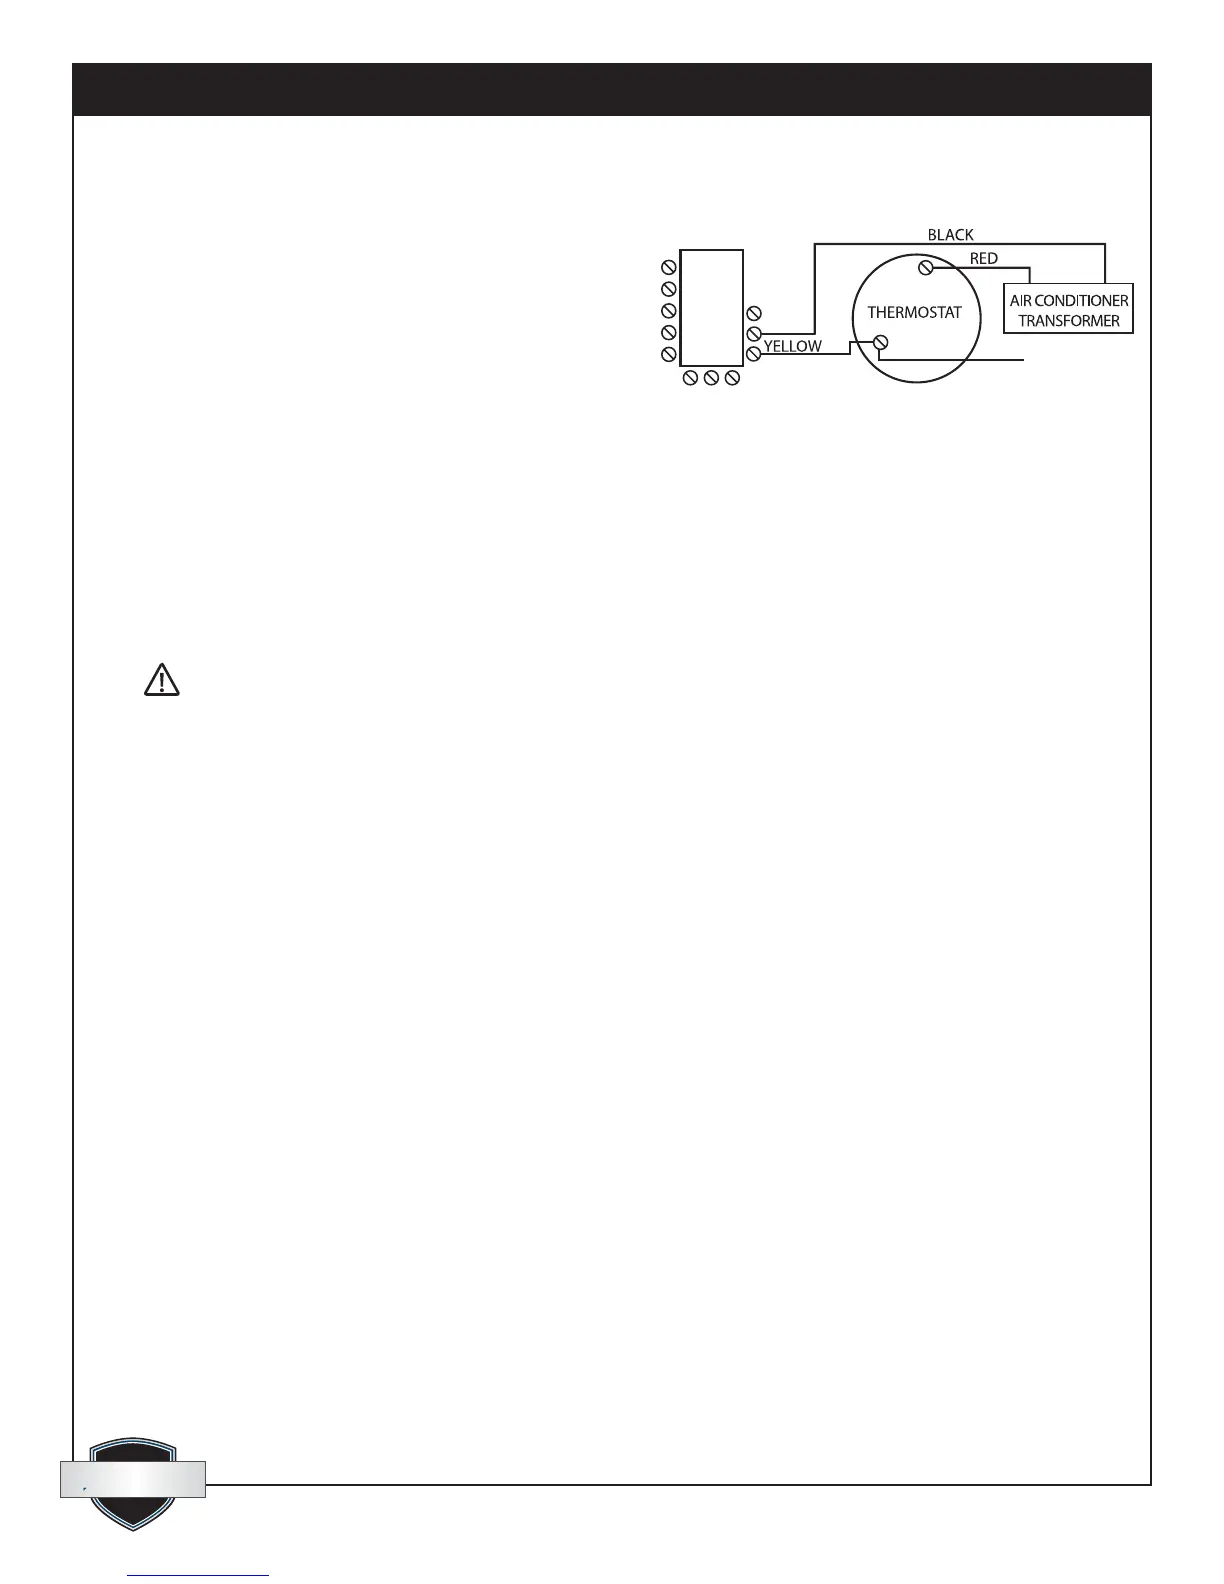
Deactivate dehumidication when the air-conditioner is running.
Avoltmeterisrequiredforthenextstepstoensurethe
correctwiringfromtheA/Ctransformerisusedtosetup
theLock-outdehumidierfunction.
1. ThecommonwirefromtheexistingA/C
transformer(usuallyBlack)mustbeattachedto
the“COM”sensorterminalbetween“ON-D”
and“OFF-D”ontheDEH3000.
TIP: The common wire can be identied as the wire
from the A/C transformer that reads 0 volts between it
and the Yellow air conditioning call for cooling wire. The
incorrect wire will give a 20 to 28 volt reading.
2.AnotherYellowwiremustbeaddedtothethermostatYellowterminalandruntothe“OFF-D”
sensorterminalontheDEH3000.
2.5 Testing
Verifythewiringconnections.
WARNING! ONLY CONNECT THE WHITE WIRE TO THE CONTROL IF IT IS WIRED IN A
CIRCUIT THROUGH AN ELECTRIC DAMPER, OTHERWISE TRANSFORMER DAMAGE MAY RESULT.
Aftercheckingthewiring,thisshorttestwillconrmproperhook-up.
1. InstallfrontcoveroftheQuestDEH3000;connectthetoprst,thenthebottom.
2.PlugintheQUESTdehumidier.TheQuestDEH3000shouldpowerup.
3.TurntheQuestDEH3000ONbypressingthe“ON/OFF”button.
4.VerifydehumidicationoperationbyadjustingtheRH“SETPOINT”tobelowthe“%RH”reading
onthedisplay.Usethedown“RH”button.ConrmQuestfanandcompressoroperation.Both
shouldbeONnow.
IncreasetheRH“SETPOINT”onthedisplaytowellabovethe“%RH”readingonthedisplay.Pressthe“RH”up
arrowtoincreasetheRH“SETPOINT”.
AfterrunningthedehumidiercompressortheQuestDEH3000appliesa10minuterestartlockoutonall
functions.Youwillhavetowaitfortherestartlockouttoexpire.
5.VerifyFAN-onlyoperation:
a.Checkthe“VENT”modeonthedisplay,itwilleitherbe“CLOSED”or“OPEN”.Ifitis“CLOSED”gotothe
nextstep.Ifitis“OPEN”,pressandholdthe“VENT”keyuntil“OPEN”ashesonthedisplay,releasethe
keyandthenpressitonemoretime.“OPEN”willchangeto“CLOSED”.Don’ttouchthekeysforseveral
secondsuntilitstopsashing.
b.Pressandholdthe“FAN”buttonuntil“AUTO”beginsashingonthedisplay,releaseit,andthenpressit
againtoswitchthefantothe“ON”setting.
c.ConrmthattheQUESTfanisON.QuestcompressormustbeOFF.Ventilationdamper(ifused)shouldbe
CLOSED.
6.VerifyoptionalVENToperation(ifelectricdamperisinstalled):
a.Pressandholdthe“FAN”buttonuntil“ON”ashesonthedisplay.
b.Releasethe“FAN”button,thenpressitagaintoswitchfanoperationto“AUTO”.
TO A/C