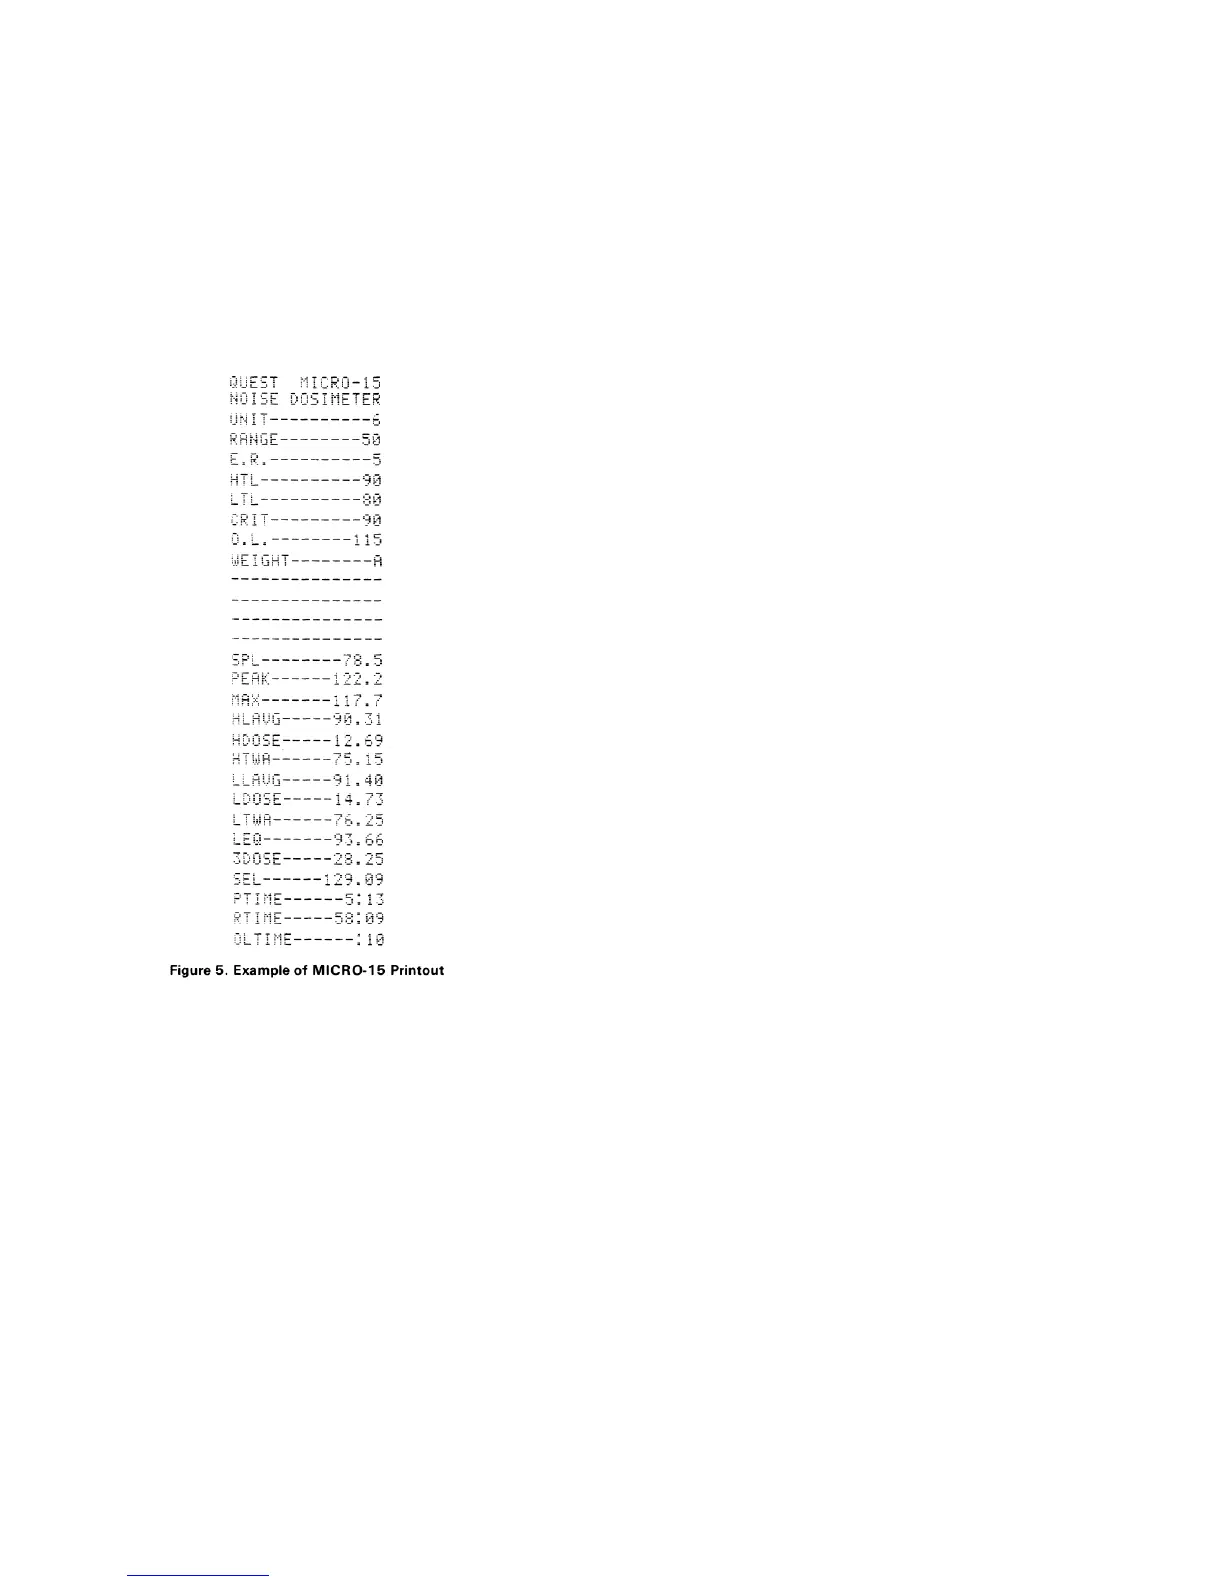
Lines are sent at a rate of 1 line every 2 seconds. The busy line from the
printer is not checked. There is a delay of at least 1.5 seconds between the line
feed character and the start of the next character.
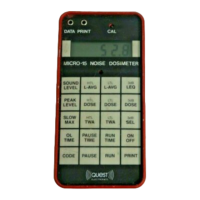
TESTING AND CALIBRATION
Battery Test
Press SOUND LEVEL and check the display for a single decimal point
(example 72.9). If additional colons and decimal
points appear (example :7:29), the battery is low and requires replacement. If this
indication is observed after having accumulated data to 8 hours or less, the data
is still accurate but new measurements should not be made.
Battery Replacement
Loosen the 2 screws on the back of the unit and remove the back. Remove
the battery from the cavity and carefully unclip the battery. Replace with a new
battery. Take care to observe the polarity of battery and do not reverse the
terminals. For best results use a 9-volt alkaline battery. Replace the battery in the
compartment and check the display. If it displays 4 dashes replace the back
cover. If not check the connections on the battery. The MICRO-15 is now operat-
ing in the Pause mode.
NOTE
When the unit is off, the battery still powers the
memory. If the unit is not going to be used for a few
days, remove the battery.
Calibration and Maintenance
The MICRO-15 should maintain its accurate calibration for many months of
use. However, to insure consistently accurate operation it is recommended that
the unit be returned once a year for a complete checkout and calibration. The
calibration standards for the equipment in Quest's laboratory are traceable to
N.I.S.T.
The MICRO-15 should be checked each day before it is used. It is
recommended that one of the Quest calibrators, be used with the proper 8 mm
microphone adaptor.
Daily Calibration
1. Turn MICRO-15 on, press SOUND LEVEL, and check to see if only one
decimal point is on the display. If two colons and a decimal point are on, the
battery is low and should be changed.
2. Turn on the calibrator and check the battery indicator. Replace the
battery if required. If the calibrator has multiple frequencies or levels, set it to
1000 Hz. Listen to determine if the calibrator is producing a tone.
3. Remove the windscreen from the microphone. Carefully insert the
microphone into the coupler and place the coupler into the calibrator. Make sure
the microphone is inserted all the way into the