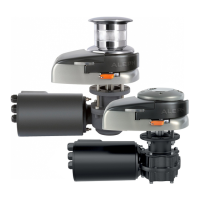
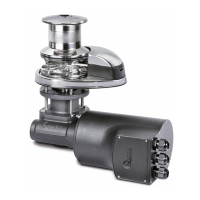
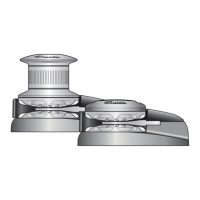
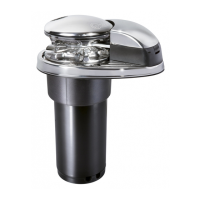
The Quick AL3 Series is a range of vertical windlasses designed for marine applications, specifically for weighing and casting anchors. This manual provides comprehensive instructions for installation, operation, and maintenance of the AL3-P 712, AL3-P 724, AL3-P 1012, AL3-P 1024, AL3 1512, and AL3 1524 models.
Function Description
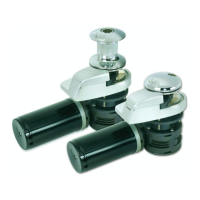
The primary function of the AL3 Series windlass is to facilitate the raising and lowering of anchors, utilizing a gypsy for chain and rope. The windlass is designed to be operated via electrical controls, but also supports manual operation in case of power failure or for specific tasks like manual anchor weighing or casting. It integrates a motor and gearbox to provide the necessary power for anchor handling. The design allows for versatility in mounting the motorgearbox and includes features for clutch control and drum use.
Important Technical Specifications
The AL3 Series windlasses are available in various power and voltage configurations, catering to different vessel sizes and requirements.
Model Power and Voltage:
- 700W: Available in 12V and 24V.
- 1000W: Available in 12V and 24V.
- 1500W: Available in 12V and 24V.
Performance Data:
- Maximum instantaneous pull: 850 kg (1874 lb) for 700W/1000W models, and 1100 kg (2425 lb) for 1500W models.
- Maximum work load:
- 700W: 250 kg (551 lb) (12V), 300 kg (661 lb) (24V)
- 1000W: 370 kg (816 lb) (12V), 450 kg (992 lb) (24V)
- 1500W: 470 kg (1036 lb) (12V), 540 kg (1190 lb) (24V)
- Work load:
- 700W: 80 kg (176.4 lb) (12V), 100 kg (221 lb) (24V)
- 1000W: 120 kg (265 lb) (12V), 150 kg (331 lb) (24V)
- 1500W: 160 kg (353 lb) (12V), 180 kg (397 lb) (24V)
- Current consumption at work load: Ranges from 55A to 155A depending on model and voltage.
- Maximum recovery speed: Ranges from 26.4 m/min (86.6 ft/min) to 40.9 m/min (134.2 ft/min) depending on model and voltage.
- Recovery speed at work load: Ranges from 14.4 m/min (47.2 ft/min) to 21.4 m/min (70.2 ft/min) depending on model and voltage.
Electrical and Installation Requirements:
- Minimum motor cable cross section: Varies from 10 mm² (AWG7) to 50 mm² (AWG0) based on model and total wiring length (recommended for L < 20m).
- Circuit breaker: Specific DC circuit breakers are required, ranging from 40A to 100A.
- Deck thickness: 25-50 mm (63/64" - 1" 31/32) for 700W/1000W, and 30-50 mm (1" 3/16" - 1" 31/32) for 1500W.
- Weight: Ranges from 17.4 kg (38.4 lb) to 23.5 kg (51.80 lb) depending on the model and whether it includes a drum.
Gypsy Specifications:
- Chain size: 8 mm (DIN 766, ISO, G4, BBB) and 5/16" for 8 mm - 5/16" gypsies; 10 mm (ISO P.30, G4) and 3/8" for 10 mm - 3/8" gypsies.
- Rope size: 1/2" (12.7 mm), 9/16" (14.2 mm), 5/8" (15.8 mm) for 8 mm - 5/16" gypsies; 5/8" (15.8 mm) for 10 mm - 3/8" gypsies.
Usage Features
Installation Requirements:
- Roller Alignment: The windlass gypsy must be precisely aligned with the bow roller. A positive chain tilt of up to 10° is allowed. Excessive negative tilt can interfere with the windlass base.
- Deck Level: The deck surfaces must be as parallel as possible. Any difference should be compensated to prevent loss of motor power.
- Peak Depth and Bow Roller Height: Ensure no obstacles for cable, rope, and chain passage under deck. A positive chain tilt of up to 5° is allowed.
Installation Procedures:
- Drill holes using the provided template.
- Smooth the rope/chain passage hole.
- Position the upper section with a gasket, connect to the lower section, and secure with nuts.
- Connect supply cables to the reversing contactor unit.
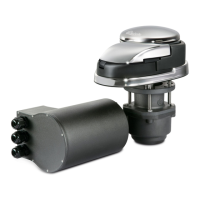
Flange Mounting (AL3 700W - 1000W):
- The flange can be fixed on both sides of the gearbox.
- The motorgearbox can be rotated 180° by unscrewing screws C and D, separating parts A and B, turning gearbox B, and reassembling. This provides mounting versatility while maintaining overall dimensions.
Motorgearbox Rotation:
- The motorgearbox can be rotated every 45° relative to the windlass base, offering flexible installation positions.
Important Cautions for Use:
- Always supervise the work area and deactivate the windlass when not in use.
- Ensure no bathers are nearby when dropping anchor.
- Secure the chain with a retainer before sailing.
- Do not operate the windlass with the handle inserted in the drum or gypsy cover.
- Isolate the windlass from the electrical system during navigation.
- The windlass is not designed to support storm loads and should not be used as the sole securing device for the anchor.
- Quick® recommends using a suitable power fuse/thermal-magnetic/hydraulic-magnetic protection.
Clutch Use:
- The clutch links the gypsy to the main shaft.
- Disengagement: Turn the handle counter-clockwise when inserted into the drum bush or gypsy cover. This allows manual casting of the anchor.
- Re-engagement: Turn the handle clockwise to re-engage the clutch for powered operation.
Weighing the Anchor (Electrical):
- Turn on the boat engine.
- Ensure the clutch is engaged and remove the handle.
- Press the UP button on the control.
- Monitor chain movement during the last few meters to prevent bow damage.
Casting the Anchor:
- Manually: Disengage the clutch to allow the gypsy to revolve and the chain/rope to fall freely. Turn the handle counter-clockwise to slow the chain.
- Electrically: Press the DOWN button on the control for controlled, even unwinding of the chain.
- Always fasten the chain or secure it to a firm hold with a rope once anchored to avoid stress on the windlass.
Manual Anchor Weighing (No Drum Version):
- Disconnect windlass power.
- Engage the lock lever on the gypsy.
- Disengage the clutch (at least 2 turns anticlockwise).
- Insert the lever into the gypsy cover and manually take up the chain by rotating clockwise.
- After weighing, remove the lever, insert it into the bush to tighten the clutch, release the gypsy, and reconnect power.
Manual Anchor Weighing (Drum Version):
- Disconnect windlass power.
- Engage the lock lever on the gypsy.
- Use the lever to loosen the bush, pull off the drum, and mount the manual anchor weighing on the gypsy with screws.
- Insert the lever into the anchor weighing seat and manually take up the chain by rotating clockwise.
- After weighing, remove the lever, reinsert the drum, tighten the drum to tighten the clutch.
- Maintain a safe distance from hands and the windlass drum during take-up.
Drum Use (Independent):
- Check that the anchor and rope/chain are solidly fixed to a bitt or strong point.
- Engage the lock lever (H) of the gypsy.
- Release the clutch with the handle (C) (at least 2 turns anticlockwise).
- Remove the handle from the gypsy bush.
- Wrap the rope around the drum (at least 3 turns).
- Activate the windlass control, keeping the rope under tension. Varying tension modifies winding speed.
- Once take-up is complete, tighten the clutch by screwing the gypsy drum clockwise and secure the rope to a bitt or strong point.
- Before weighing anchor, release the gypsy by disengaging the safety lock and sliding the control toward the stern for automatic insertion of the gypsy lock.
Maintenance Features
Troubleshooting:
- If the windlass stops and the circuit breaker has not tripped, wait a few seconds and try again (avoid pressing the button continuously).
- If the circuit breaker has tripped, reset it and wait a few minutes before trying again.
- If the windlass remains blocked after several attempts, move the boat to release the anchor.
General Maintenance:
- WARNING: Ensure electrical power to the motor is switched off when working manually on the windlass.
- Quick® windlasses are made of marine-resistant materials, but regular cleaning is essential to prevent corrosion. Periodically remove salt deposits from external surfaces and wash with fresh water.
- Annually, disassemble the gypsy and drum for cleaning and greasing.
Disassembly Sequence (Drum Version):
- Use the handle (1) to loosen the bush (7); pull off the drum (6).
- Remove the top clutch cone (11).
- Undo the retaining screws (10) to remove the chain stripper (14).
- Remove the gypsy (12).
- Remove the bottom clutch cone (13).
Disassembly Sequence (No-Drum Version):
- Use the handle (1) to loosen the clutch bush (2), screw (5), gypsy cover (4).
- Remove the top clutch cone (11).
- Undo the retaining screws (10) to remove the chain stripper (14).
- Remove the gypsy (12).
- Remove the bottom clutch cone (13).
Post-Disassembly:
- Clean all removed parts to prevent corrosion.
- Grease (with marine grease) the shaft thread and the gypsy where the clutch cones rest.
- Remove any oxide deposits from the electric motor terminals and the reversing contactor unit; grease them.
- If required, the windlass must be disassembled by qualified personnel.
- Ensure the gearmotor is cold before disassembling.
Product Disposal:
- Dismantling at the end of the product's life must be carried out by qualified personnel.
- The product contains various materials, some recyclable, others requiring specific disposal.
- Dispose of the product according to local regulations; do not dispose of it as domestic waste. Return the product to the seller when purchasing a new equivalent product, or separate for disposal according to local regulations.