3. V-Scanner folder 00 should already be
selected by default, or use the ST keys to
scroll to the desired location. You can save
your work to an empty folder or overwrite the
contents of a programmed folder.
4. Press the
Stor softkey. If the folder is not
empty, you are prompted to confirm the
operation, which will erase the current
V-Scanner folder contents. Press YES to
confirm and overwrite, or NO to cancel. The
scanner will display:
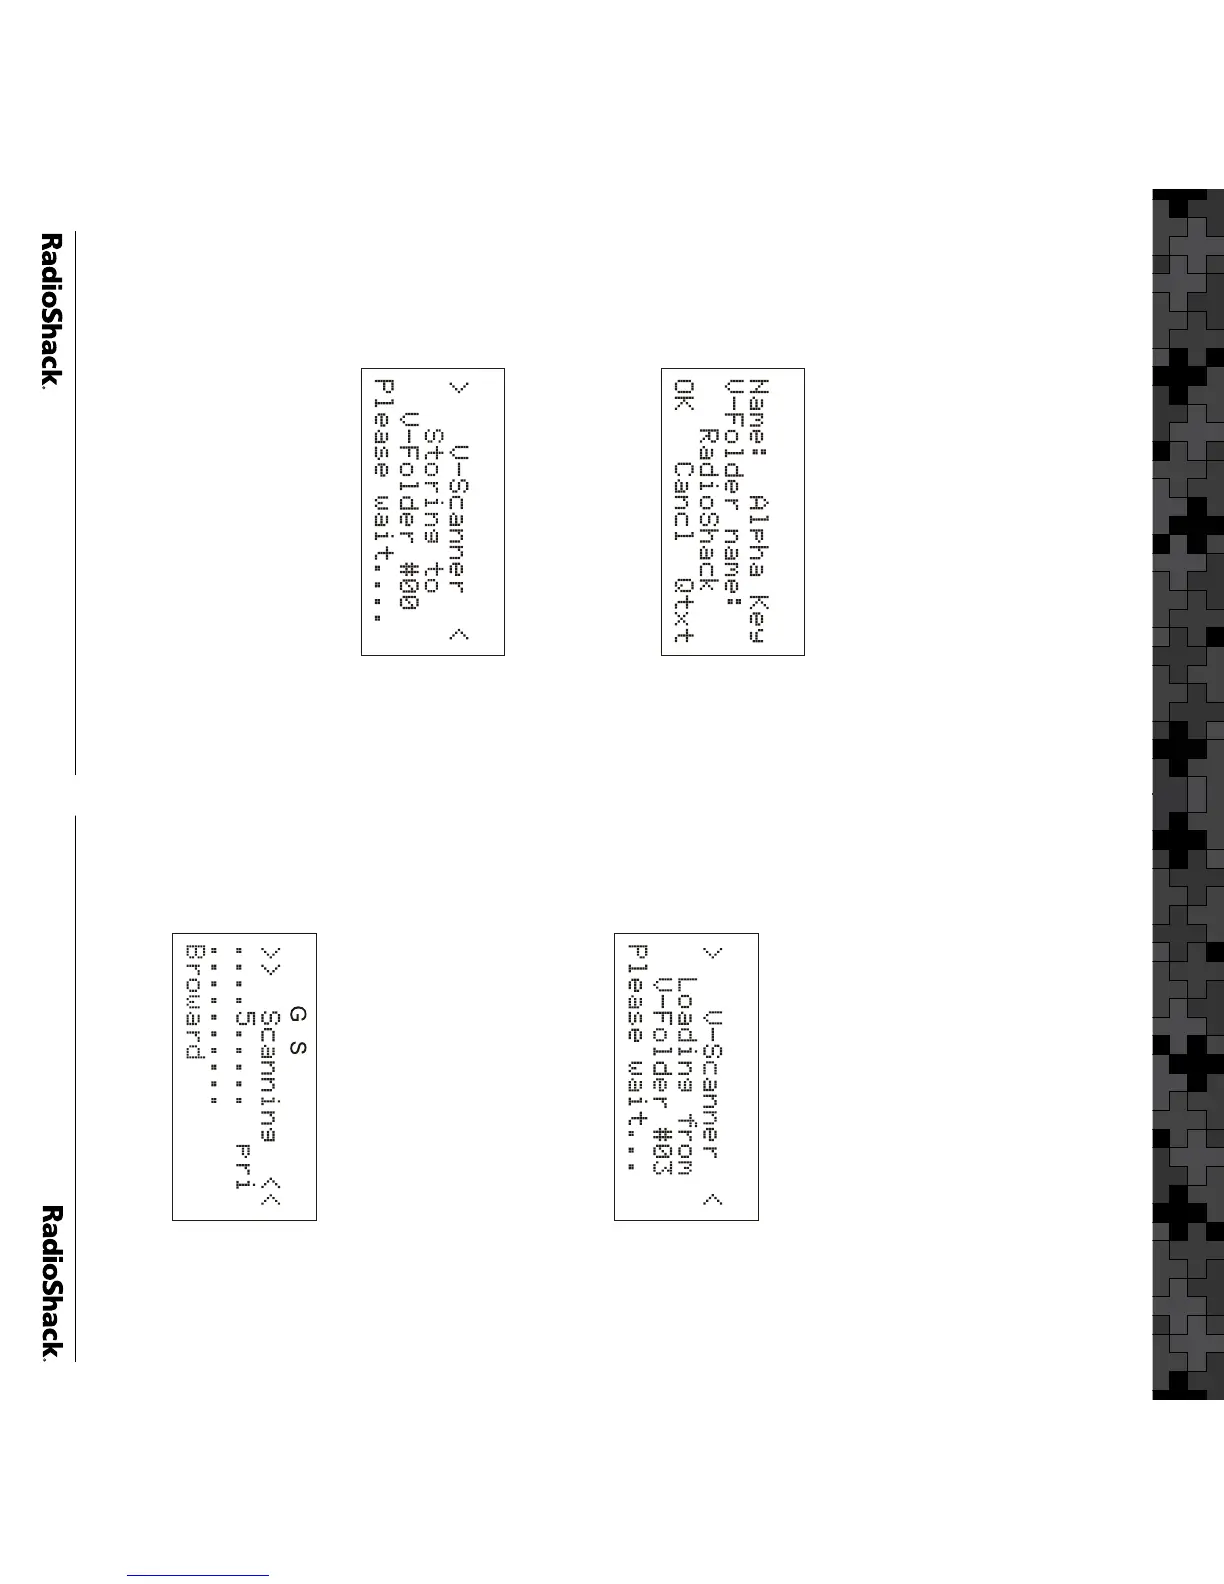
5. Enter a name for the V-Scanner using the
Standard Text Entry Method and press OK.
The scanner displays the following screen
while storing the contents of working memory
to the selected V-Folder:
6. Press the Cancl softkey to return to the main
V-Scanner menu.
To Load a V-Scanner folder into Working
Memory:
1. Press
FUNC PGM (PROG) to open the
V-Scanner menu.
2. Press the
Load softkey.
Introduction
3. Use the ST keys to select the V-Scanner
folder for your location.
4. Press the Load softkey.
5. The scanner will prompt you with a warning:
“Really overwrite main memory?” Press
the YES softkey to proceed, or press NO if you
don’t want to erase your working memory
contents. (See the previous section if you
need to save your working memory.)
6. After pressing the YES softkey, the scanner
loads the V-Folder (example shows Folder #3
for South Florida):
7. After the loading operation is complete,
press the SCAN key. The scanner will reboot
and begin scanning.
8. While the radio is scanning, turn off the Scan
Lists except the one for your area. Use the
1 – 0 keys to toggle Scan lists 1-10 on and
off, and FUNC 1 – FUNC 0 to toggle Scan
Lists 11-20 on and off. If your were to turn off
all but Scan List 5, the display would appear
as follows while scanning:
Using the Preprogrammed Data
 Loading...