EasyManua.ls Logo

Radio Shack 63-1039 User Manual

Radio Shack 63-1039
2 pages
To Next Page IconTo Next Page
Page #1 background imageLoading...
Page #1 background image
Indoor / Outdoor
Car Thermometer
with Voltmeter
63-1039
Battery Installation
The thermometer requires two AAA batteries
(not supplied) for power.
1. Slide the battery compartment cover in the
direction of the arrow to remove it.
2. Insert the batteries as indicated by the
polarity symbols (+ and –) marked inside.
3. Replace the battery compartment cover.
Mounting the Thermometer
Place your thermometer on a flat surface inside your car. For measuring
outdoor temperature, the thermometer's sensor cord extends up to 10 feet.
Mounting the Bracket
1. Clean the desired location inside your car with a soft cloth.
2. Peel off one side of adhesive paper from the supplied mounting stickers,
and attach the stickers to the back of the supplied mounting bracket.
Then, peel off the paper on the other side of the sticker.
3. Firmly press the bracket onto the desired car location.
4. Slide the thermometer onto the bracket.
Mounting the Sensor
1. Peel off the paper from the back of the sensor to expose the adhesive
tape.
2. Firmly press the sensor against a clean, flat surface on the outside of
your vehicle.
Step One
Step Two
Setting the Time
1. Repeatedly press MODE until the time and
indoor temperature (IN), or the time and
outdoor temperature (OUT) appear on the
display.
2. Repeatedly press or hold down HR until
the correct hour digits appear.
3. Repeatedly press or hold down MIN until
the correct minute digits appear.
4. To select 12- or 24-hr time format, hold
down C/F until the time display changes to
the desired format.
Step Three
Using the Thermometer
1. Extend the sensor cord and attach the
sensor to the outside of your car.
2. Repeatedly press MODE until the time and
outdoor temperature (OUT), outdoor
temperature (OUT) and voltage (V), or
outdoor temperature (OUT) and indoor
temperature (IN) appears on the display.
3. Repeatedly press C/F to select Celsius or
Fahrenheit. The current temperature (IN or
OUT, depending on your display view)
appears.
Step Four
What’s Included
Indoor/Outdoor Thermometer
Adapter
Mounting Bracket
Mounting Stickers (2)
Voltmeter
Sensor Cord
Adapter
12V DC
Question and Answer IconNeed help?

Do you have a question about the Radio Shack 63-1039 and is the answer not in the manual?

Radio Shack 63-1039 Specifications

Power IconPower
battery typeAAA
battery quantity2
Operating Environment IconOperating Environment
indoor temperature range–4°F to 158°F (–20°C to 70°C)
outdoor temperature range–58°F to 158°F (–50°C to 70°C)
temperature accuracy at 0°C to 40°C±1.0°C
temperature accuracy other range±1.5°C

Summary

Step One Battery Installation

Battery Installation

Instructions for installing the two AAA batteries required for the thermometer's power supply.

Step Two Mounting the Thermometer

Mounting the Bracket

Steps to clean the location, attach adhesive stickers to the mounting bracket, and press it firmly onto the car's surface.

Mounting the Sensor

Instructions for peeling the sensor's backing and pressing it against a clean, flat surface on the vehicle's exterior.

Step Three Setting the Time

Setting the Time

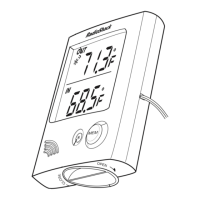
Guide on using MODE, HR, MIN buttons, and C/F to set the clock and time format.

Step Four Using the Thermometer

Using the Thermometer

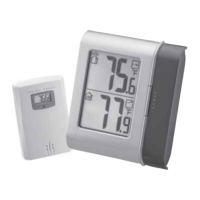
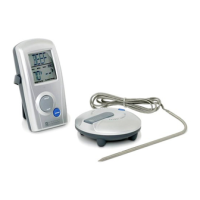
Steps to connect the sensor cord, select display modes (OUT, V, IN), and choose Celsius or Fahrenheit.

Step Five Using the Digital Voltage Meter

Using the Digital Voltage Meter

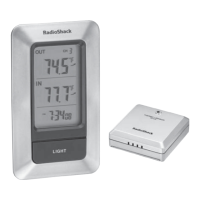
Instructions for connecting the adapter and unit to check vehicle battery voltage and charging voltage.

Step Six Using the ICE Alert

Using the ICE Alert

How to set an alert for potential freezing conditions (30.2°F-39.2°F) and turn it on/off.

Step Seven Minimum and Maximum Memory

Minimum and Maximum Memory

How to view and clear the minimum/maximum temperature recorded in the last 24 hours.

Cautions and Notes

Cautions and Notes

Important guidelines on battery handling, mixing, removal, and placement of the thermometer and sensor.

Care and Specifications

Care Instructions

Instructions on keeping the thermometer dry, handling it carefully, and cleaning it with a damp cloth.

Product Specifications

Details on power, temperature range (indoor/outdoor), and temperature accuracy.

Limited One-Year Warranty

Limited One-Year Warranty

Information regarding the product's one-year warranty against manufacturing defects.

Related product manuals