You can place your thermometer and sensor
on a fl at surface, using the included stand or
you can mount them on a wall. Insert your wire
stand into the holes on the back of your sensor
and place it in a desired location.
mounting your thermometer
Drill a hole in the wall.
Thread a screw (not supplied) into the hole,
letting it extend about 3/16” from the wall. Be
sure to use a screw with a head that fi ts into the
keyhole slot.
Slide the thermometer down until it is secure.
mounting your sensor
Drill a hole in the wall.
Thread a screw (not supplied) into the hole, letting
it extend about 3/16” from the wall. Be sure to use a
screw with a head that fi ts into the keyhole slot.
Slide the sensor down until it is secure.
Be sure to insert the batteries before you mount your
sensor.
Please read this user’s guide before
installing, setting up and using your new product.
www.radioshack.com
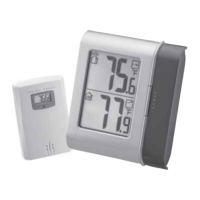
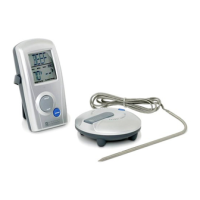
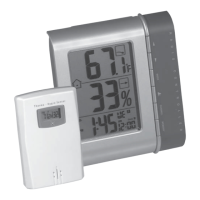
Thank you for purchasing your Indoor/Outdoor
Thermometer and Hygro Sensor from
RadioShack. You can mount it on a wall or
place it on a fl at surface using the included
stand. Your thermometer displays indoor and
outdoor temperatures, as well as humidity
information. And, your thermometer even
features an atomic alarm clock.
in your sensor
Remove the battery compartment cover.
Insert two AAA batteries, matching the polarity symbols (+ and -),
marked inside.
Select CHANNEL 1, 2, or 3 inside the compartment.
Press RESET to initialize the transmission.
Replace the cover and secure it with the screws.
in the thermometer
Remove the battery cover.
Insert two AA batteries, matching the polarity symbols
(+and -) marked inside.
Replace the battery cover.
Replace the batteries when the low battery icon appears. Press RESET
when you replace the batteries, or if it does not perform normally. All
settings will return to the default values and you will lose all stored
information.
63-1089
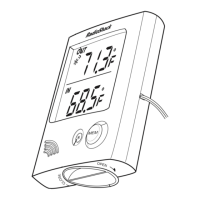
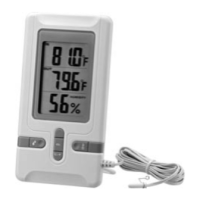
indoor/outdoor thermometer
and hygro sensor
thermometer and stand • thermo-sensor
user’s guide
Note: Actual product may vary from the images found in this
document.
Press RESET on the sensor to receive a signal. Then, press and hold MEMORY and
CHANNEL on your thermometer to search for the sensor.
º - - º blinks on your thermometer while it is searching. To clear readings in
memory, press and hold MEMORY for 2 seconds. A beep sounds to confi rm the
memory is clear.
If you have more than one sensor, select a different channel for each one. Three
signal icons display when at least one channel has been found.
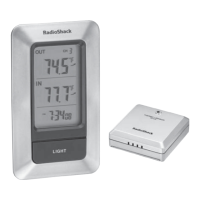
selecting sensor channels
To auto-scan between sensors, press and hold CHANNEL for 2 seconds. Each
sensor’s data will be displayed for 3 seconds. To end auto-scan, press CHANNEL or
MEMORY. To select a specifi c channel, press Channel. The following icons display
based on the selected channel.
Kinetic Wave Icon
Designated
Display
Indoor Display
Remote Display
Channel 1
Remote Display
Channel 2
Remote Display
Channel 3
battery notes
• For the best results, install batteries in
the remote sensor fi rst, and then the
thermometer. Press RESET after each
battery replacement.
• ) displays when battery power is low.
• Dispose of old batteries promptly and
properly. Do not burn or bury batteries.
• Do not use rechargeable batteries.
• Use only fresh batteries of the required size
and recommended type.
• Do not use batteries of different types
capacities, or chemistries.
• If you do not plan to use this product for a
month, remove the batteries. Batteries can
leak chemicals that can damage electronic
parts.
Keyhole Slot
Keyhole Slot
CHANNEL
RESET
MEMORY - Press to view
current or saved maximum
and minimum temperature or
humidity readings.
CHANNEL - Press to switch
to a different sensor.
3 - Press to view/change
alarm settings.
MODE - Press to change
display/settings.
-
Press to increase settings and activate
the Atomic Clock signal reception.
- Press to decrease
the setting.
C°/F° Switch
Trend line - Indicates the trend of
temperature and humidity.
Falling Rising Steady
Current Temperature
Humidity Reading