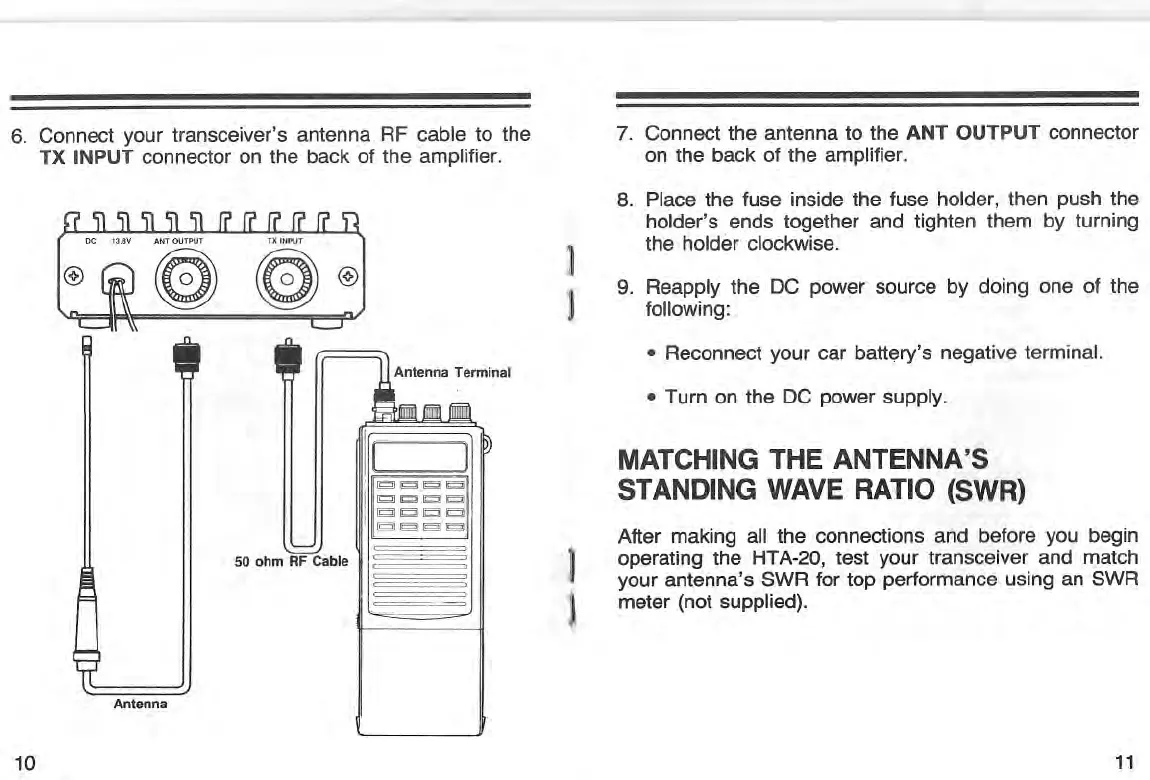
6. Connect your transceiver's antenna RF cable to the
TX INPUT connector on the back of the amplifier.
7. Connect the antenna to the ANT OUTPUT connector
on the back of the amplifier.
• Reconnect your car battery's negative terminal.
• Turn on the DC power supply.
After making all the connections and before you begin
operating the HTA-20, test your transceiver and match
your antenna's SWR for top performance using an SWR
meter (not supplied).
MATCHING THE ANTENNA'S
STANDING WAVE RATIO (SWR)
8. Place the fuse inside the fuse holder, then push the
holder's ends together and tighten them by turning
the holder clockwise.
9. Reapply the DC power source by doing one of the
following:
)
1
1
l
.- -=
I'-J
I~===cil
I ~ (g) [g) g]l
I [Q] [Q] [Q] QJI'[g] IQ] [Q lQl
ANT OUTPUT TX INPUT
~ ~@
50 ohm RF Cable
Antenna
®
10
11
 Loading...