- 57 -
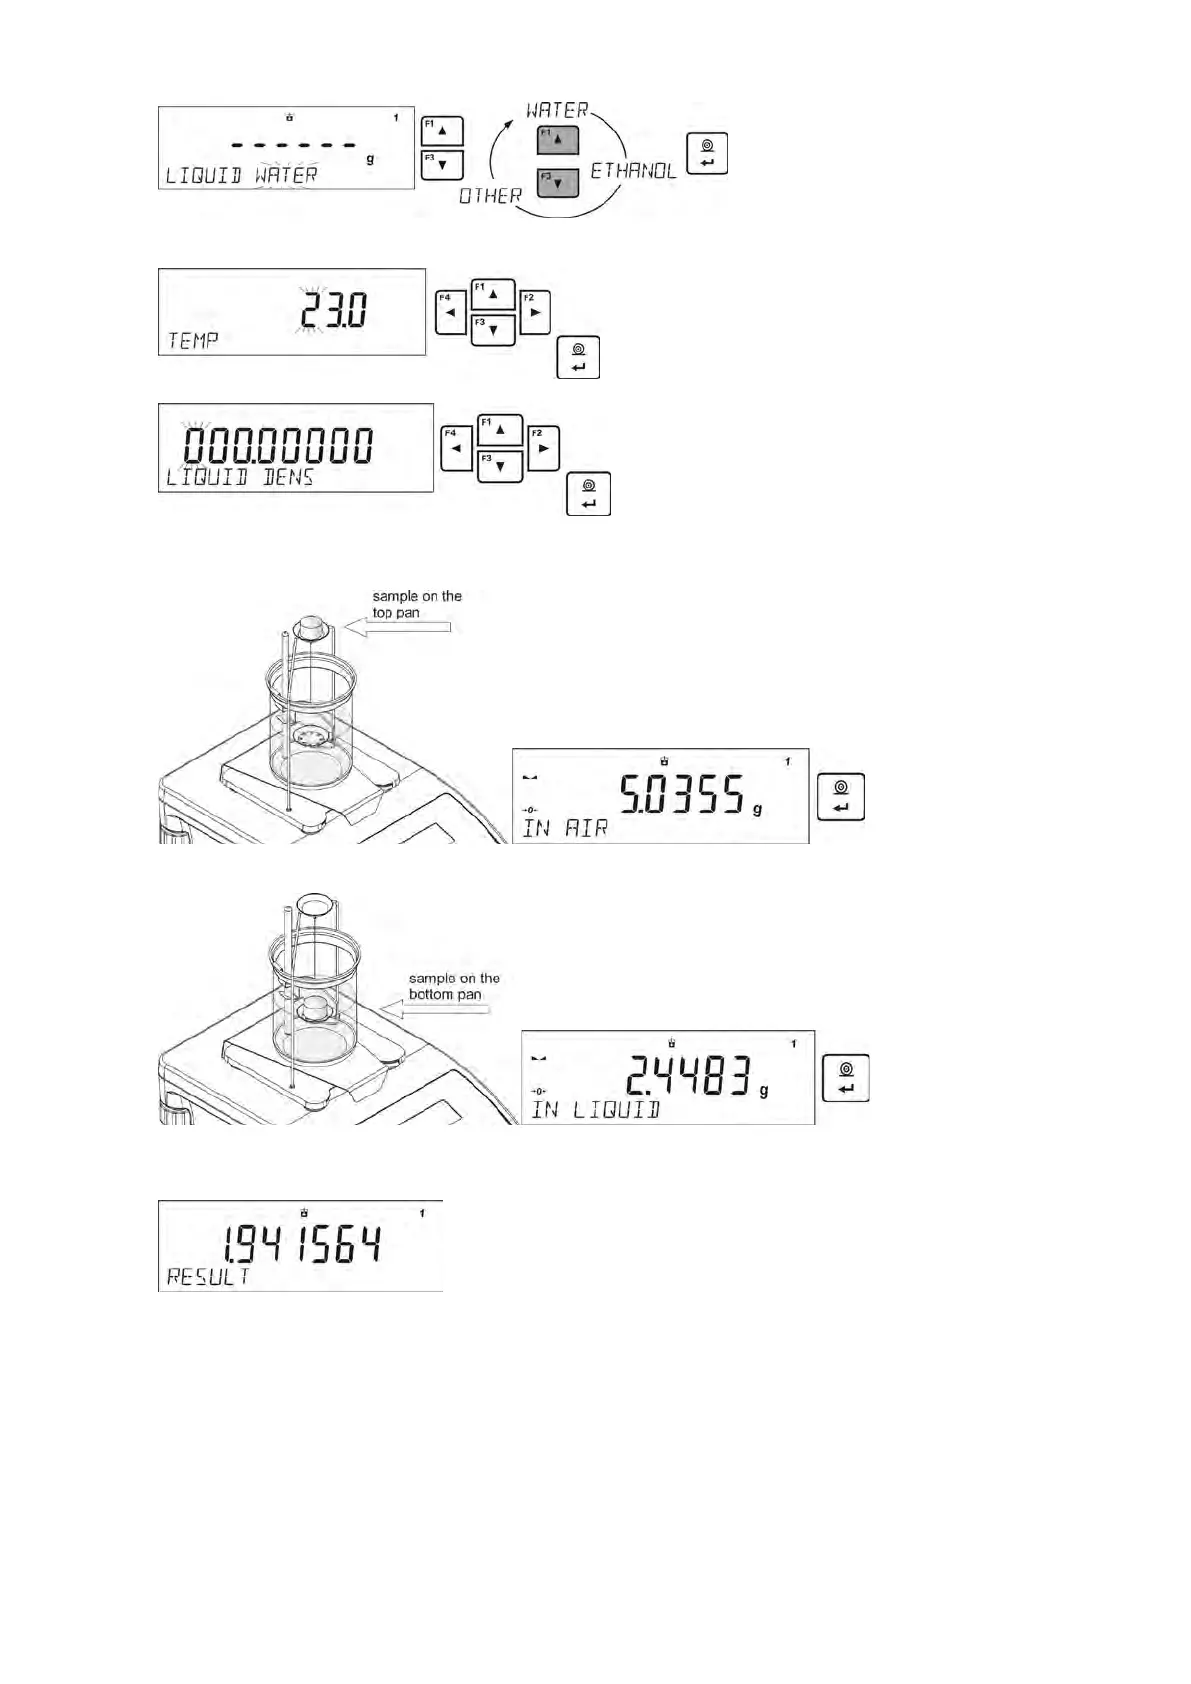
9. After selecting and entering a liquid type by pressing <ENTER> button, the software proceeds
to setting the liquid temperature.
10. If <OTHER> liquid of determined density has been chosen, enter its density.
11. With this data entered, the program proceeds to weighing.
12. First, place a mass sample on the top weighing pan of the kit (weighing in the air), and confirm
the indication when stable.
13. Next, place a mass sample on the bottom pan of the kit (mass determination in the liquid), and
confirm the indication when stable.
14. On the second confirmation of the indication, the program automatically calculates and displays
the tested solid object density. At the same time, a report on the measurement is sent to a
selected port of a printer.
An exemplary report:
 Loading...