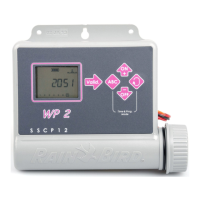
This manual describes the installation and maintenance of Rain Bird Residential Valves, which are essential components of sprinkler systems. These valves act as the link between the system's timer (the "brains") and the sprinkler heads, controlling the flow of water to turn the system on and off.
Function Description:
Sprinkler systems typically utilize two types of valves: a shutoff valve and zone valves.
-
Shutoff Valve: This is usually a brass "gate valve" or "ball valve" located immediately after the "tee" where the sprinkler system connects to the main water supply of the house. Its primary function is to shut down the entire sprinkler system for repairs or winterizing without affecting the water supply to the rest of the house. It is recommended that all systems include a shutoff valve installed in a box for easy access.
-
Zone Valves: These are the sprinkler "zone valves." Each zone valve is piped to a specific set of sprinklers. When a zone valve is activated, either manually or by an electronic signal from the timer, all sprinklers connected to that valve turn on. Most systems have multiple zone valves grouped together in a "manifold." The need for several zone valves arises because sprinkler systems are limited by water pressure (psi) and available gallons per minute (gpm). Each sprinkler consumes a certain amount of water, which reduces pressure. To ensure maximum performance, each zone is controlled by one valve and configured with the appropriate number of sprinklers to avoid exceeding the system's psi and gpm capacity.
Rain Bird offers two basic types of zone valves:
-
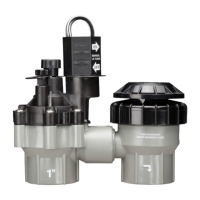
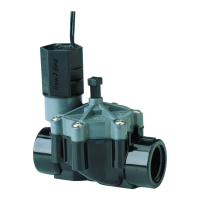
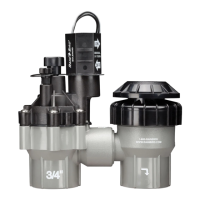
Anti-Siphon Valves (APAS-100-P, APAS-075-P, PAS-100, PAS-075):
- Function: These valves incorporate a built-in backflow device designed to prevent potentially contaminated water from flowing back into the household water supply. They offer an inexpensive form of backflow protection, provided local codes approve their use. Electric models can be easily connected to a timer for automatic watering.
- Installation Requirement: Anti-siphon valves must be installed at least 6 inches above the highest sprinkler head on the line for the backflow device to function correctly.
- Limitations: These valves are designed as zone valves and should not be subjected to constant pressure on the outlet (sprinkler) side, as this can cause severe damage. The manual versions are not suitable for continuous open operation as a main shutoff valve or as a primary backflow prevention for an entire system. Automatic models should not be used as a master valve with other valves downstream. They are best suited for installations with minimal elevation changes and relatively clean water sources.
-
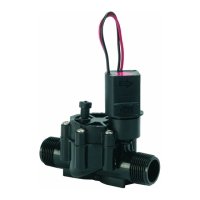
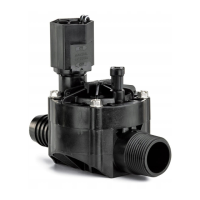
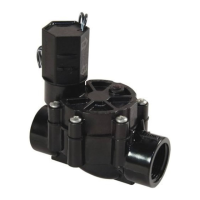
In-Line Valves (CP-075, CP-100, EV-100, EV-100F):
- Function: These valves are installed below ground, typically within a valve box for protection and ease of maintenance. Their protected location makes them less susceptible to tampering by children or vandals and reduces the risk of freeze damage compared to above-ground models.
- Backflow Protection: In-line valves do not provide inherent backflow protection. A separate backflow preventer is required for systems using in-line valves, especially if the water supply is also used for drinking or if water is sourced from lakes, wells, or ditches (which may contain fertilizers or toxic chemicals).
- Suitability: They are suitable for sites with varying elevation changes. They can also be used as a master valve.
- Water Source Considerations: If the water is pumped from a "dirty" source (lake, well, ditch), a filter with a 100-mesh screen should be installed upstream to remove sand and debris.
Important Technical Specifications:
- Power Requirements (for 24 Volt valves):
- Smaller valves: Minimum 0.30 amps for opening, 0.19 amps for holding open.
- Larger valve models: Slightly higher requirements.
- Compatibility: All Rain Bird valves are designed to work with Rain Bird timers and other timers that provide sufficient power output to activate the valve.
- Installation Orientation: Valves must be installed horizontally according to the flow direction arrows on the valve body. Incorrect installation (backward or vertical) can lead to erratic operation and void the warranty.
- Thread Sealant: Only Teflon tape should be used on valve threads. Plumber's pipe dope can react with plastic valve bodies, causing weakening and cracking. Three wraps of Teflon tape are generally sufficient for a leak-proof seal.
Usage Features:
Rain Bird valves offer several operational features, though not all models include every feature.
- Flow Control: (Not available on all models) This feature regulates the amount of water passing through the valve.
- Manual Bleed: This allows for manual activation of the valve by "bleeding" water off the diaphragm.
- External Bleed Models: Have a knob or screw to turn, causing water to spray out from the top of the valve.
- Internal Bleed Models: Have an open/close knob or require a 1/4 turn of the solenoid, with water bleeding off internally.
- Manual On/Off: Turning the solenoid 1/4 turn counterclockwise manually activates the valve.
Maintenance Features:
- Flushing: Before installing valves, it's crucial to flush the supply line to the manifold. After installation, each line should be tested and flushed before attaching sprinklers. Most valves have a flush mode to allow a small amount of water through to clean out debris.
- Anti-Siphon Valves: Turn the black SOLENOID counterclockwise (do not turn the gray ring) until a small amount of water discharges between the SOLENOID and FLOW CONTROL ring.
- In-Line Valves: Turn the bleed knob 1 full turn counterclockwise and allow water to spray out for 10-15 seconds, then turn it back clockwise.
- Troubleshooting: The manual provides a detailed troubleshooting guide for common issues like valves not turning on/off with the timer, water leaks, or water hammer. This guide helps diagnose problems based on symptoms and suggests remedies for both diaphragm and piston-type valves.
- Disassembly for Cleaning/Part Replacement:
- Diaphragm Valves (Procedure A): Involves shutting off water, unscrewing bonnet screws (and bleed screw/flow control knob on some models), removing the bonnet assembly to access the spring, diaphragm, and rubber gasket. These parts should be inspected for wear, damage, or clogs. The valve body and bonnet should also be inspected for dirt or clogs in the bleed port. New diaphragms should be installed if necessary, ensuring proper alignment of holes. The solenoid can also be unscrewed and inspected for debris or O-ring condition.
- Piston-Type Valves (Procedure B): Requires shutting off water, unscrewing the actuator counterclockwise using adjustable pliers, and gently pulling the piston from the valve for inspection of seals or replacement. The solenoid can be removed by holding the gray flow ring and twisting counter-clockwise. Reassembly involves screwing the actuator assembly clockwise until it contacts the valve body, being careful not to overtighten.
- Parts Availability: A variety of parts and assemblies are available. Customers can contact their local Rain Bird dealer or the Customer Support Center (1-800-RAIN-BIRD) for assistance in identifying and ordering parts. The manual includes part numbers for solenoids and diaphragms for specific models (e.g., CP-075/100, EV-100/100F).
- Quality Assurance: The manual emphasizes using only genuine Rain Bird parts for quality assurance.