Pro2-Series 3D Printer
/ Quick Start Guide
11
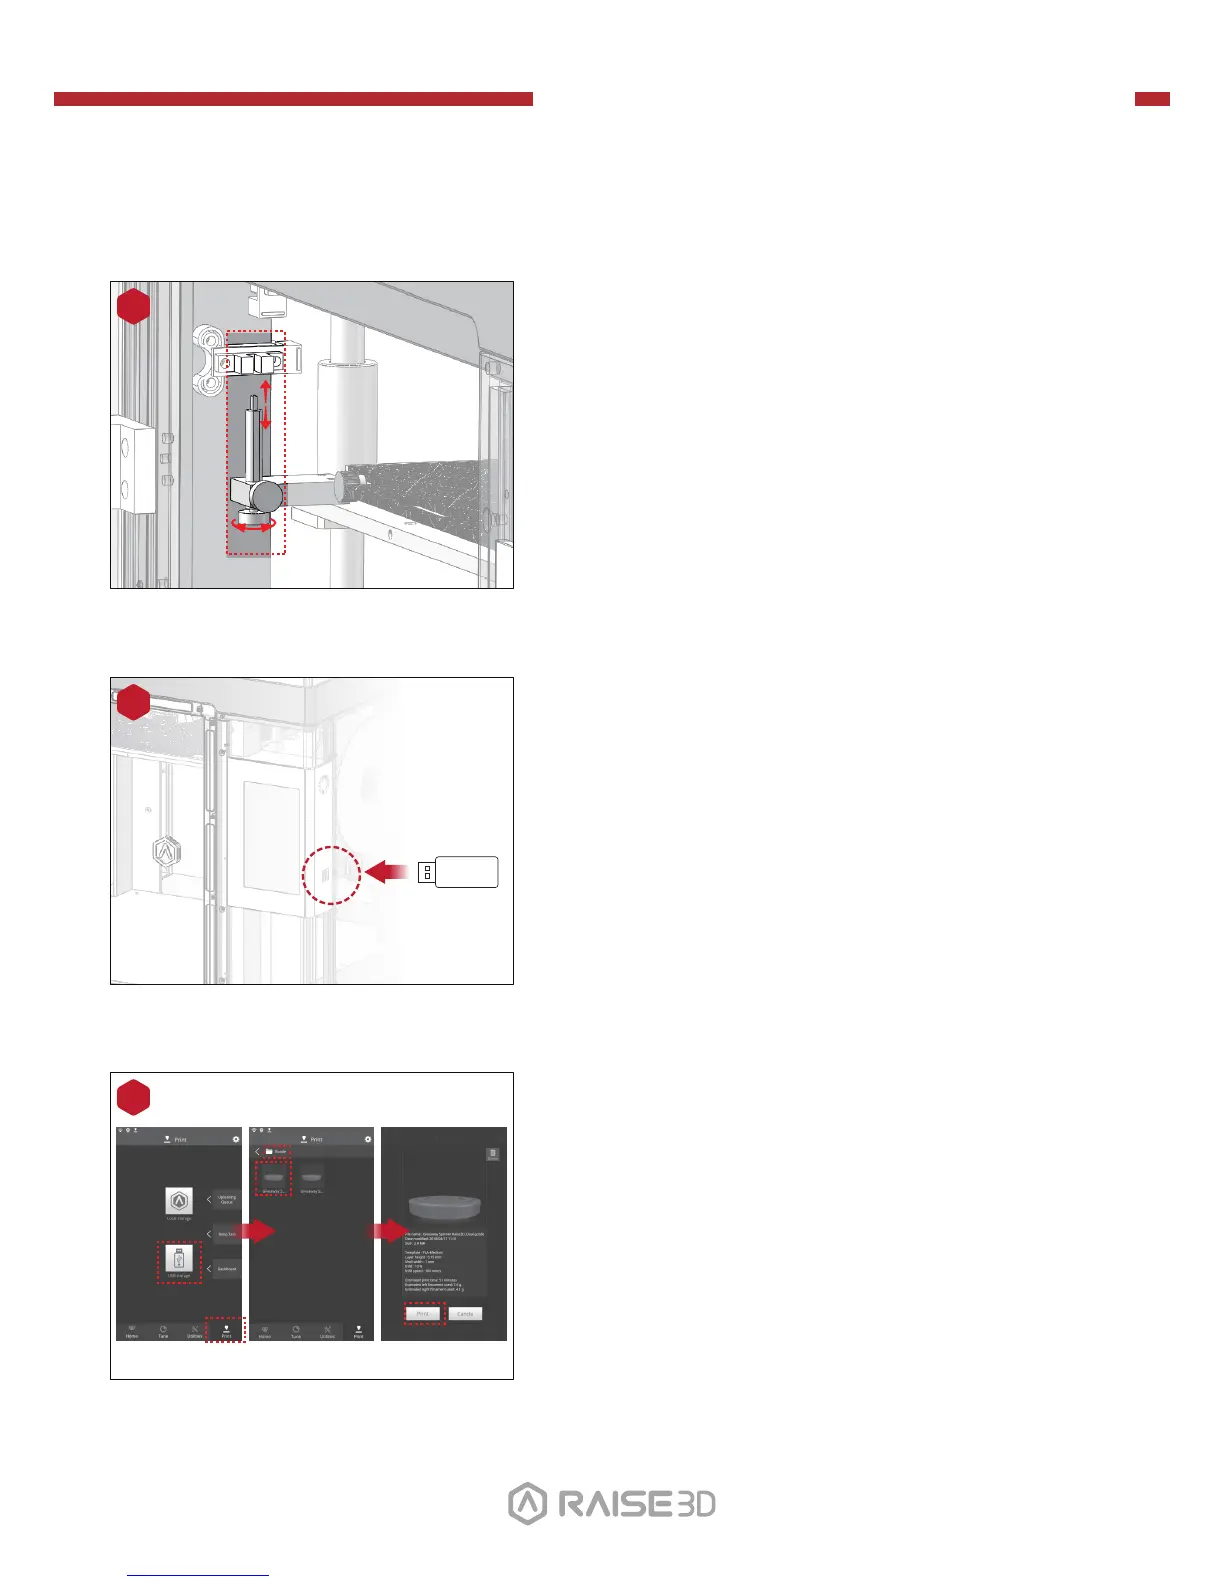
USB Storage
Insert the USB storage that contains your sliced
model (.gcode and .data files).
Insert this USB drive into the USB slot on the
side of touchscreen.
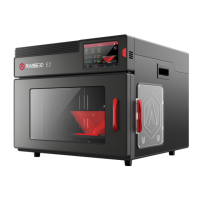
Open the “Print” tab, and choose “USB Storage”
to open the file storage path. Select your dual
extrusion file to check the printing parameters
and settings. Press “Print” to start printing test
file.
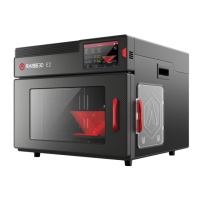
12
H. Dual-Extruder Print - Start First Print (continued)
The distance between the nozzle and the
printing platform can be adjusted by turning the
thumb screw on the left-front corner of the
Z-plate, the higher the screw stands, the further
the distance between the nozzle will be from the
printing platform.
Home the Z axis after each adjustment.
10
Closer Further