Pro2-Series 3D Printer
/ Quick Start Guide
F. Start First Print
The Pro2/Pro2 Plus units are preleveled in the
factory, but we recommend verifying that the
leveling has not changed during shipping.
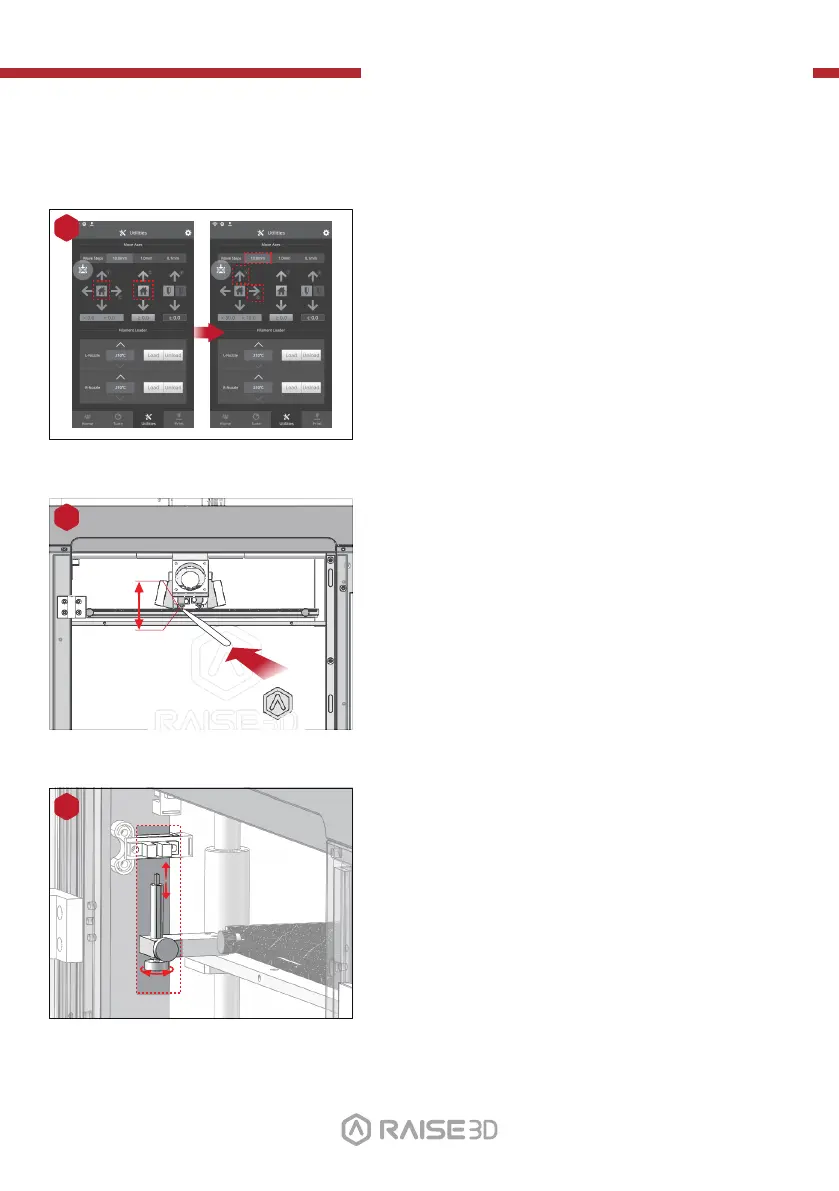
First, home the X/Y Axis by selecting the
"home" button, then Z axis "home" button.
If the homing procedures complete without issues,
reposition the print head.
Select "10mm" for "Move Steps" and move X to
50mm, Y to 10mm.
1
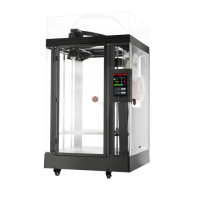
Please use the feeler gauge to check the distance
between nozzle and printing platform. The optimal
distance between is 0.2mm.
The best condition of this is that you can feel a little
friction when you slide the feeler gauge into the gap.
2
0.2mm
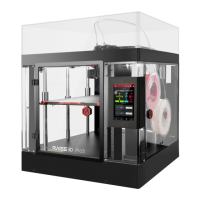
The distance between the nozzle and the printing
platform can be adjusted by turning the thumb
screw on the left-front corner of the
Z-plate, the higher the screw stands out, the further
the distance between the nozzle to the printing
platform gets.
3
Closer Further
Feeler Gage
01 02
03 04 05 06
07 08 09 10
11 12 13 14
15 16 17 18
19 20 21 22
23 2624 25
27