Do you have a question about the Raise3D Pro2 and is the answer not in the manual?
Declares device compliance with EU directives and provides full text link.
Warns that the product may cause radio interference in domestic environments.
Outlines FCC rules compliance, including non-interference and operational conditions.
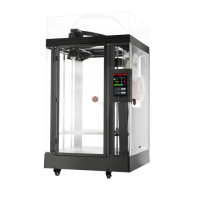
Identifies and describes the front components of the 3D printer.
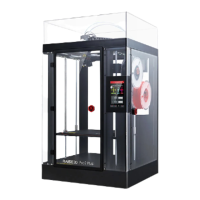
Identifies and describes the rear components of the 3D printer.
Mentions bottom parts, but content is primarily on subsequent pages/images.
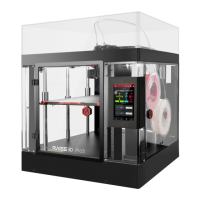
Details the electrical components and their locations within the printer.
Specifies operating and storage temperature/humidity and air quality conditions.
Details requirements for connecting the printer to a power source safely and correctly.
Introduces the steps for physically installing the printer hardware.
Guides through the installation process of the ideaMaker slicing software on Windows.
Provides instructions for installing ideaMaker on macOS, including drag-and-drop method.
Explains how to select the printer model and filament diameter during the initial setup.
Demonstrates how to import models and start the slicing process in ideaMaker.
Guides on verifying printer leveling by homing axes and using a feeler gauge.
Displays status, model name, print time, and allows basic controls like pause/resume.
Allows adjustment of printing parameters like nozzle temperature, fan speed, and flow rate.
Provides access to movement controls, extruder loading/unloading, and other utility functions.
Enables selection of print jobs from storage, checking lists, and initiating prints.
Guides on importing and preparing dual-extrusion models for slicing in ideaMaker.
Explains the Wipe Wall feature for dual-extrusion, its purpose, and configuration options.
Discusses material compatibility for dual-extrusion and lists supported combinations.
Details specific settings and considerations when printing with PVA filament.
Provides steps for installing filament holders and feeding filament for the right nozzle.
Guides on preparing for the first dual-extrusion print, including Z-offset verification.
| Build Volume | 305 x 305 x 300 mm |
|---|---|
| Layer Resolution | 0.01 - 0.25 mm |
| Print Technology | Fused Filament Fabrication (FFF) |
| Print Speed | 30 - 150 mm/s |
| Max Extruder Temperature | 300°C |
| Max Bed Temperature | 110°C |
| Connectivity | USB, Ethernet, Wi-Fi |
| Dual Extrusion | Yes |
| Frame Material | Aluminum |
| Heated Bed | Yes |
| Number of Extruders | 2 |
| Filament Diameter | 1.75 mm |
| Nozzle Diameter | 0.4 mm |
| Supported Filament Types | PLA, ABS, PETG, TPU, Nylon, Carbon Fiber, Metal Filled, Wood Filled |
| Touchscreen | 7-inch touchscreen |
| Power Requirements | 110-240 V AC, 50/60 Hz |