Do you have a question about the Raise3D E2 and is the answer not in the manual?
Indicates a potentially hazardous situation which may result in injury or damage.
Alerts to the presence of devices with high temperatures like nozzles and surfaces.
Warns about hazards from moving parts that can cause serious bodily injury if touched.
Indicates the presence of high voltages and advises staying away from exposed circuitry.
Details EU declaration of conformity and CE mark warning for radio interference.
Provides CE and FCC output power tables for Wi-Fi frequencies.
Explains device compliance with FCC rules and conditions for operation.
Notes manufacturer's non-responsibility for interference caused by unauthorized modifications.
Details testing and certification as a Class B digital device against harmful interference.
Specifies FCC radiation exposure limits and installation distance requirements.
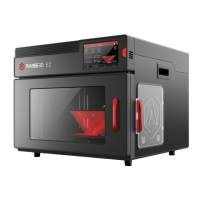
Details build volume, machine size, power supply input and output.
Covers print technology, filament diameter, build plate, supported materials, and nozzle.
Lists slicing software, supported OS, machine code, UI, network, and controller components.
Contains the air filter and holds the filament spool ready for printing.
Feeds filament and consists of nozzle, heater block, and other components.
Magnetized tray for build plate stability and flexible plate for model removal.
On-board computer for status display and commands, plus power saving button.
Includes screen components and motion control panel; do not open without permission.
Camera for observing operation; LED bar for interior lighting.
Filament holders, exit, run-out sensor, and input power connection.
Switches AC to DC; dangerous, do not remove without permission.
Pulls air out of the machine through the air filter.
RJ45 port for connecting the printer to a network.
Limits Z-axis position and guides extruder movement along the X-axis.
Feeds filament into the hotend.
Controls horizontal movement of the extruder.
Controls X-axis beam for synchronous lifting.
Includes power cables, fuses, USB storage, and quick connectors.
Contains wrenches, spatula, feeler gauge, tweezers, and nozzle cleaning kit.
Includes filament, filament guide tube, filament holder, and box block.
Provides heat-resistant gloves and plastic rivets.
Read installation section first; know emergency procedures and use adequate lighting.
Specifies indoor use, temperature, humidity, altitude, and noise limits.
Connect to grounded power source and verify input voltage and grounding.
Instructions to remove Z-axis and X-axis locks before operation.
Use correct power cord, connect to socket, turn on switch to start.
Printer boots for 60 seconds; follow Setup guide upon 'Welcome' window.
Guide for installing ideaMaker slicing software on Windows.
Select installation folder for the ideaMaker software.
Select desired features of ideaMaker during installation.
Confirmation that setup was successful.
Click 'Finish' to complete the ideaMaker installation.
Open ideaMaker installer disk image for macOS.
Copy ideaMaker to Applications folder and replace if updating.
Choose the correct printer model and build volume in the wizard.
Choose the filament diameter (1.75 mm for E2) and finalize settings.
Import a model file, like 'Giveaway Spinner', using the '+' button.
Begin the slicing process for the loaded model.
Choose a standard slicing template, then edit platform and support types.
Save template changes and return to the previous menu to slice.
Export sliced files (.gcode, .data) to USB storage.
Verify files are saved and safely eject the USB storage device.
Select SSID and enter password to connect to a Wi-Fi network.
Alternative method to connect by manually inputting network name and password.
Verify that the factory leveling has not changed during shipping.
Instructions to level X-axis and home/adjust Z-axis.
Adjust nozzle distance to the platform after centering the extruder.
Use a 0.3 mm gauge to set the exact nozzle-to-platform distance.
Follow touch screen steps to run automatic 9-point leveling.
Insert the USB storage device into the printer's USB slot.
Choose 'Print' tab, select 'USB Storage', pick a file, check parameters, and press 'Print'.
Check printing status, time, and model image on the 'Home' interface.
Displays status, temperature, current model, print time, and taskbar.
Allows adjustment of print parameters like nozzle temperature and feed rate.
Controls axis movement, leveling, and filament loading/unloading.
Manages printing tasks, uploads, and statistics, showing storage locations.
Create a ticket at support.raise3d.com for issues.
Contact sales@raise3d.com or inquiry@raise3d.com for further information.
| Build Volume | 330 x 240 x 240 mm |
|---|---|
| Layer Resolution | 0.01 - 0.25 mm |
| Max Extruder Temperature | 300°C |
| Filament Diameter | 1.75 mm |
| Connectivity | USB, Ethernet, Wi-Fi |
| Print Speed | 30 - 150 mm/s |
| Frame Material | Aluminum |
| Number of Extruders | 2 |
| Build Plate | Heated, removable |
| Display | 7-inch touchscreen |
| Nozzle Diameter | 0.4 mm |
| Max Bed Temperature | 110 °C |
| Printer Dimensions | 607 x 596 x 465 mm |
| Supported Materials | PLA, ABS, HIPS, PC, TPU, TPE, PETG, ASA, PP, PVA, Nylon |
| Power Requirements | 100-240V, 50/60Hz, 600W |