12
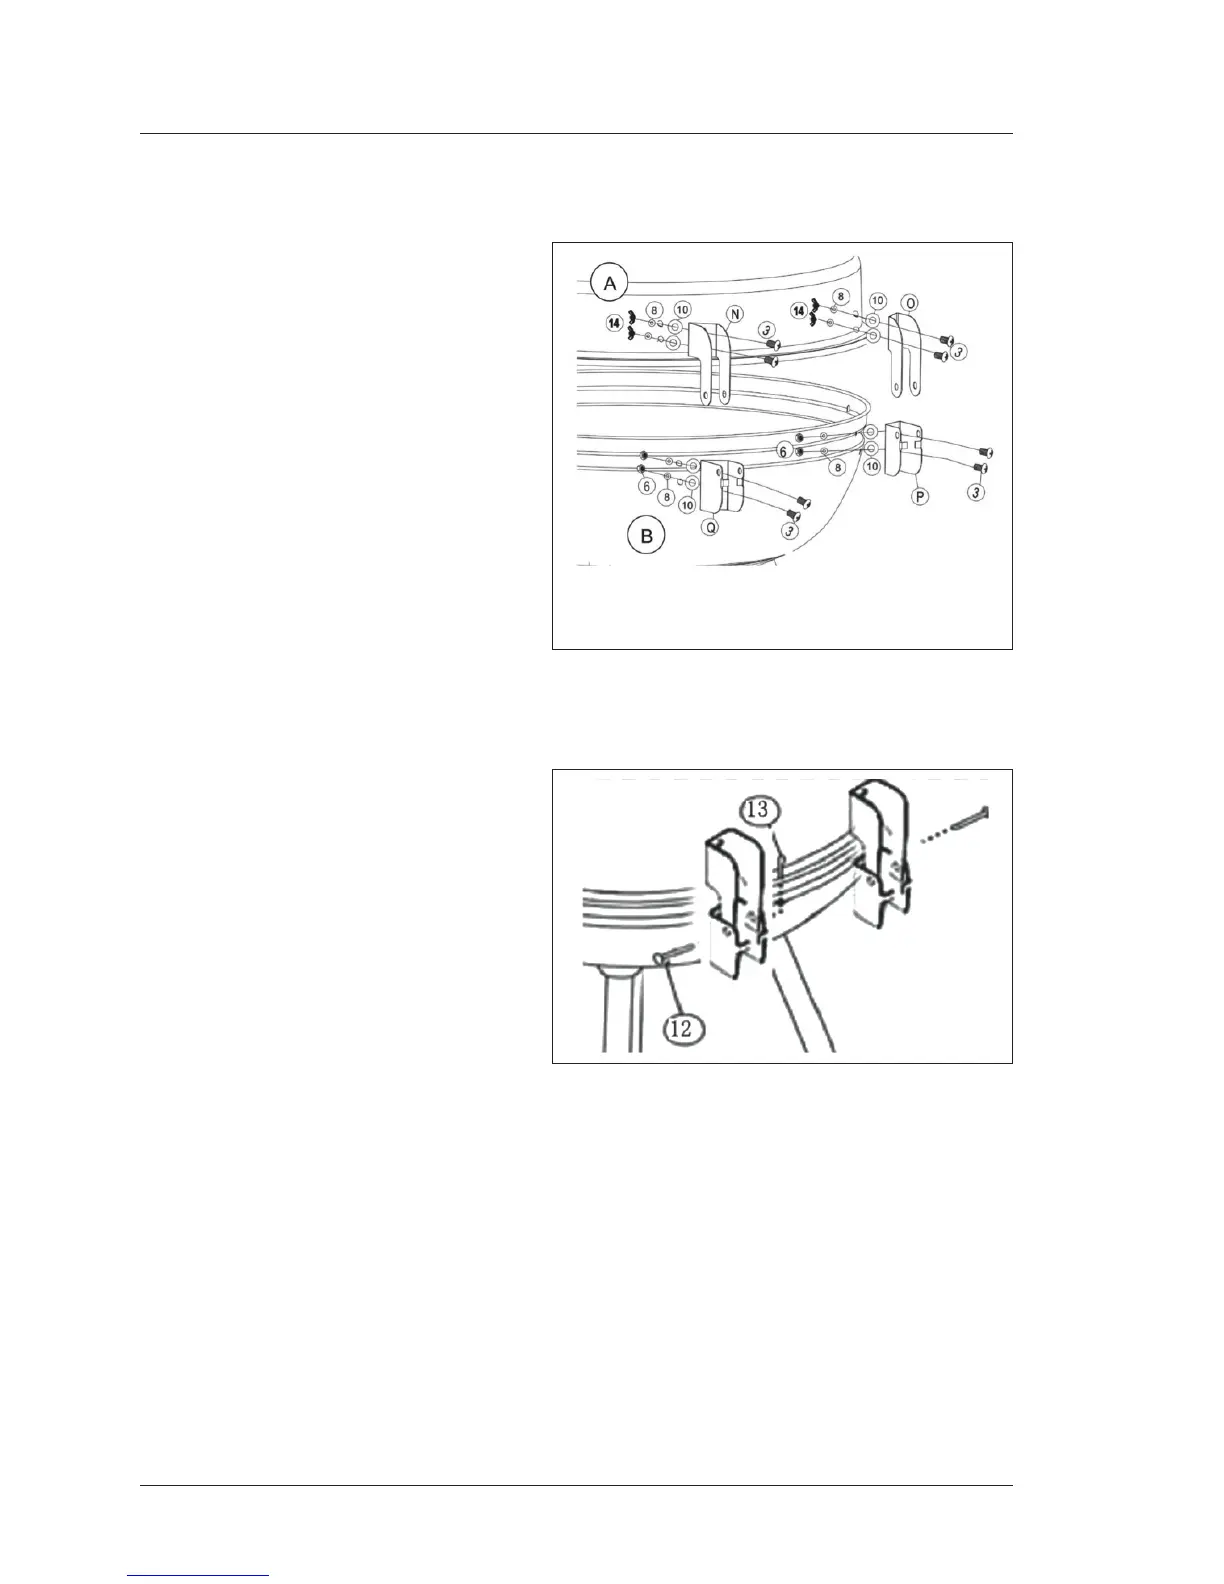
STEP 5
To aach the Upper Right Hinge (N) and
Upper Le Hinge (O), insert the Hinge
Bolts (3) through the Metal Washers (8),
Upper Hinge, Top Lid (A) and Fiber
Washers (10). Thread the Wing Nuts
(14) onto the Hinge Bolts. To aach the
Lower Right Hinge (Q) and Lower Le
Hinge (P), insert the Hinge Bolts (3)
through the Metal Washers (8), Lower
Hinge, Boom Bowl (B) and Fiber
Washers (10). Thread the Hinge Nuts
(6) onto the Hinge Bolts.
Note: hinges should point straight back
when assembled correctly.
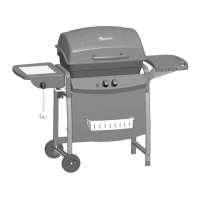
STEP 6
Align holes in the Upper and Lower
Hinges by placing the Top Lid (A) on top
of the Boom Bowl (B). Note that the
Upper Hinges should t inside of the
Lower Hinges. Insert Hinge Pins (12)
through aligned holes in both hinges.
Insert Coer Pins (13) through holes at
the end of each Hinge Pin.
Assembly instrucons