8 S1000 Autopilot Installation Guide
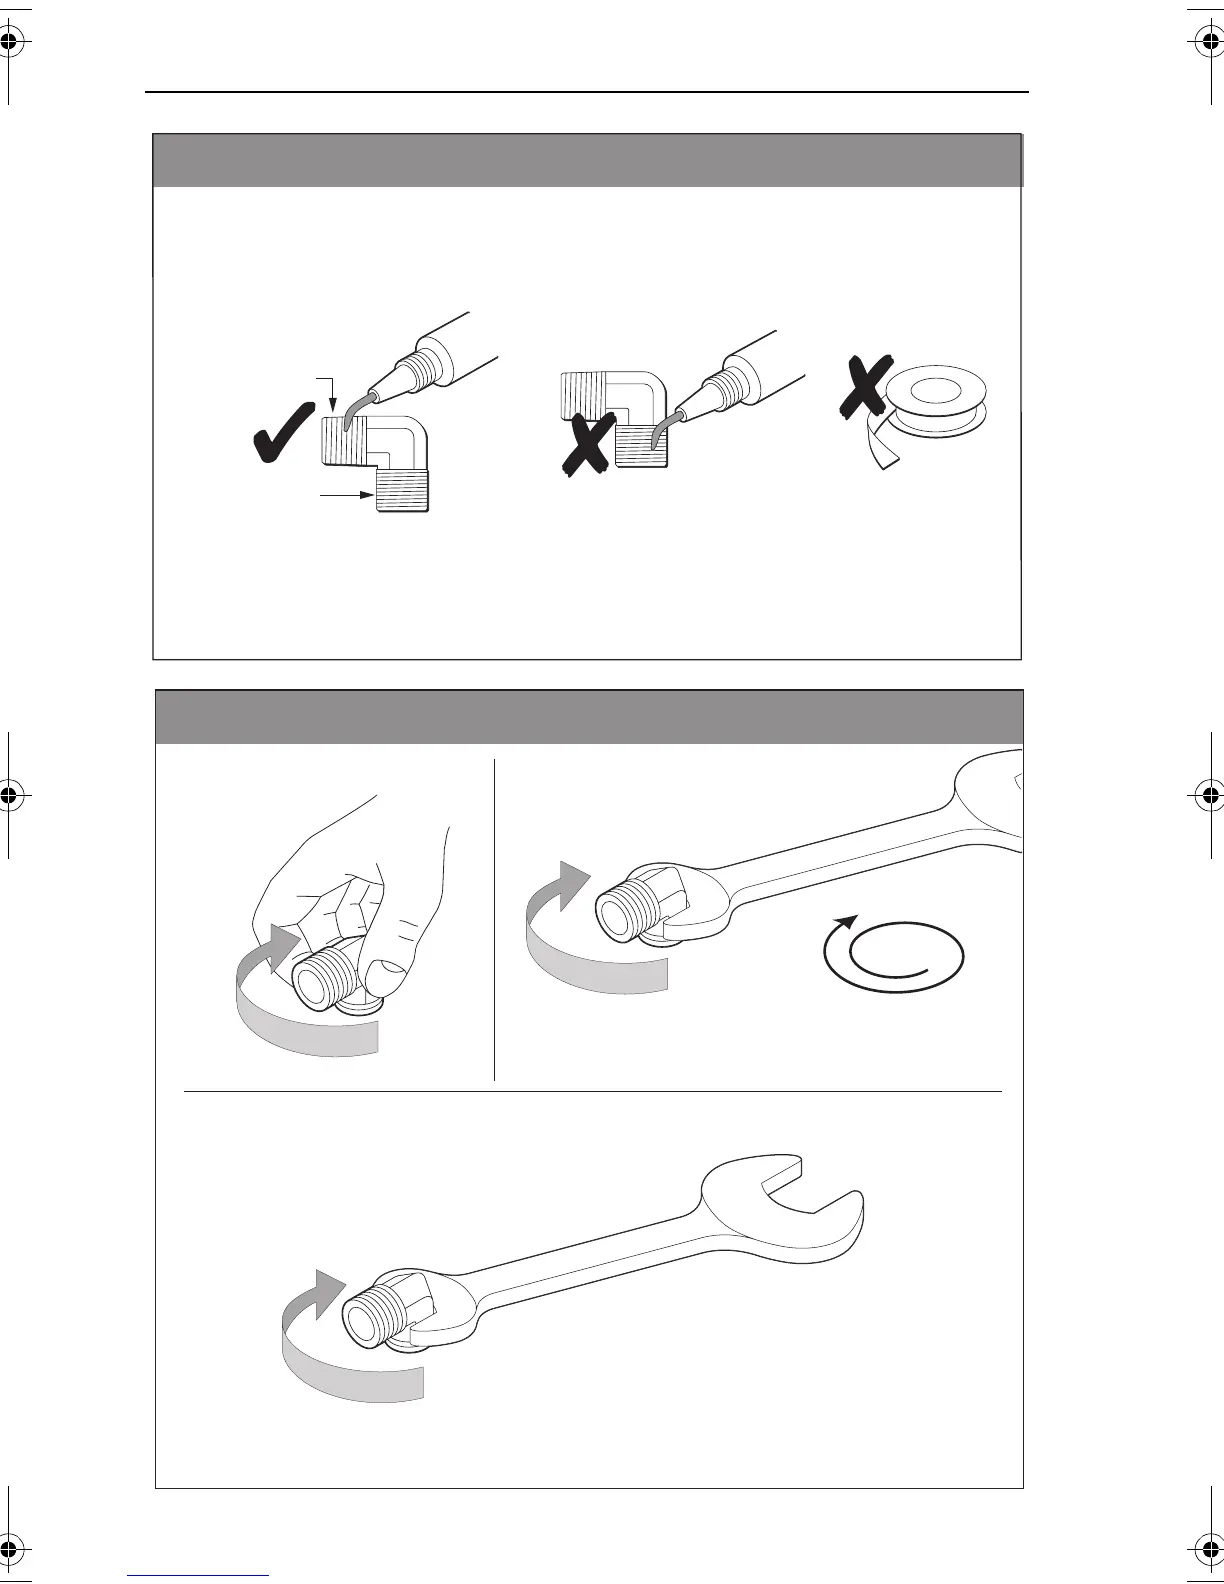
Note: The hydraulic fittings supplied with the autopilot pump have sealant pre-
applied to the tapered threads. You only need to apply sealant to any extra joints
you may obtain. The recommended sealant for doing this, is Loctite 542.
Do not use sealing tape on any part of a hydraulic system, as this can
disintegrate and the resulting particles can cause blockages in the
hydraulic system.
CAUTION:
D7545-1
Tapered thread
Thread for hose
connection
Sealing hydraulic joints
Do not apply sealant to
hose connection thread.
2.
3.
1.5 turns
D7546-1
From hand tight, use a wrench to tighten the joint a
further 1.5 turns. This should make it leakproof.
To change the orientation of the joint to align it with the
hose, further tighten the joint, to a maximum of one
further turn, until the joint is facing the required
direction.
1.
Hand tighten
CAUTION:
Do not exceed 13 ft/lbs
(17.6 Nm) torque.
CAUTION:
Do not exceed 13 ft/lbs (17.6 Nm) torque.
DO NOT EXCEED 2.5 TURNS in total, from
hand tight.
Installing tapered thread fittings
87040_3.book Page 8 Thursday, February 17, 2005 2:01 PM

 Loading...