The brake is capable of causing
the electric four wheeler
to skid the tire throwing an
unsuspecting rider. Practice
in an open area free from
obstacles until you are familiar
with the brake function. Avoid
cause you to lose control or
Check the Razor web site for any updates on the latest
Turn power switch off before conducting any maintenance procedures.
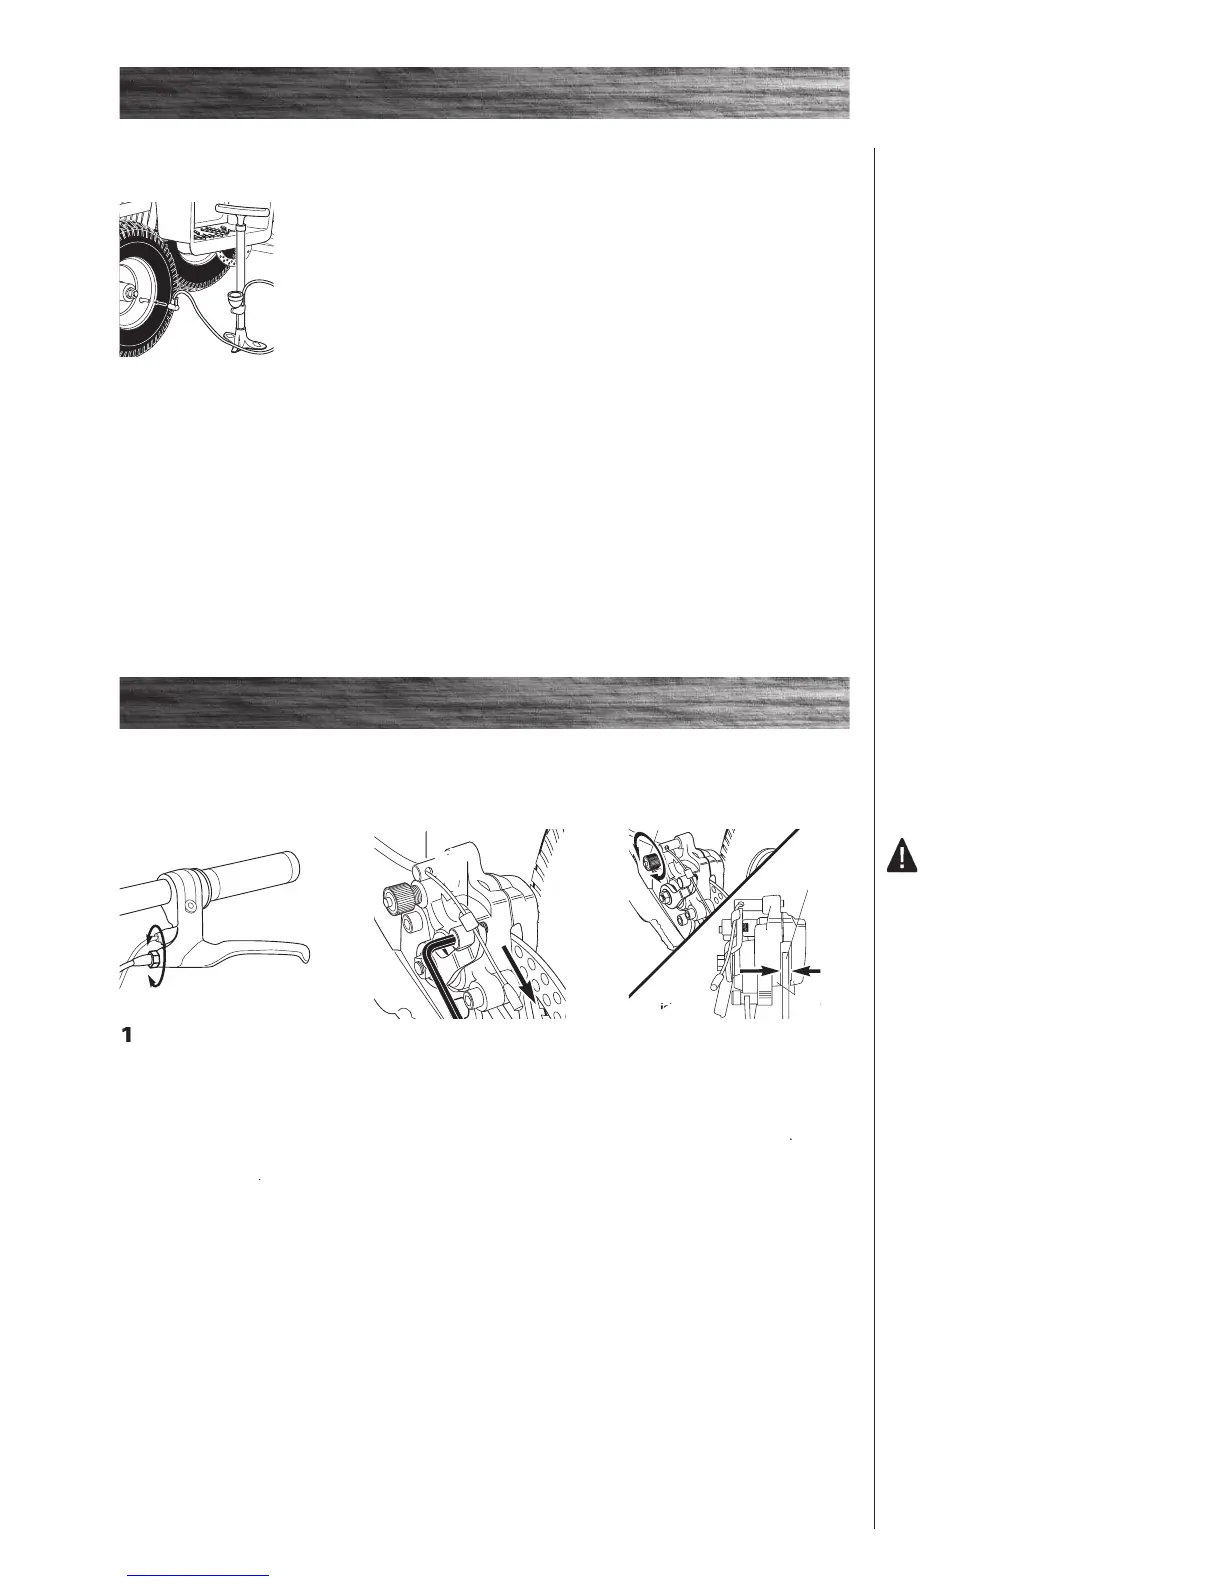
To adjust the play, thread the
brake lever adjuster in or out
1/4 to 1/2 turn until the desired
brake adjustment is attained.
Most adjustments are complete
at this step. If brake still needs
further adjustment, proceed to
res are infl ated when shipped, but they invariably lose some pressure between the point of
manufacturing and your purchase. Always infl ate the tires to the correct PSI before fi rst time use.
supplies found at gasoline
stations are designed to infl ate
high-volume automobile tires.
air supply to infl ate your tires,
fi rst make sure the pressure
gauge is working, then use very
short bursts to infl ate to the
correct PSI. If you inadvertently
over-infl ate the tire, release the
excess pressure immediately.
Using a bicycle-style tire pump equipped for a Schrader-type valve, infl ate the front tire to the PSI indicated
on the sidewall of the tire.
To use the brake, squeeze the lever to increase the pressure on the brake. The brake lever is fi tted
with a cable adjuster to compensate for cable stretch and/or to fi ne-tune the lever movement to brake
t. If brake is not engaging properly, follow instructions for adjusting the brakes outlined below.
Locate the rear brake caliper
and disk brake behind the right
rear wheel. The distance of the
the cable and the anchor bolt
should be between 37 and 44
If the rear brake has too
much slack, loosen the rear
anchor bolt with a hexagonal
wrench and pull the brake wire
tighter (direction indicated with
dragging on the brake pads
use your fi ngers to twist the
caliper adjuster in either