Do you have a question about the Razor Light-Up and is the answer not in the manual?
Emphasizes parental responsibility in selecting appropriate riding products and supervision.
Specifies minimum age 8 and maximum weight 110 lbs (50 kg) for safe operation.
Limits weight to 110 lbs (50 kg) and stresses rider size appropriateness for control.
Advise checking covers, guards, and wheels for wear and tear before use.
Guidance on safe riding locations, speed, and environmental conditions.
Recommends wearing protective gear like helmets, elbow/kneepads, long sleeves, pants, and shoes.
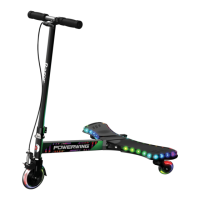
The unit has no power switch; lights turn off automatically, unit is always on standby.
Provides estimated time for assembly (5 mins) and initial charge (4 hours).
Warns against using non-Razor products as they may not be compatible and void warranty.
Step-by-step instructions for attaching handlebars using a 5mm Allen wrench.
Regularly check handgrips and end caps for wear or damage and replace if necessary.
Instruction not to thread the handlebar into the front fork thread; tighten collar clamp securely.
Warns that improper collar clamp installation can lead to loss of control and falls.
Details initial and recharge times, charging frequency, storage, and temperature limits.
Verify brake function, ensuring positive action and motor cut-off when engaged.
Periodically inspect wheels for excessive wear.
Check for cracks or broken connections in frame, fork, and handlebars.
Ensure all nuts, bolts, and fasteners are secure before each ride.
Always wear proper protective equipment, including helmet, elbow/kneepads, and appropriate footwear.
Always check and obey local laws and regulations regarding scooter use.
Instructions on how to start and operate the electric scooter safely.
Guidance on using the rear-fender brake for controlled stops and safety features.
Instructions for cleaning the scooter using a damp cloth and avoiding harsh cleaners.
Guidelines for battery care, including temperature limits and proper disposal methods.
Regularly examine the charger for damage and use only the recommended charger.
Periodically inspect wheels and bearings for wear and play, using genuine replacement parts.
Details the 90-day warranty against manufacturing defects, excluding normal wear and tear.
Provides contact information for product support and authorized service centers.